How to deploy .NET WPF applications using MSI installer
Windows Presentation Foundation (WPF) is a powerful User Interface (UI) framework for building desktop client apps. It's a part of .NET and offers a multitude of helpful features, such as media services, controls, data binding, and security.
The WPF framework platform allows you to develop applications efficiently, since it separates the application behavior from its UI. For example, you can use XAML markup for developing the front-end of the application and a programming language for the back-end.
By separating an app's behavior from its user interface, its development and maintenance become easier.
In this article, we’ll show you how to create an MSI for a .NET WPF application using Visual Studio (VS).
How to Create a WPF Application in Visual Studio
Before creating the MSI installer, we’ll need a WPF application. In case you don’t have one already, follow these steps to create one in Visual Studio:
1. Go to File → New Project.
2. Set language to C#, platform to Windows and project type to Desktop.
3. Select WPF Application from the template list.
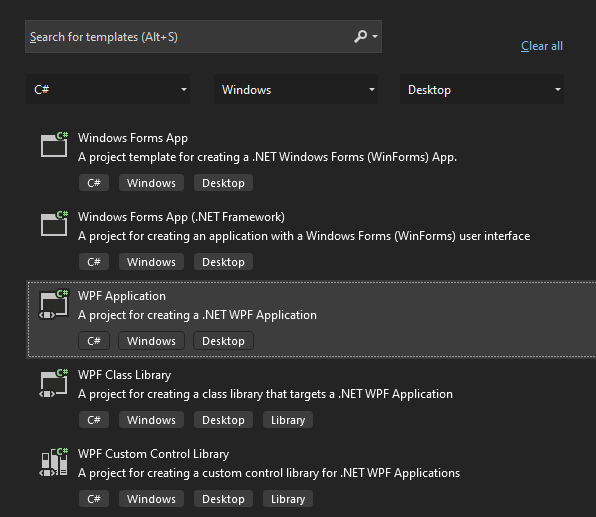
4. Name it in the Configure your new project windows (e.g. MyApp).
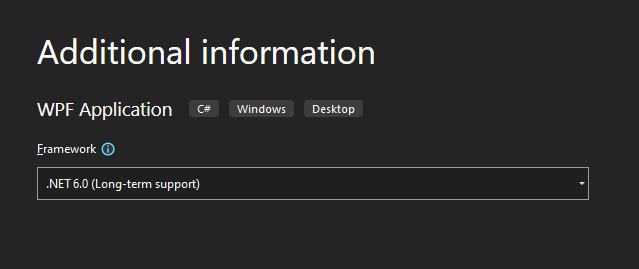
5. Next, make sure to specify the version of .NET that your application targets. Depending on the versions installed on your computer, this option can have different values. For this example, we selected .NET 6.0.
6. After you choose the version, press the Create button to create the WPF application.
How to Add a Setup Project to Your WPF Application
Before we create our MSI installer, we first need to download the Microsoft Visual Studio Installer Project extension.
Let’s see how to add the extension to Visual Studio:
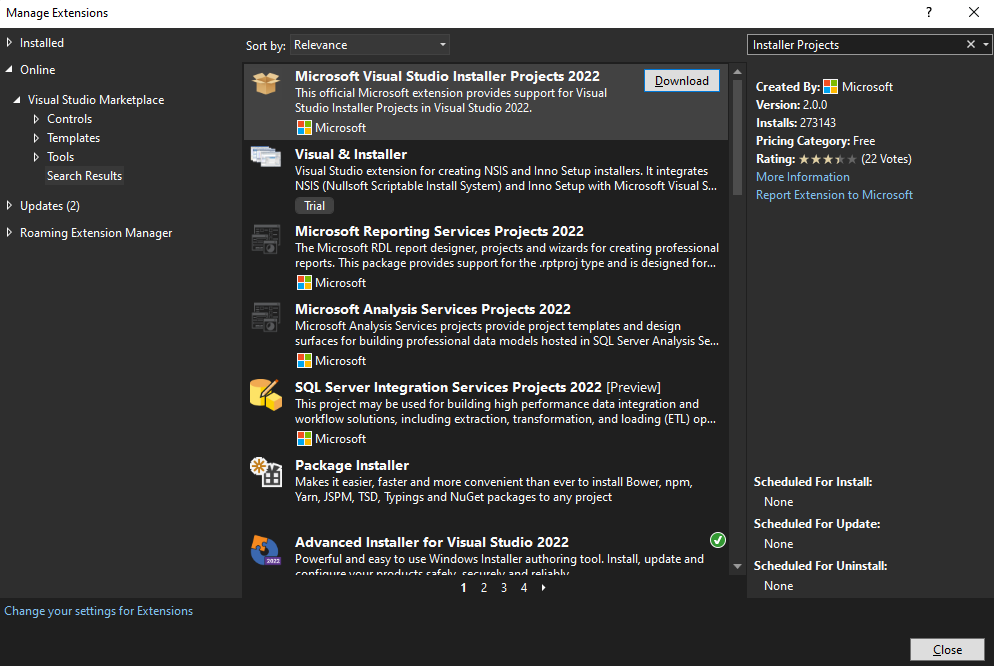
1. Go to Extensions → Manage extensions.
2. In the left menu, select Online →Visual Studio Marketplace.
3. Search for Microsoft Visual Studio Installer Project in the list of extensions.
4. Select the extension and press the Download button. Be aware that the extension will be installed only after you close Visual Studio.
Once the extension is installed, we can create the Setup project for our application.
1. Right-click on the project solution → Add → New Project.
2. From the Add new project window, choose Setup project and then name it. In our example, its name is AppSetup.
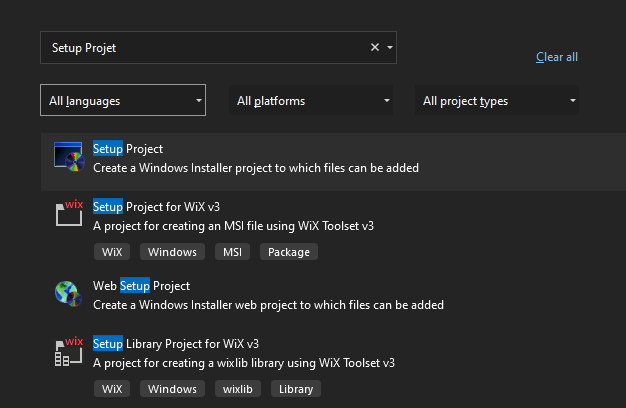
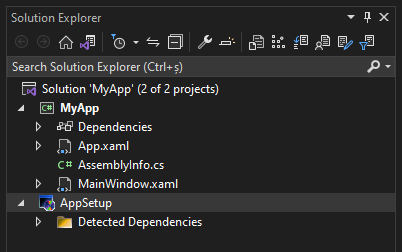
After creating the Setup project, you should see it in the Solution Explorer.
How to Add Project Output to Your WPF Setup Project
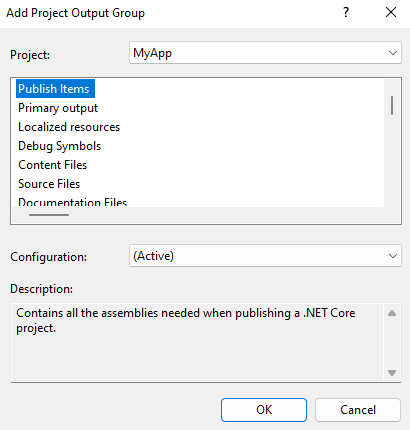
Now, we need to specify the project we're creating the installer for, which is MyApp. For this, right click on AppSetup → Add → Project output.

From the opened dialog, choose your project and then select Publish Items which contains all the assemblies needed when publishing a .NET project.
How to Create a Desktop Shortcut for Your WPF Application
To create a Desktop shortcut for your WPF application, follow the next steps:
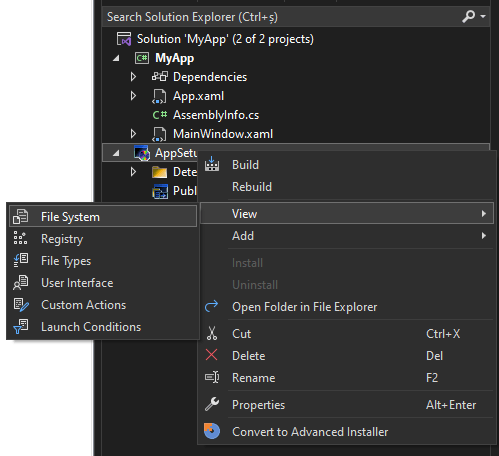
1. Right click on AppSetup → View → File System.
2. Under the File System open the Application Folder. Next, right-click on Publish Items from MyApp and select Create Shortcut to Publish Items from MyApp.
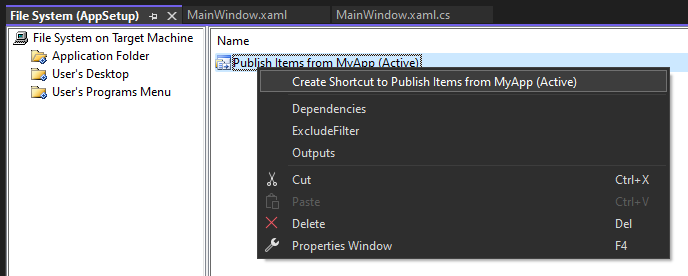
3. Rename the shortcut and place it in the User's Desktop folder.

Build and Install Your WPF Application
You’ll first need to build the MyApp, followed by the AppSetup. After you build the AppSetup for the first time, a launch condition regarding dependency on .NET is automatically generated.
This launch condition checks if the destination computer has the same .NET Desktop Runtime version that the application targets. You can keep the default launch condition properties or change them if needed.
To access the launch condition, right click on AppSetup → View → Launch conditions.

If you want to change the launch condition properties, select the condition and then go to the Properties section.
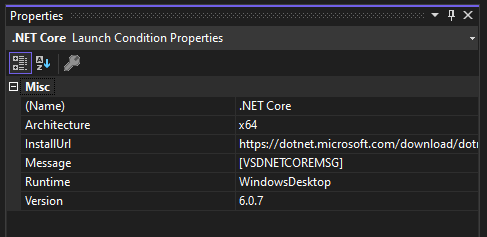
For example, we made the following changes:
- We set the runtime from Auto to Windows Desktop,
- Added 6.0.7 to the version and,
- We set the architecture to x64.
Thus, the installer will require the x64 .NET Desktop Runtime version 6.0.7 in order to run.
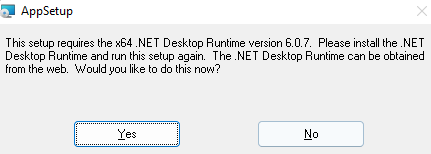
If you press Yes, you’ll be redirected to dotnetmicrosoft.com to download the specific .NET Desktop Runtime.
If you have the runtime version that the application targets, you only have to go through the classic installation process.
Conclusions
Visual Studio enables you to create installer packages for WPF applications, regardless of the .NET version. For basic WPF applications, Visual Studio is a reliable solution. However, it does have some limitations when it comes to complex packaging scenarios.
We highly recommend using a tool such as Advanced Installer, which offers reliable customization options, a user-friendly GUI, and support for multiple platforms.
To see just how simple it is to create and manage MSI packages in Advanced Installer, check out the following tutorial.
