Deploy MSIX Applications with Group Policies: Direct MSIX Deployment and MSI Wrapper Methods Explained
In this article, we'll explore how to deploy an MSIX using Group Policies, covering Direct MSIX Deployment with Scheduled Tasks and the MSI Wrapper method.
We'll walk you through the necessary steps, from creating a simple PowerShell script to configuring Group Policy settings. By the end, you'll have a clear understanding of how to deploy MSIX applications using these methods.
So, let's dive in and learn more about MSIX deployment via Group Policies!
How does Direct MSIX Deployment work?
When working with MSIX deployments, it's essential to use PowerShell cmdlets since they are designed for MSIX/APPX packages. With these cmdlets, we'll create a short script to install the package.
Here's an example of a basic script to help you get started:
$MSIXPackage = $PSScriptRoot + "\Test.MSIX"
Add-AppPackage -path $MSIXPackage
We are using $PSScriptRoot, this way, the package will be copied into the NETLOGON share alongside this script.
If you're looking to deploy an MSIX package directly, you can use the Scheduled Tasks option within Group Policies. To find this option, navigate to Computer Configuration or User Configuration > Preferences > Scheduled Tasks.
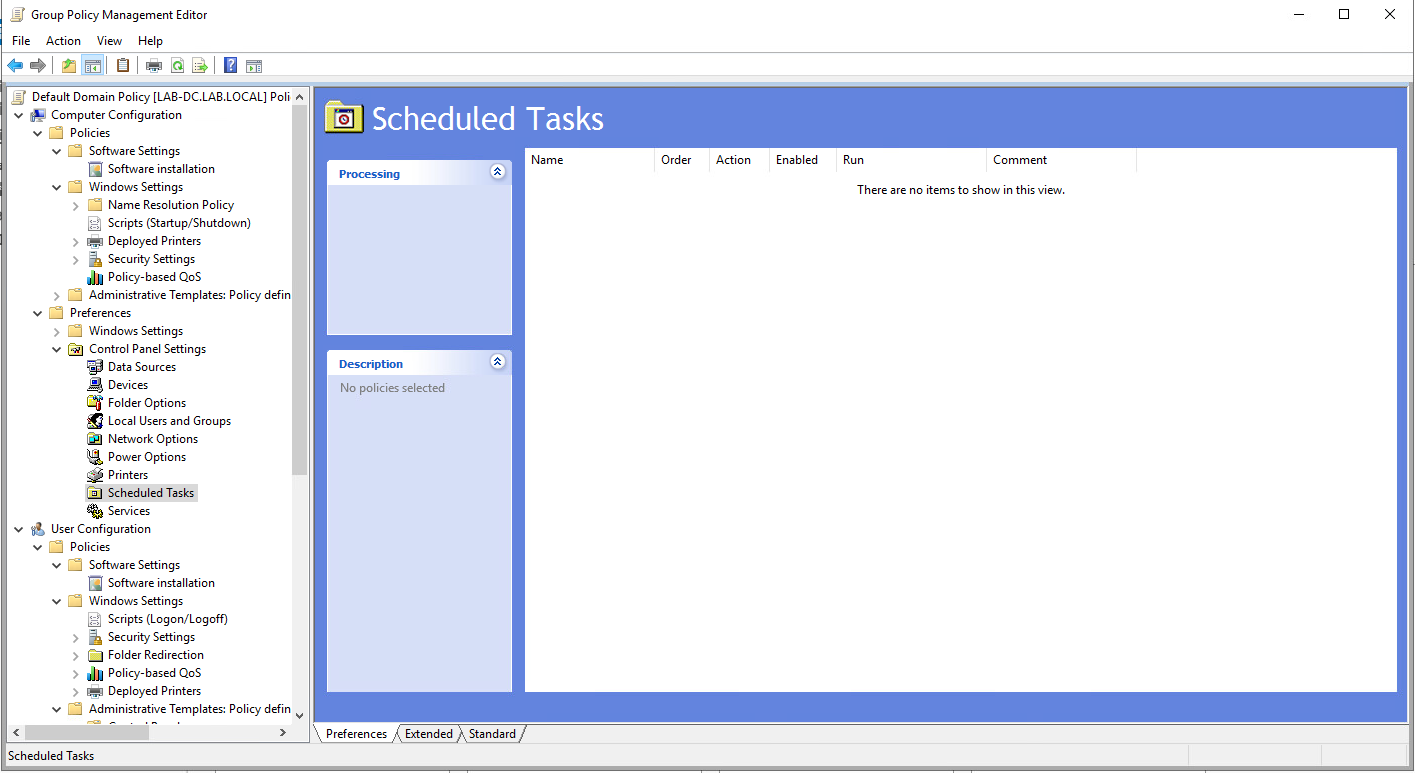
The difference between Computer Configuration and User Configuration is that of executions. When a Scheduled Task is created under Computer Configuration, it can only be executed with the NT System\Authority user. For traditional applications, this is typically not a problem and is even recommended.
MSIX packages are per-user installations, meaning that we have to run the installation with the currently logged in user. To run a scheduled task with the logged in user, we need to:
1. Navigate to User Configuration > Preferences > Scheduled Tasks > New Task (At least Windows 7) Properties and make sure that the user account for running the action is set to %LogonDomain%%LogonUser%.

2. On the Trigger tab, click on the New button and set Begin the task with At log on.

3. Select OK.
4. Then, go to the Actions tab and make sure that the New Action pane has the following values:
- Action is set to Start a program
- For the Program/Script section type in C:\WINDOWS\system32\WindowsPowerShell\v1.0\powershell.exe
- And for the Add Arguments (optional) setting put in -ExecutionPolicy Bypass -Noprofile -file %~dp0MyPSScript.ps1
The %~dp0 is an environment variable that is automatically converted to a UNC path to the script directory (in this case, NETLOGON). Make sure to first copy the script to your NETLOGON share and give the file the proper rights.
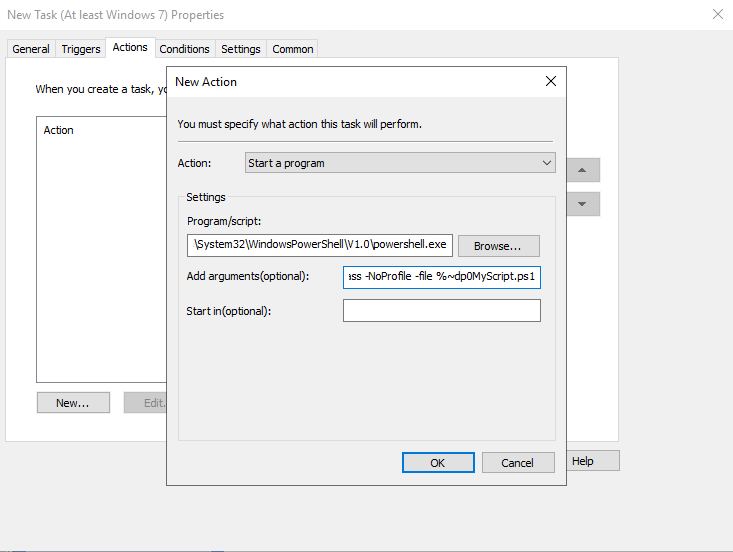
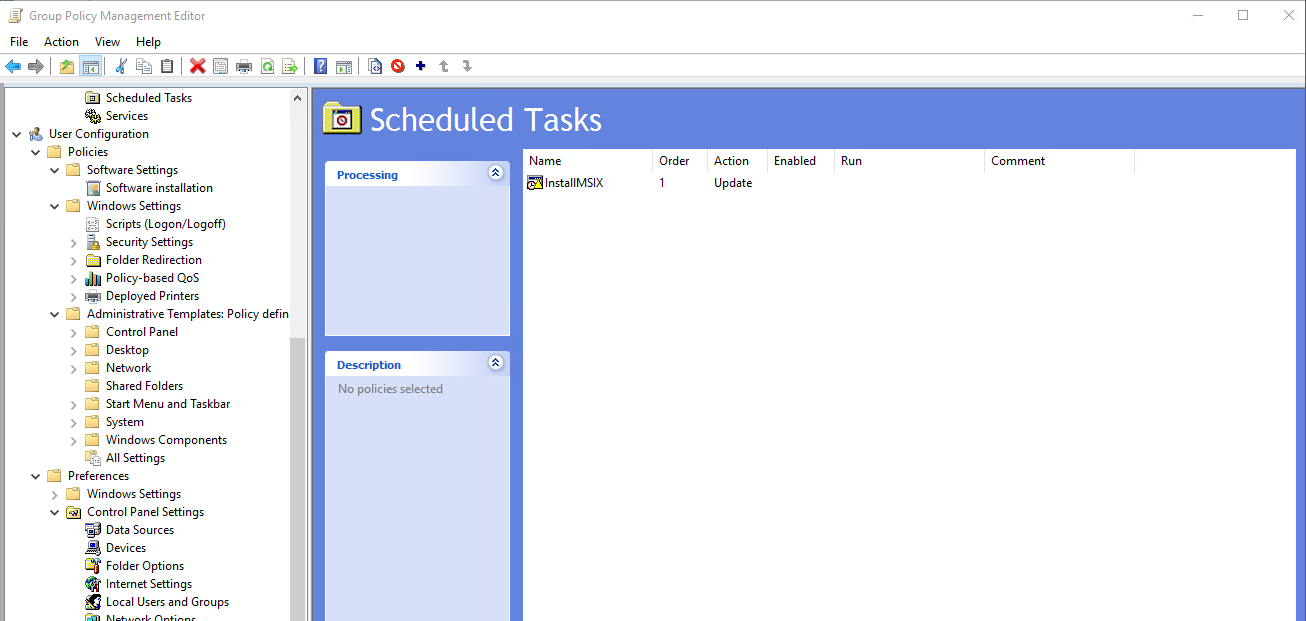
5. Next, click OK and the scheduled task is now created and deployed in your infrastructure.
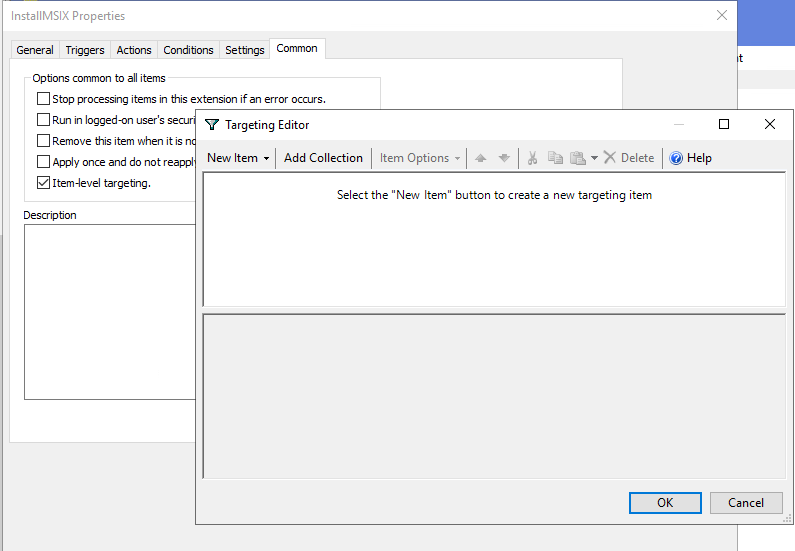
One of the standout features of Scheduled Tasks is Item-Level Targeting. This allows you to specify how Group Policy settings apply to Active Directory users or computers by setting conditions. You can even combine multiple conditions using conditional logic statements like AND, OR, and NOT, offering greater flexibility and control.
How to deploy MSIX Applications with MSI Wrapper?
If you don’t want to use the Scheduled Task option, you can deploy software with GPOs(Group Policies) via the Software Installation option.
This option can be found under User Configuration. The logic is the same, if the GPO is set for a User Configuration, then the execution will be started with the current logged in user without Administrative rights, while if you configure the deployment via Machine Policies, this will be executed with the NT System\Administrator role.
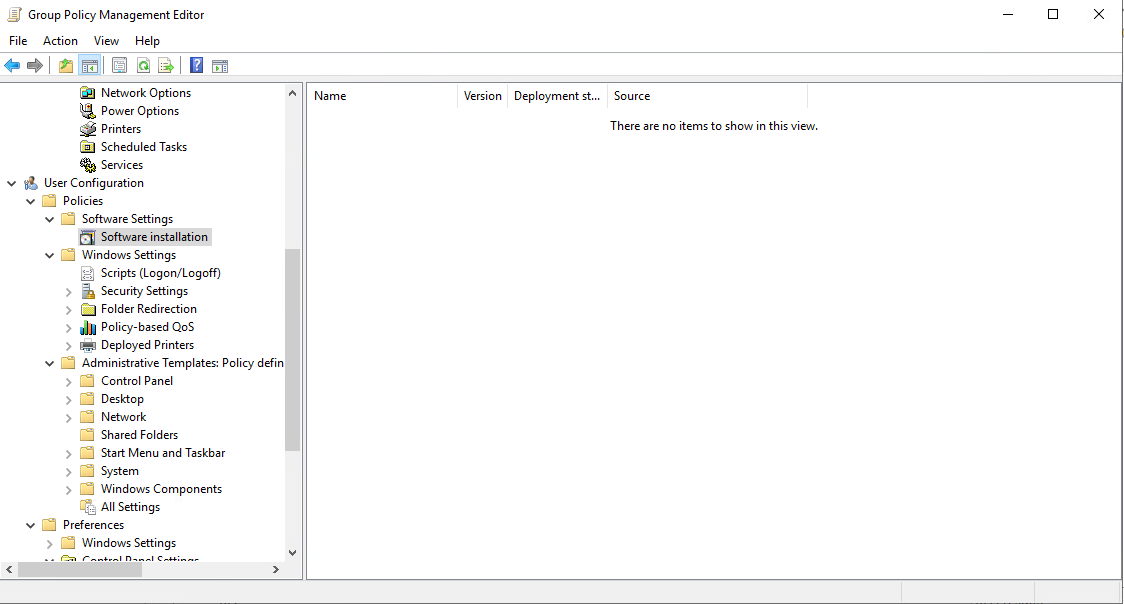
The Software Installation option only lets you use MSI packages and ZAW Down-level application packages (.zap), which means that an MSIX cannot be directly deployed.
If we take this route, we need to create an MSI wrapper that will install the MSIX package – quite an easy and code-free task with Advanced Installer. To do this:
1. Open Advanced Installer and create a new Installer Project.
2. Next, in the Files and Folders page add your MSIX package.
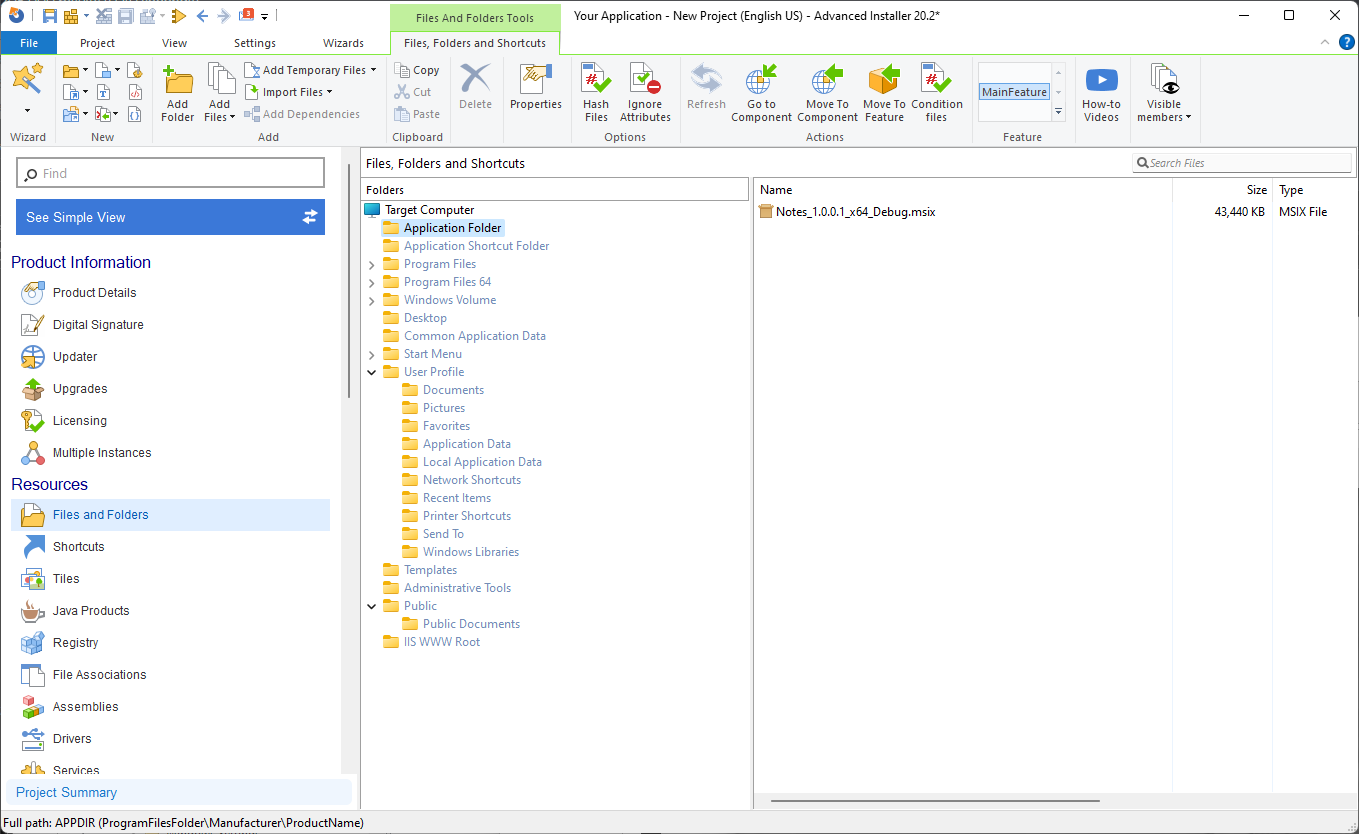
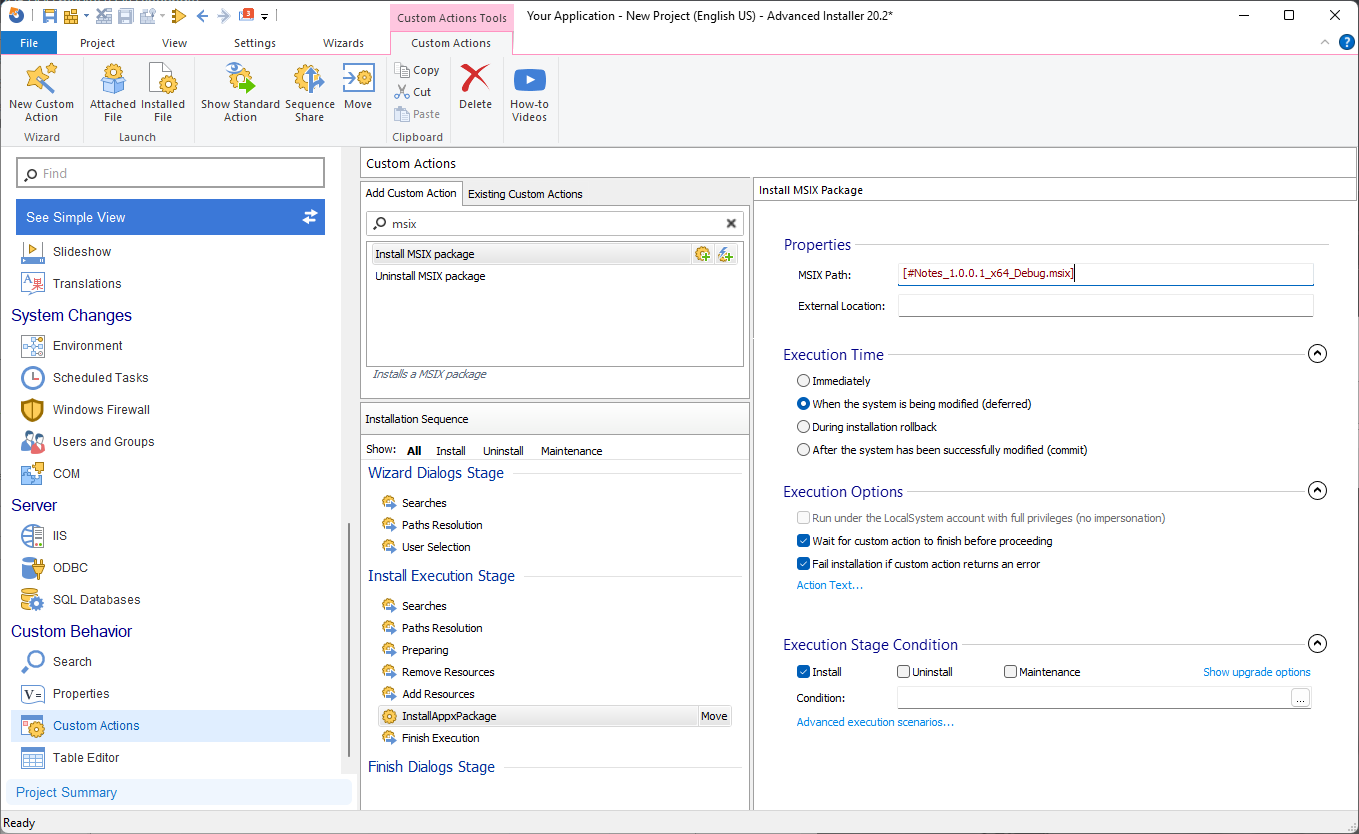
3. Once the file is added, go to the Custom Actions page and search for the Install MSIX package predefined custom action and add it in the sequence.
4. In the MSIX Path refer to your previously added MSIX package.
Don’t forget to make the proper adjustments in the package name, version, publisher, etc. in the Product Details page.
5. Then, build your package. Now you have an MSI wrapper for your MSIX installation that you can use to deploy via GPO.
6. Once the MSI is created, copy it on your NETLOGON share and give the proper permissions so the users have access to it.
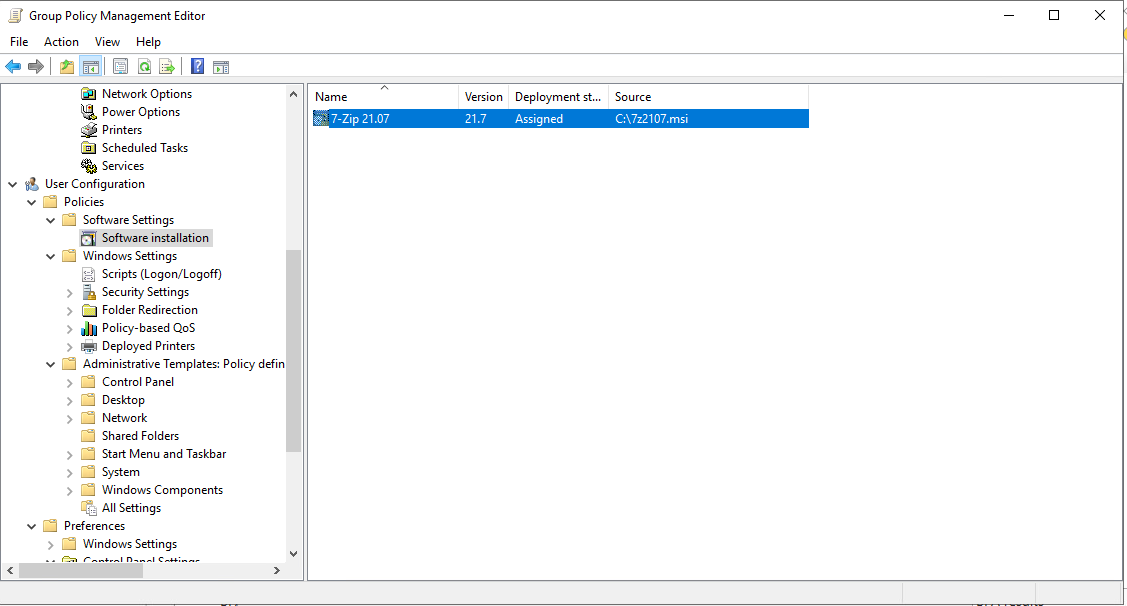
7. Next, in the Group Policy Management Editor, go to User Configuration > Software Installation and click on New > Package. Select the package from the NETLOGON share and select Advanced as the deployment method.
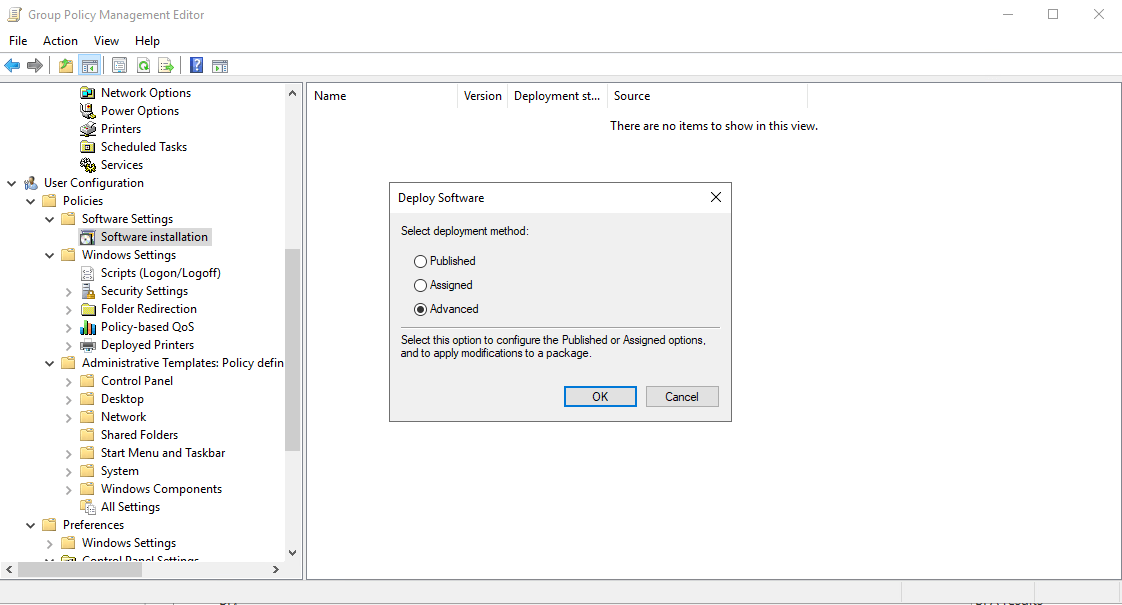
In this new window you can define multiple options such as general information, deployment options, upgrades, etc. What we are interested in can be found in the Deployment tab.
8. Make sure that the Deployment Type is set to Assigned, and the Installation user interface options is set to Basic.
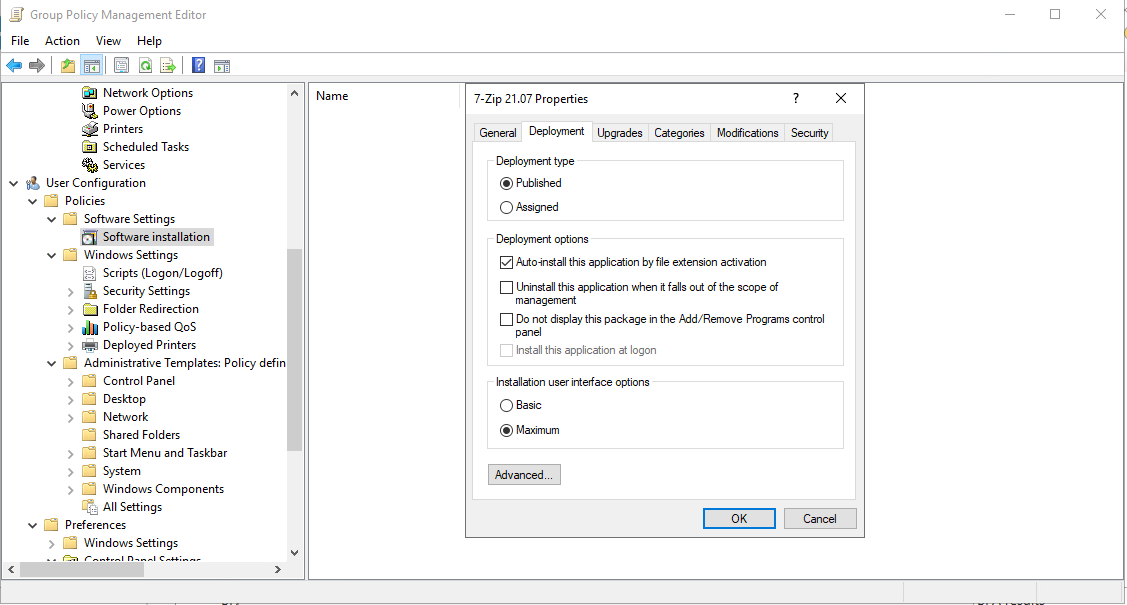
As mentioned, you can also upgrade other MSI applications, which will come in handy if you choose to deploy multiple versions of your MSIX package.
9. Once everything is set as needed, click OK, and the GPO will start running for your users.
Conclusion
MSIX provides many scenarios for deploying applications, and with this tutorial, you can now deploy an MSIX using Group Policies.
Advanced Installer's GUI makes it even easier to perform this task.
We hope you found this article useful. Let us know what topics you would like us to cover next.
Further resources:
