How to deploy MSIX Packages with Microsoft Intune
With Intune, Microsoft made it easier to deploy MSIX/APPX packages in your infrastructure.
There are three ways in which you can do this "officially":
- By adding an app directly from the Store (using a link)
- By creating a line-of-business app (LOB)
- As a third and more complex option, you can add an MSIX package along with a PowerShell script by creating and deploying a Windows app (Win32).
In this article, we will explore these three options to help you choose the most suitable one for your particular scenario.
Option 1: How to add Microsoft Store Apps?
Today, adding Microsoft Store Apps is easier than ever! If there's an app that you want to deploy in your infrastructure in the Microsoft Store, you can follow the next steps for deployment:
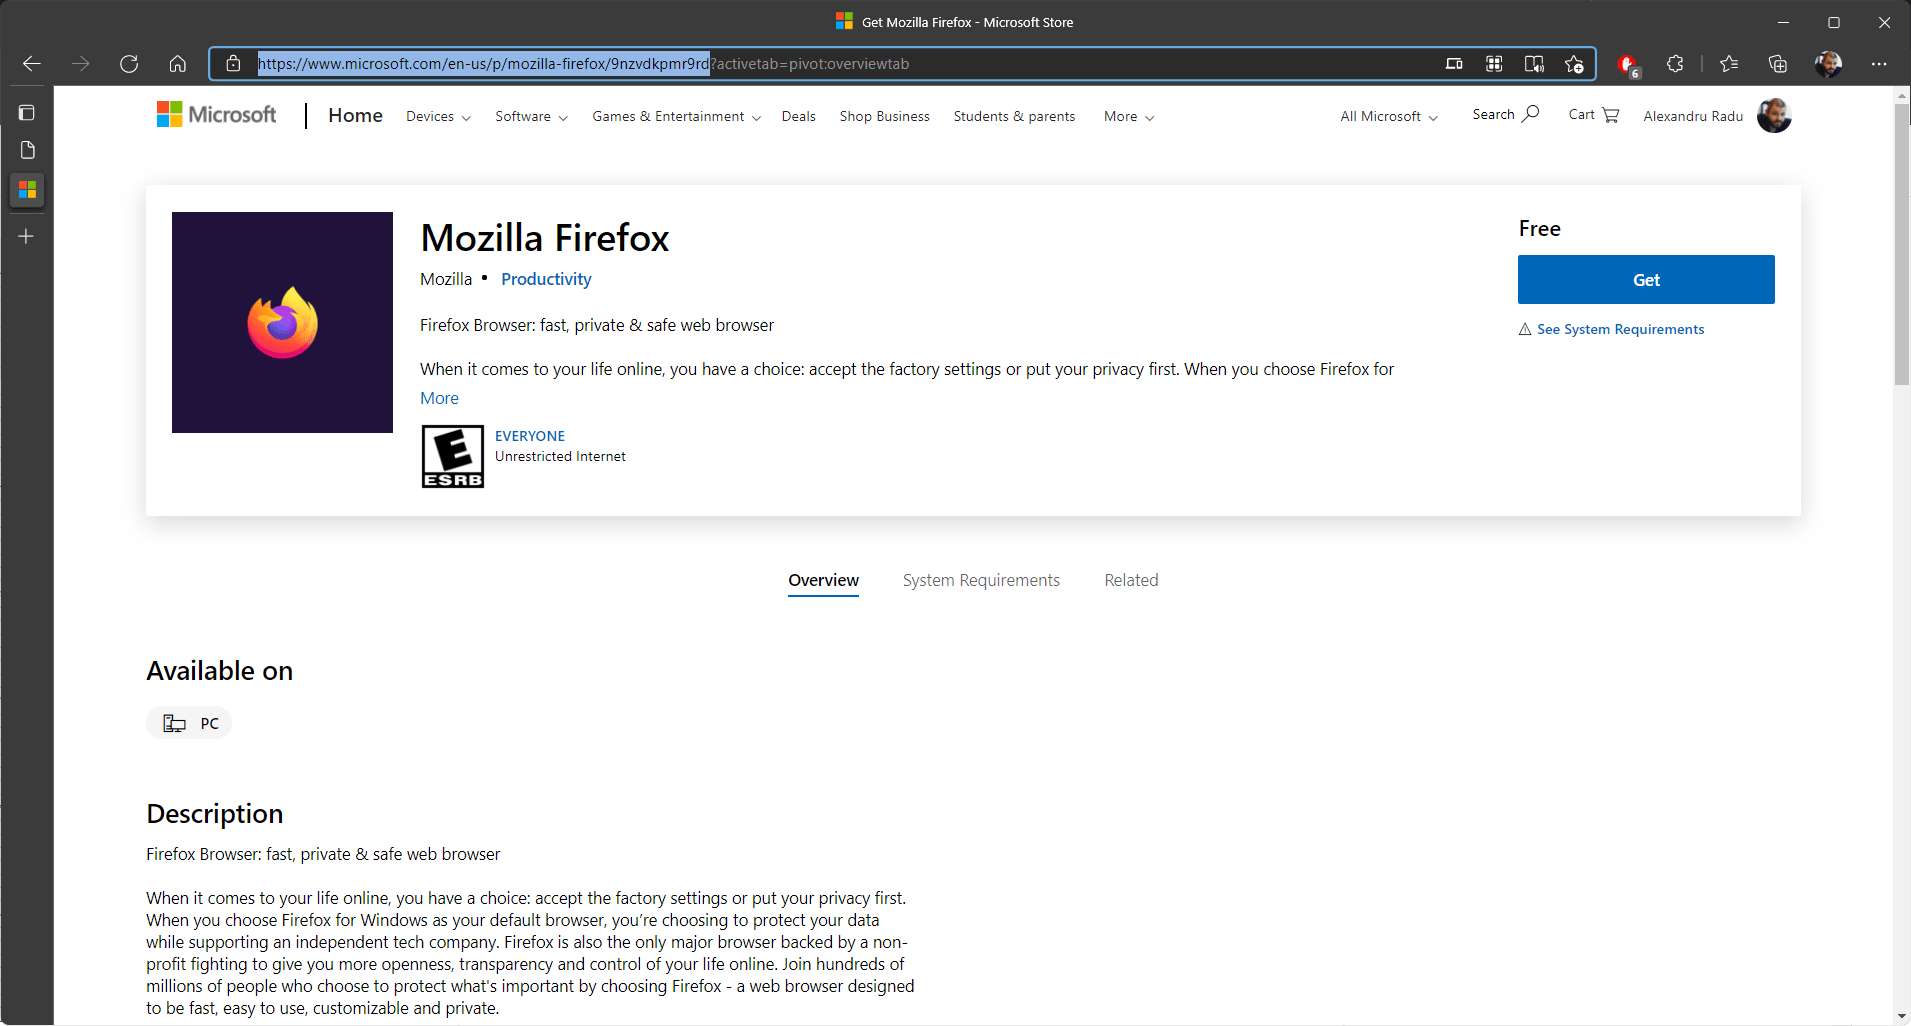
1. Browse for the app by navigating to the Microsoft Store online on the browser.
In our case we went with the official Mozilla Firefox which was recently published in the Store.
2. Once you find your app, copy the link until the question mark (“?”) character (before the search parameter)
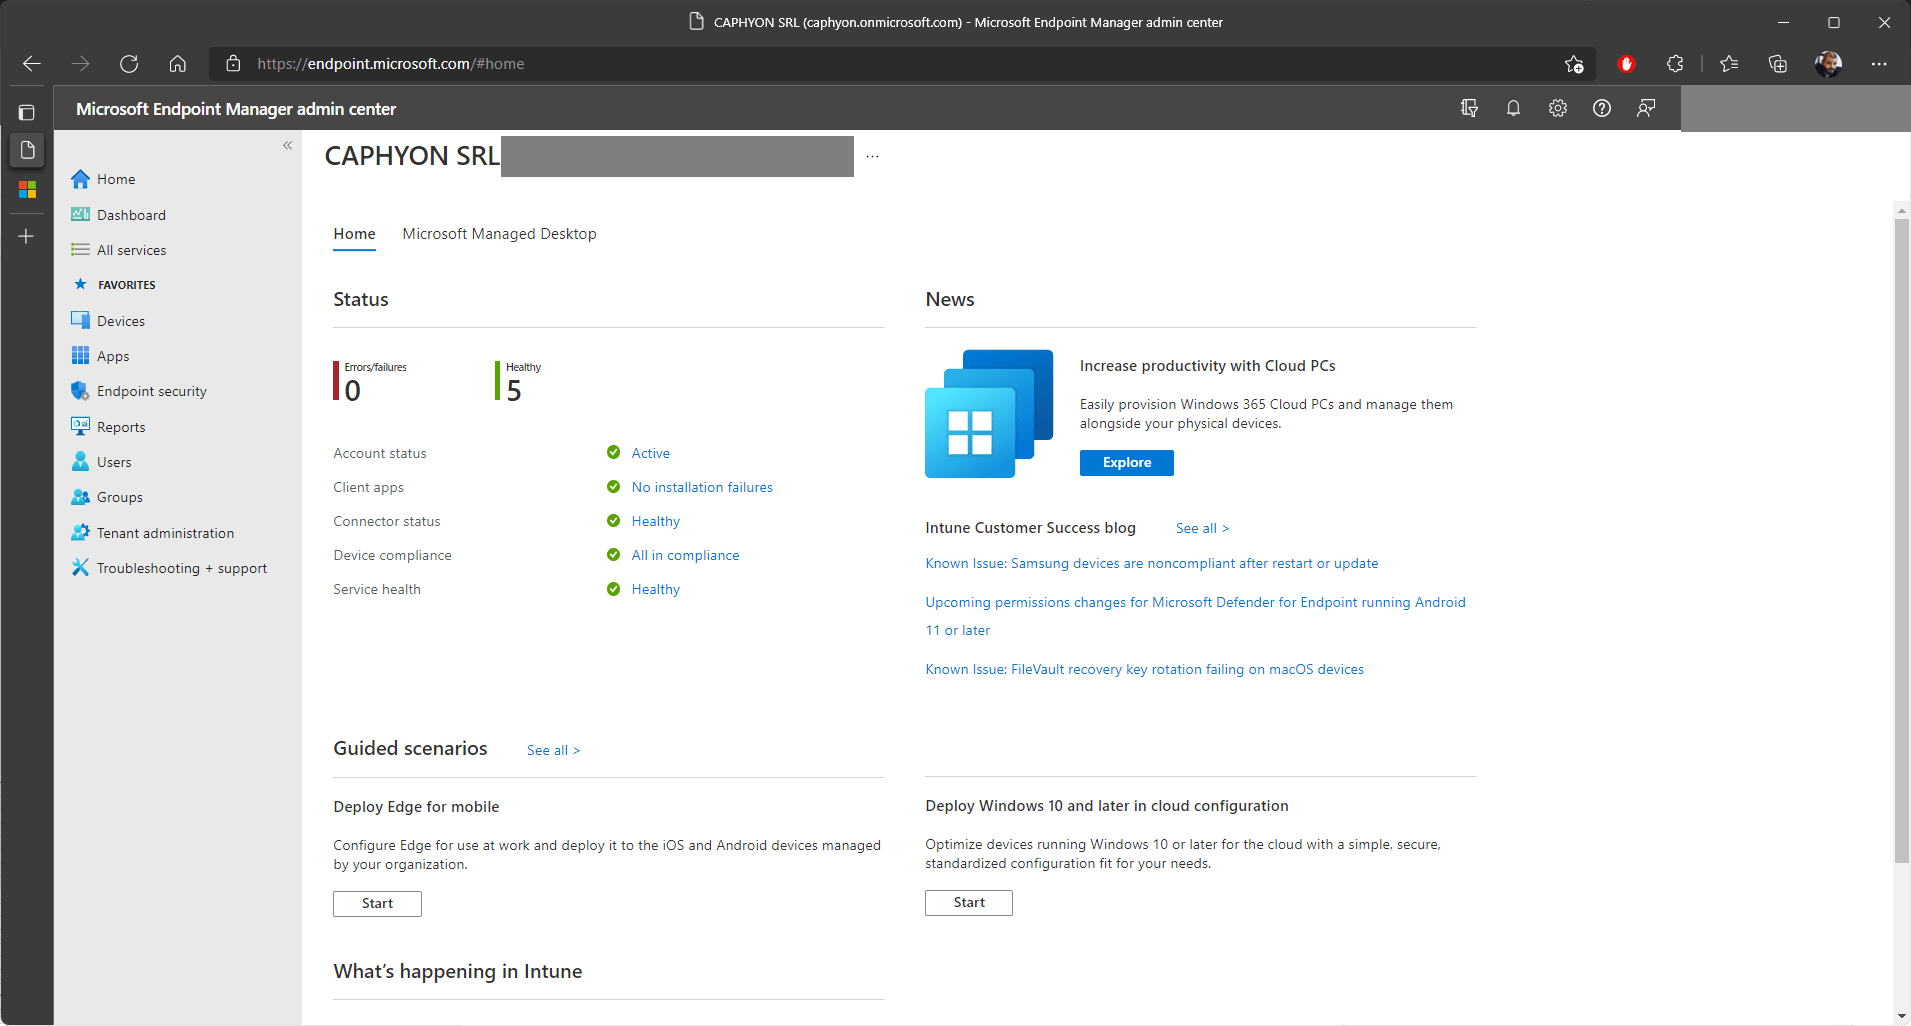
3. Next, sign into the Microsoft Endpoint Manager admin center.
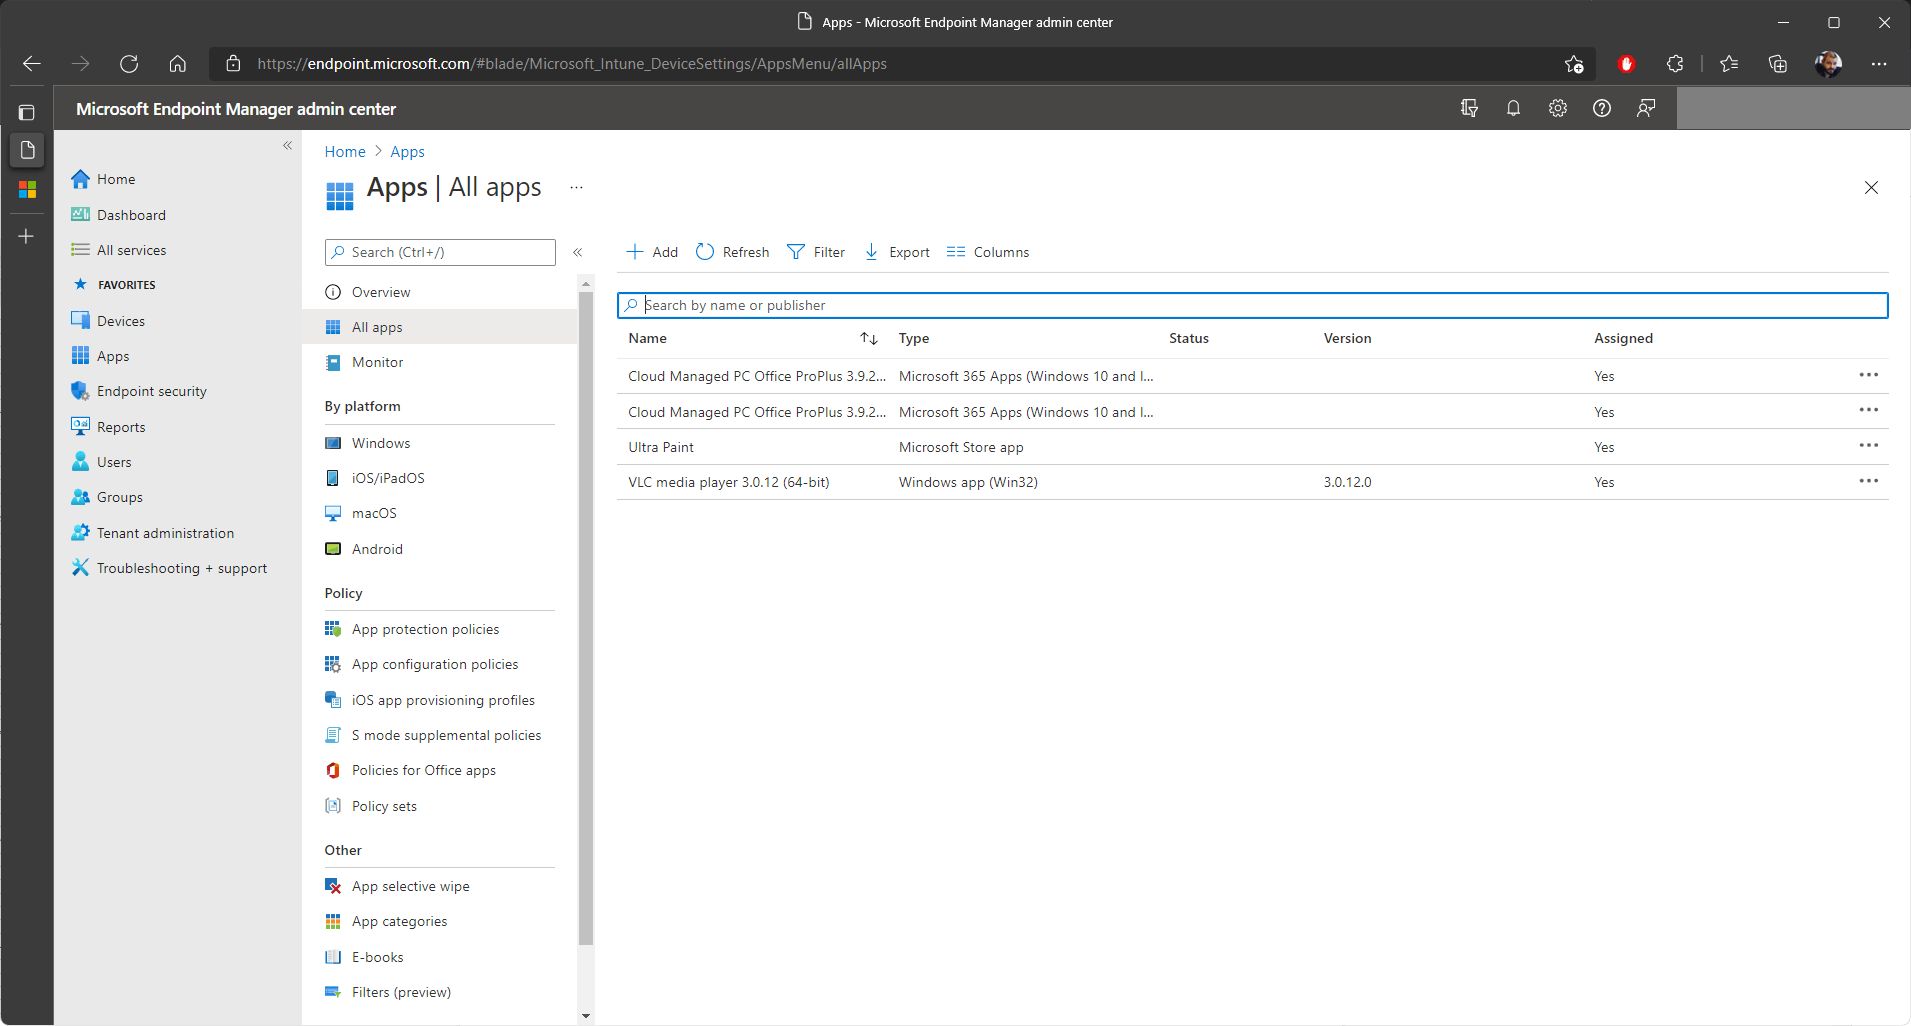
4. Once there, navigate to Apps > All Apps:
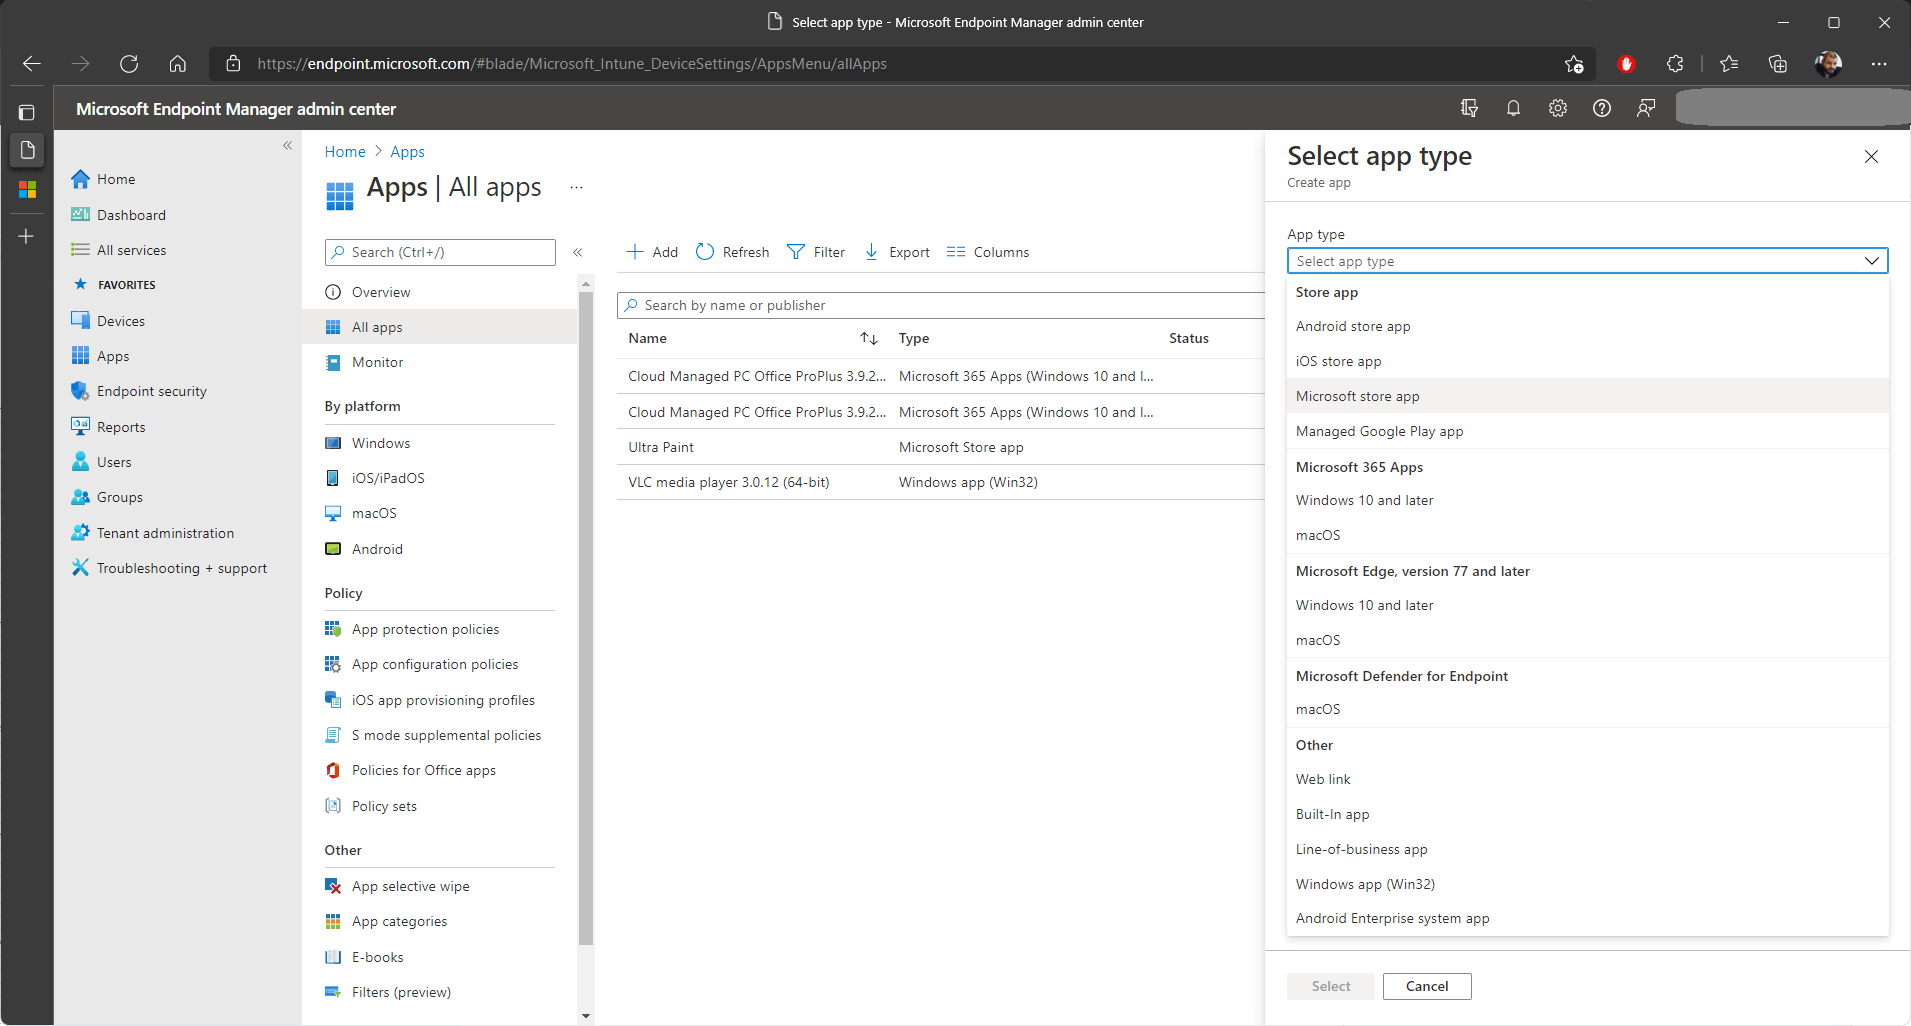
5. Click on “Add”.
6. Select “Microsoft store app” from the dropdown menu that is on the right.
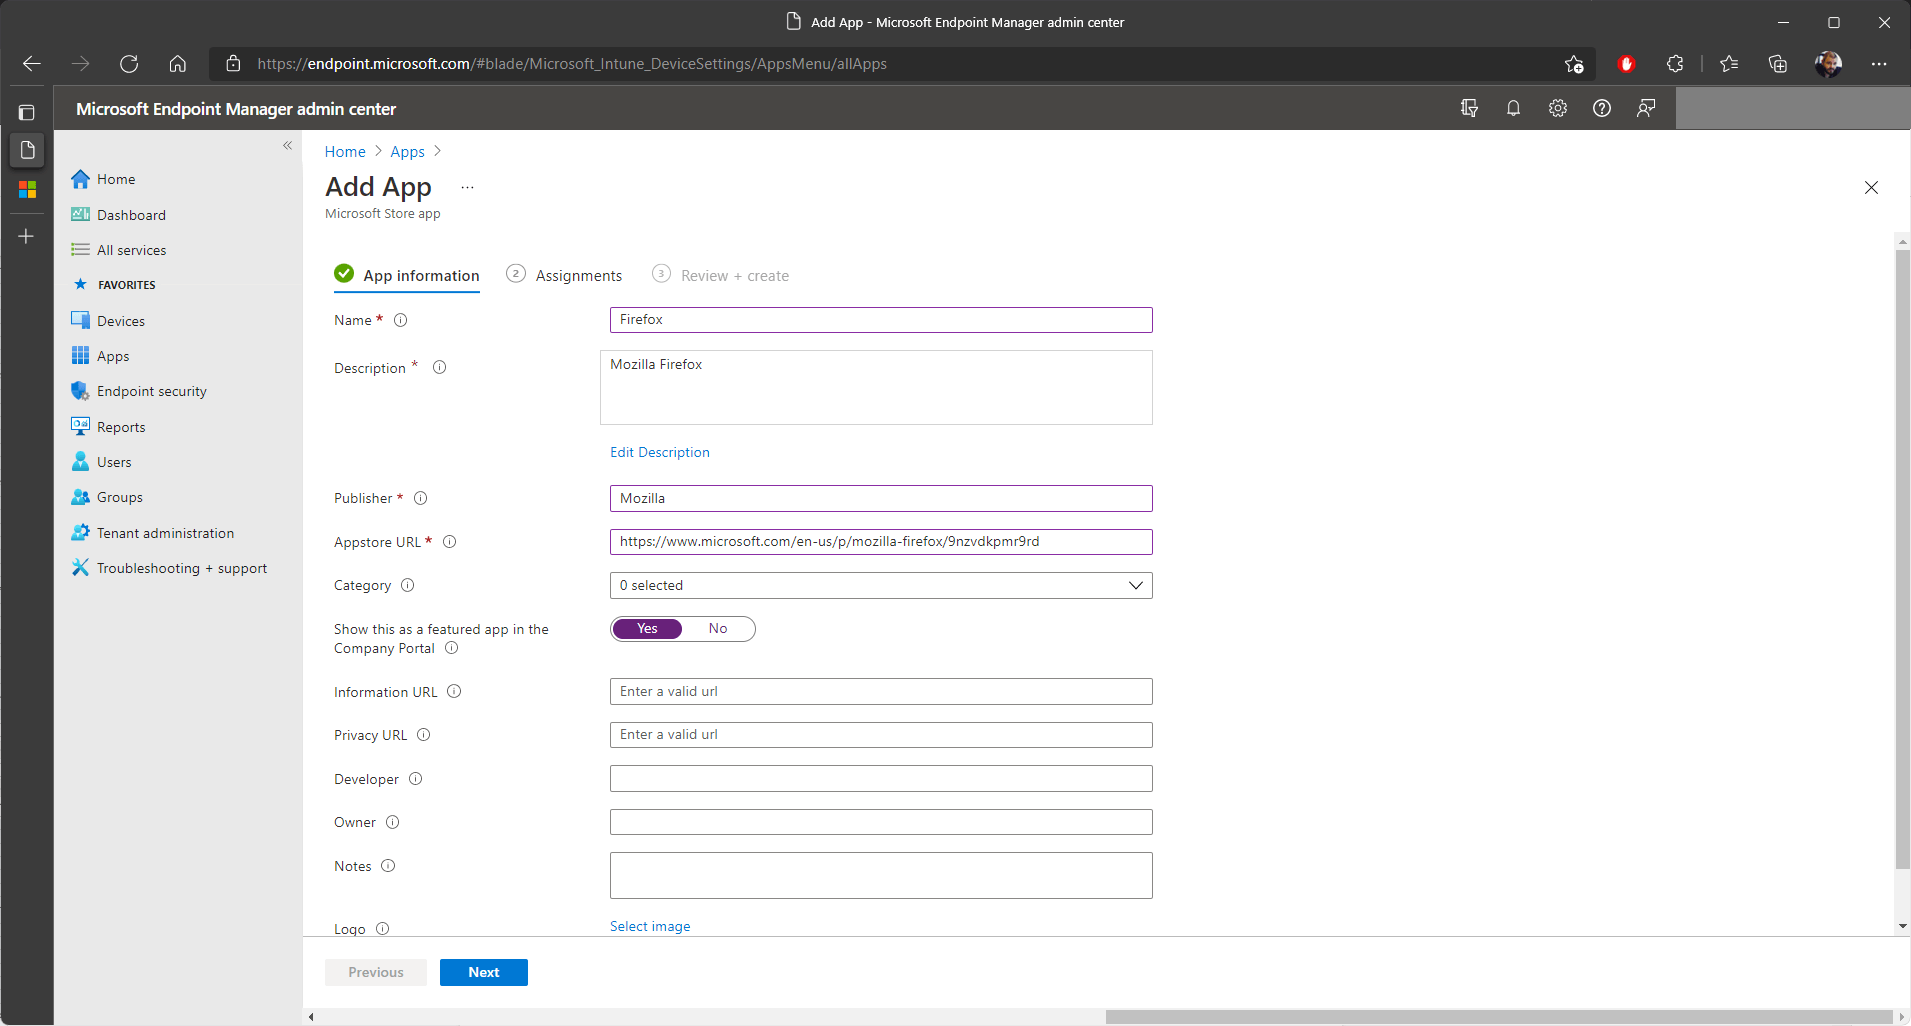
This will bring up a page where you will need to add all the necessary information: name, description, publisher, App Store URL (which we previously copied when we searched for the app in the Microsoft Store), etc.
7. Once all the information is set, click “Next”.
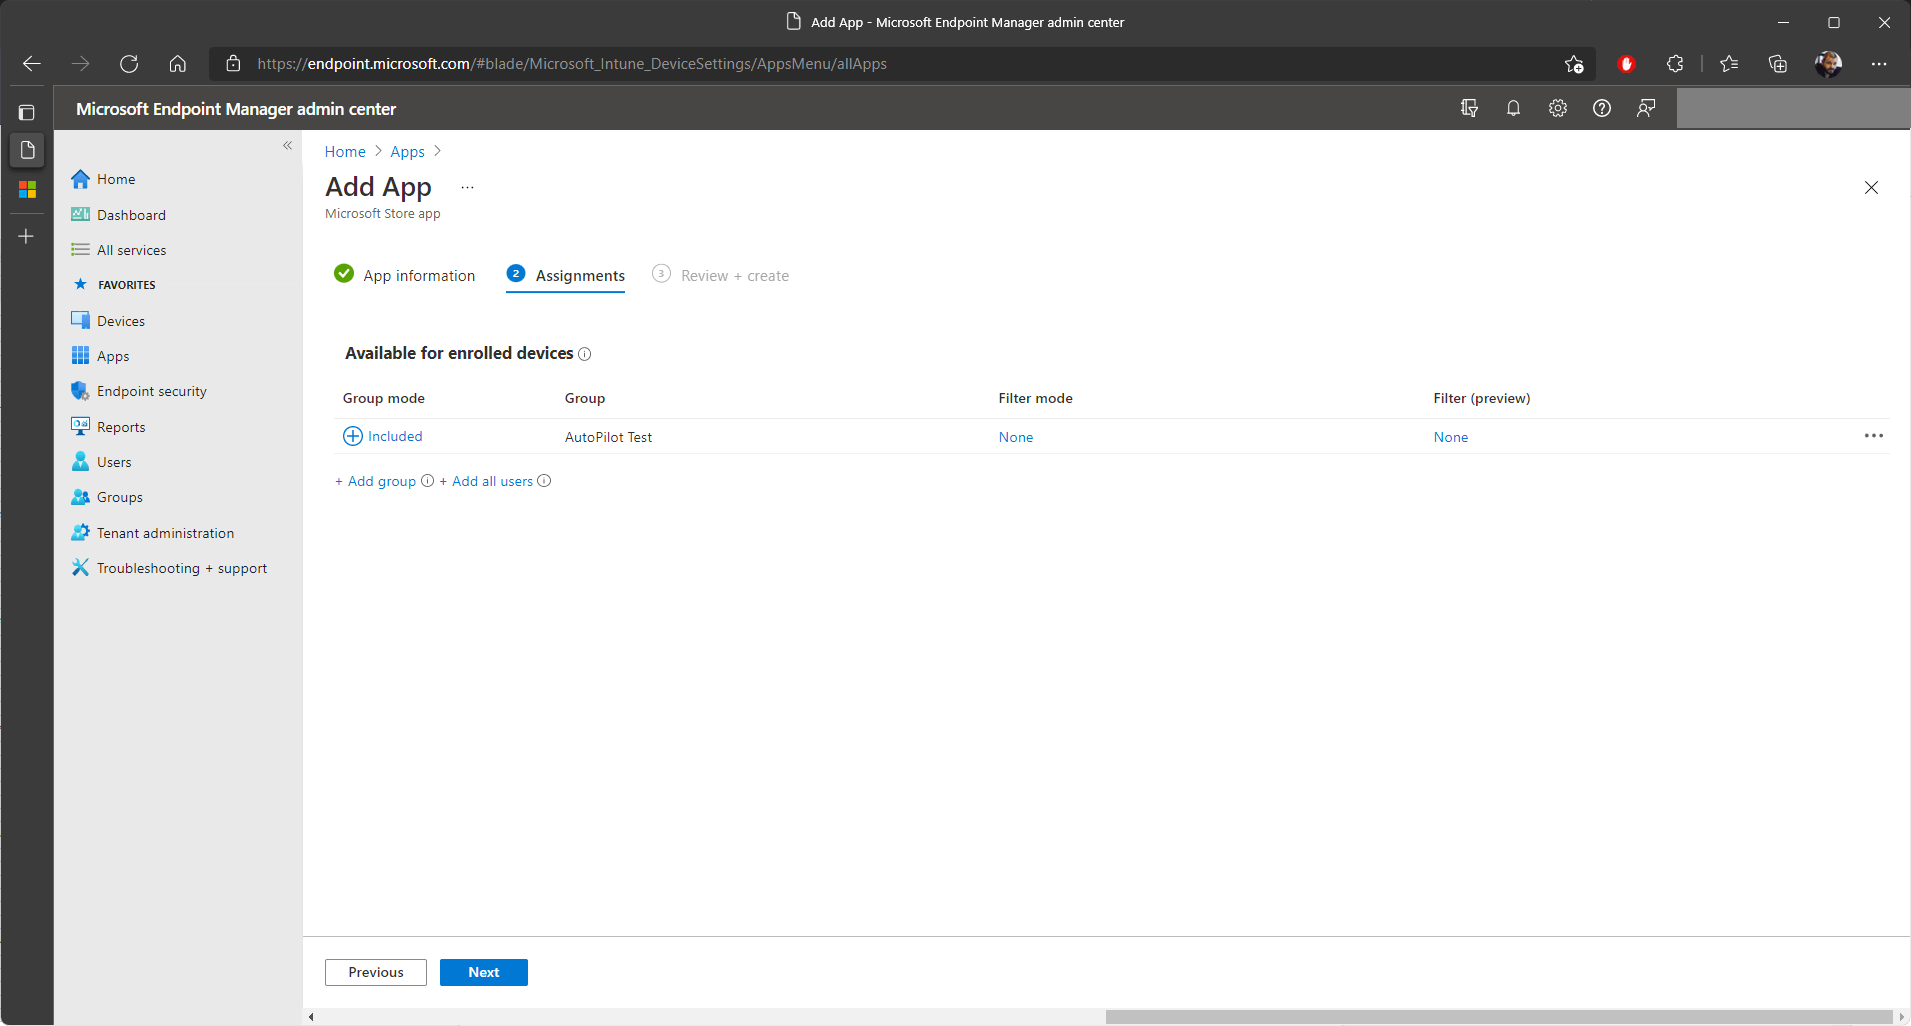
8. Assign the app to the groups you want.
9. Select the group and click “Next”.
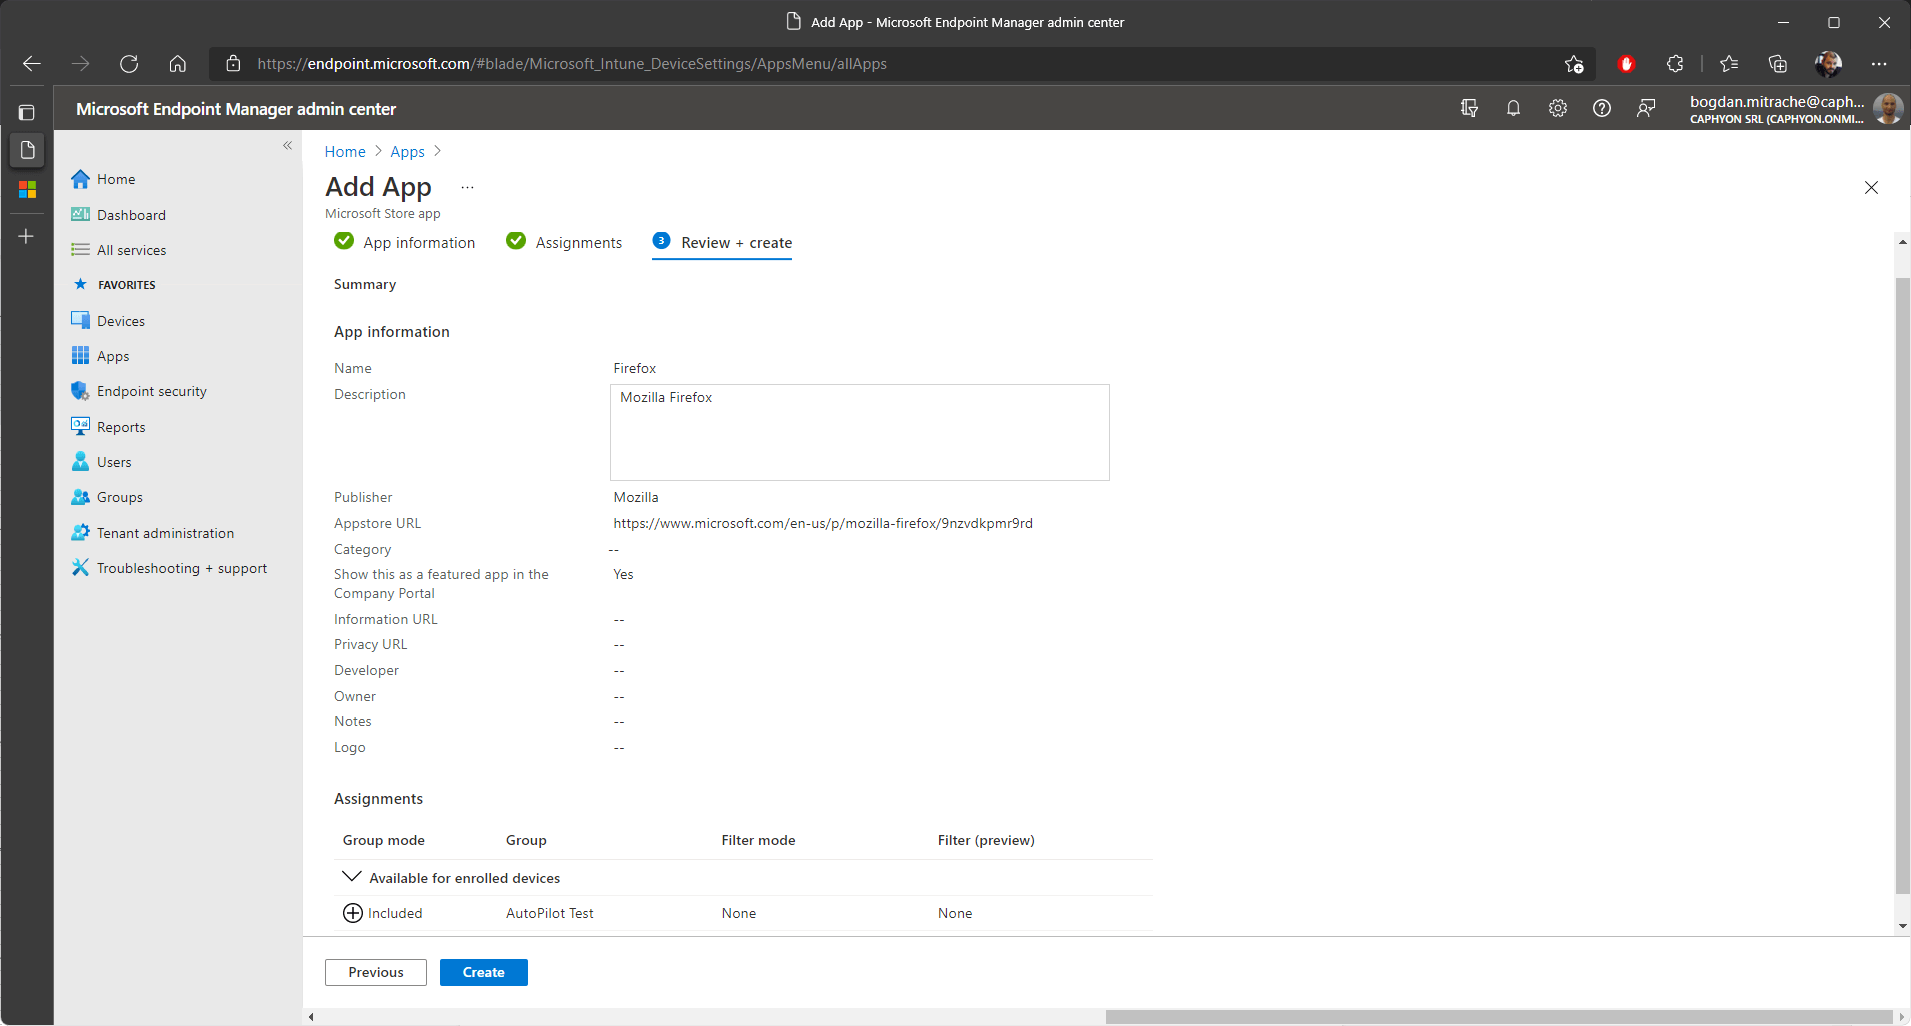
10. Then, make sure the information is correct in the “Review + create” section.
11. If everything is correct, click on “Create”.
And that is it!
That's how easy it is to deploy MSIX/APPX applications from the Microsoft Store in your infrastructure.
The good thing about this method is that the latest version of the application is always installed and kept up to date. This means that you, as a user, when you want to deploy your app in your infrastructure, you don’t have to worry about digitally signing the packages or deploying the certificate in the infrastructure.
Option 2: How to Create a Line-of-business app (LOB app)?
If the MSIX/APPX application is not available in the Microsoft Store, we need to use an alternative way to deploy it in the infrastructure. This is where a LOB app comes into play.
There are some things that must be considered before taking this route.
- If the vendor does not provide the MSIX/APPX package directly from its website, you must create the MSIX from scratch or recapture an EXE to convert it to MSIX.
- If you have an MSI, Advanced Installer makes the conversion to MSIX easily without requiring any recapture process.
The most important factor to consider is the digital signing of your MSIX packages. As previously mentioned in other articles, an MSIX/APPX package cannot be installed on the machine if it’s not digitally signed.
To better understand the whole digital signing process, we recommend you to check out this full article, or use Azure Key Vault to create, sign and deploy the required certificates.
Now that we know the minimum requirements to create and deploy MSIX apps as LOB app, let’s jump into Microsoft Endpoint Manager admin center and see what are the steps to create a LOB app.
1. Once in MEM, navigate to Apps > All Apps:

2. Click on “Add” and select “Line-of-business app”
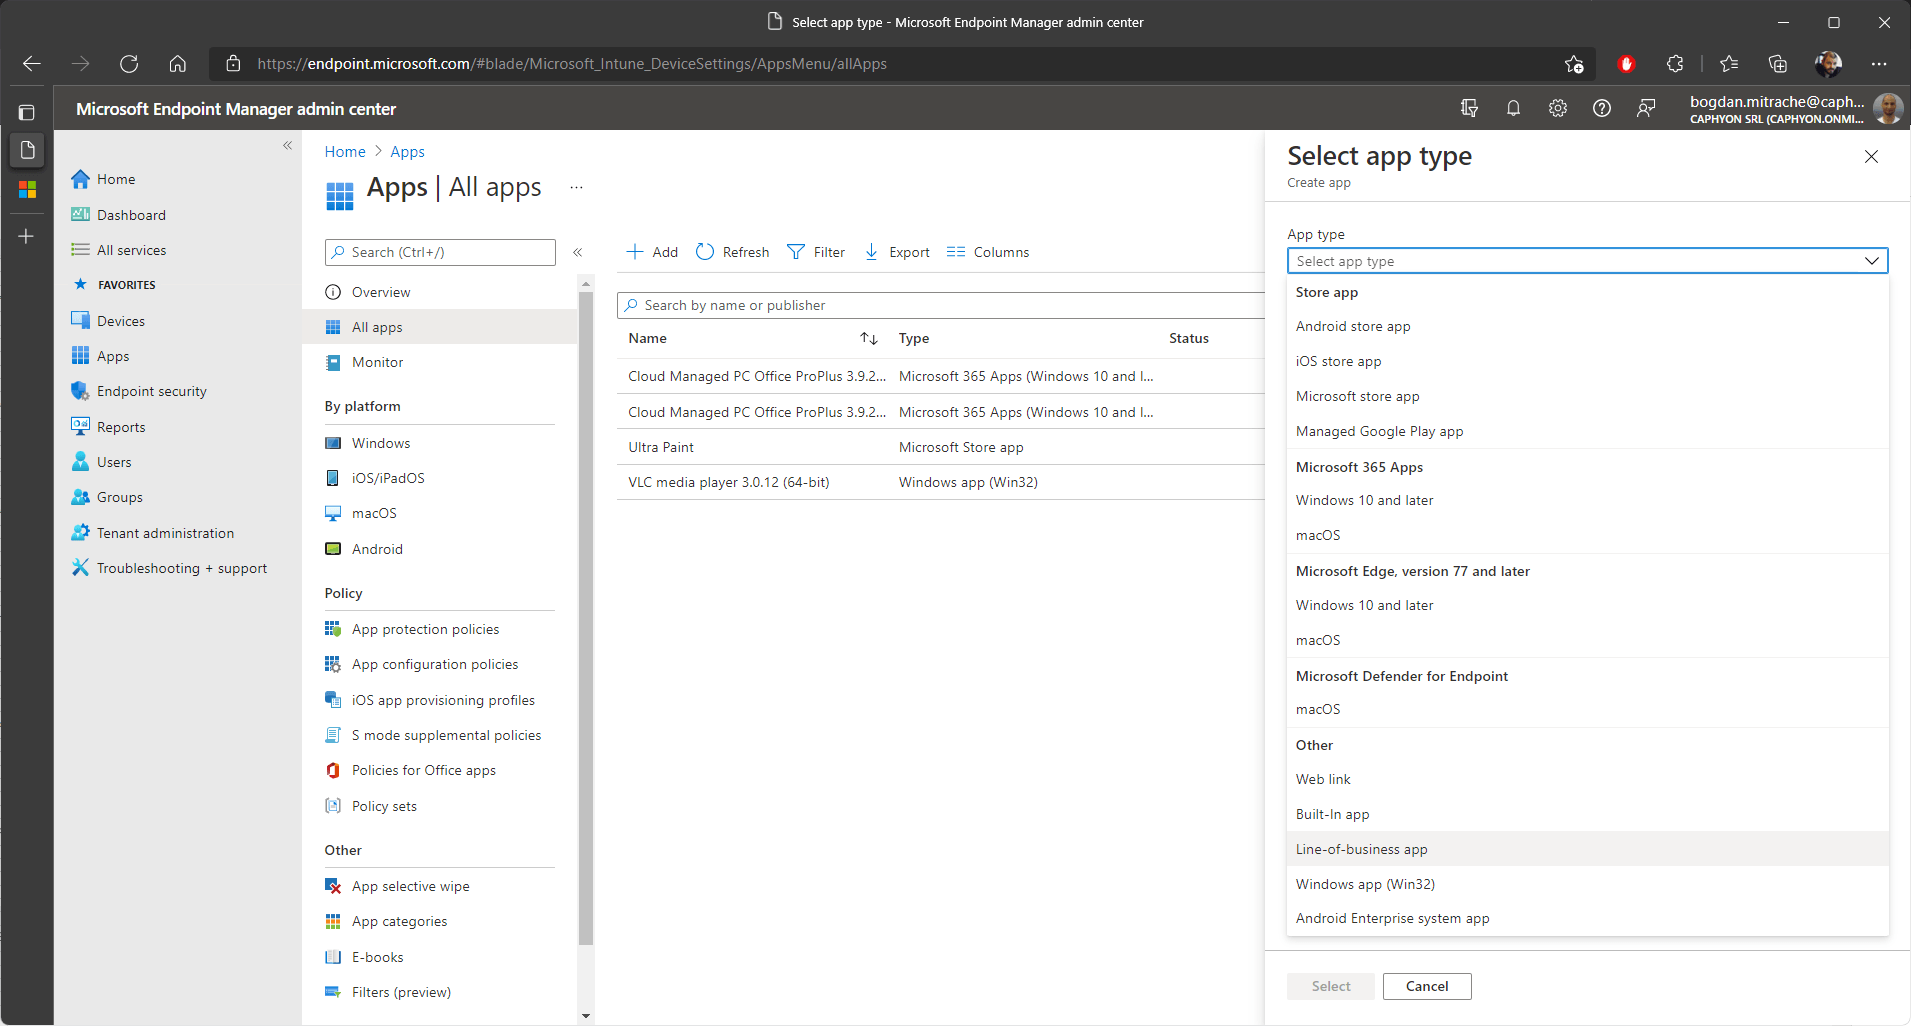
3. Next, click on “Select app package file”.
4. Browse to your MSIX application from the dialog that appears on the right side.
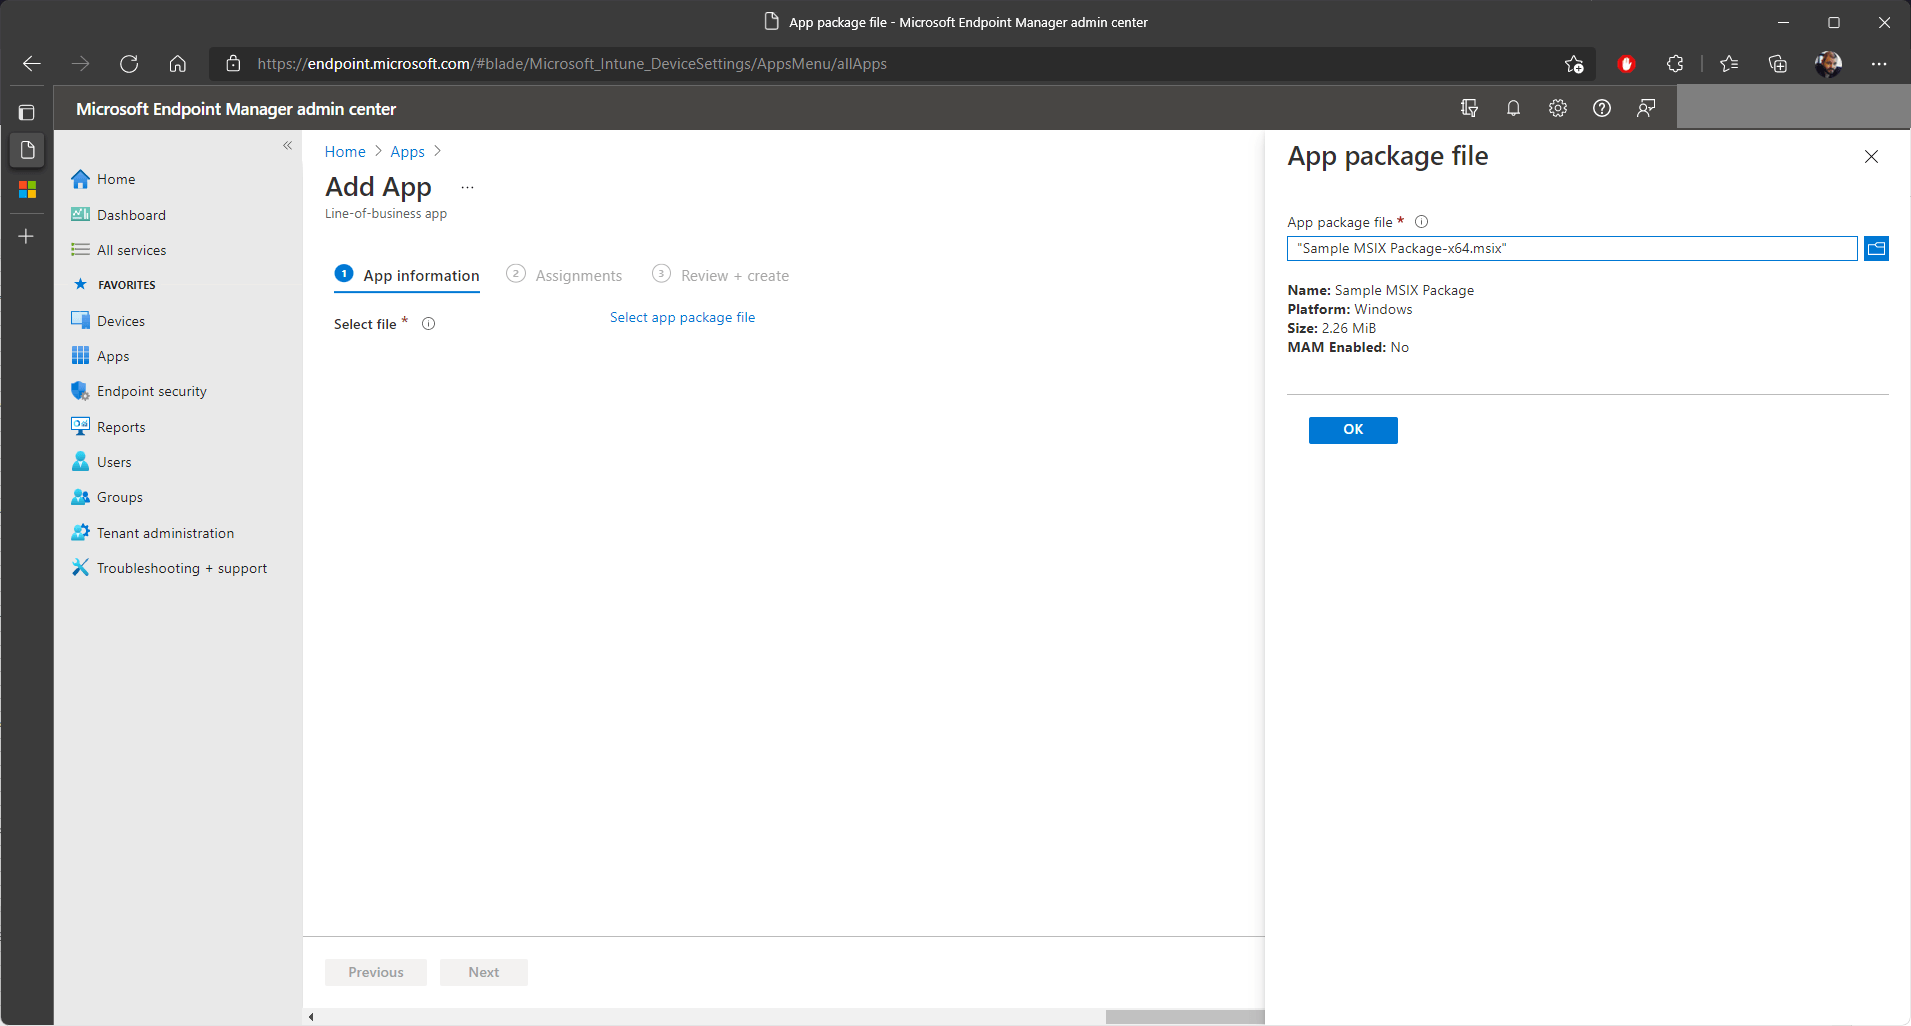
A nice touch that MEM has is that it automatically detects if the MSIX package contains any dependencies and instantly shows if the dependencies are already present in the database. If the dependencies are not present, you can add them in this step.
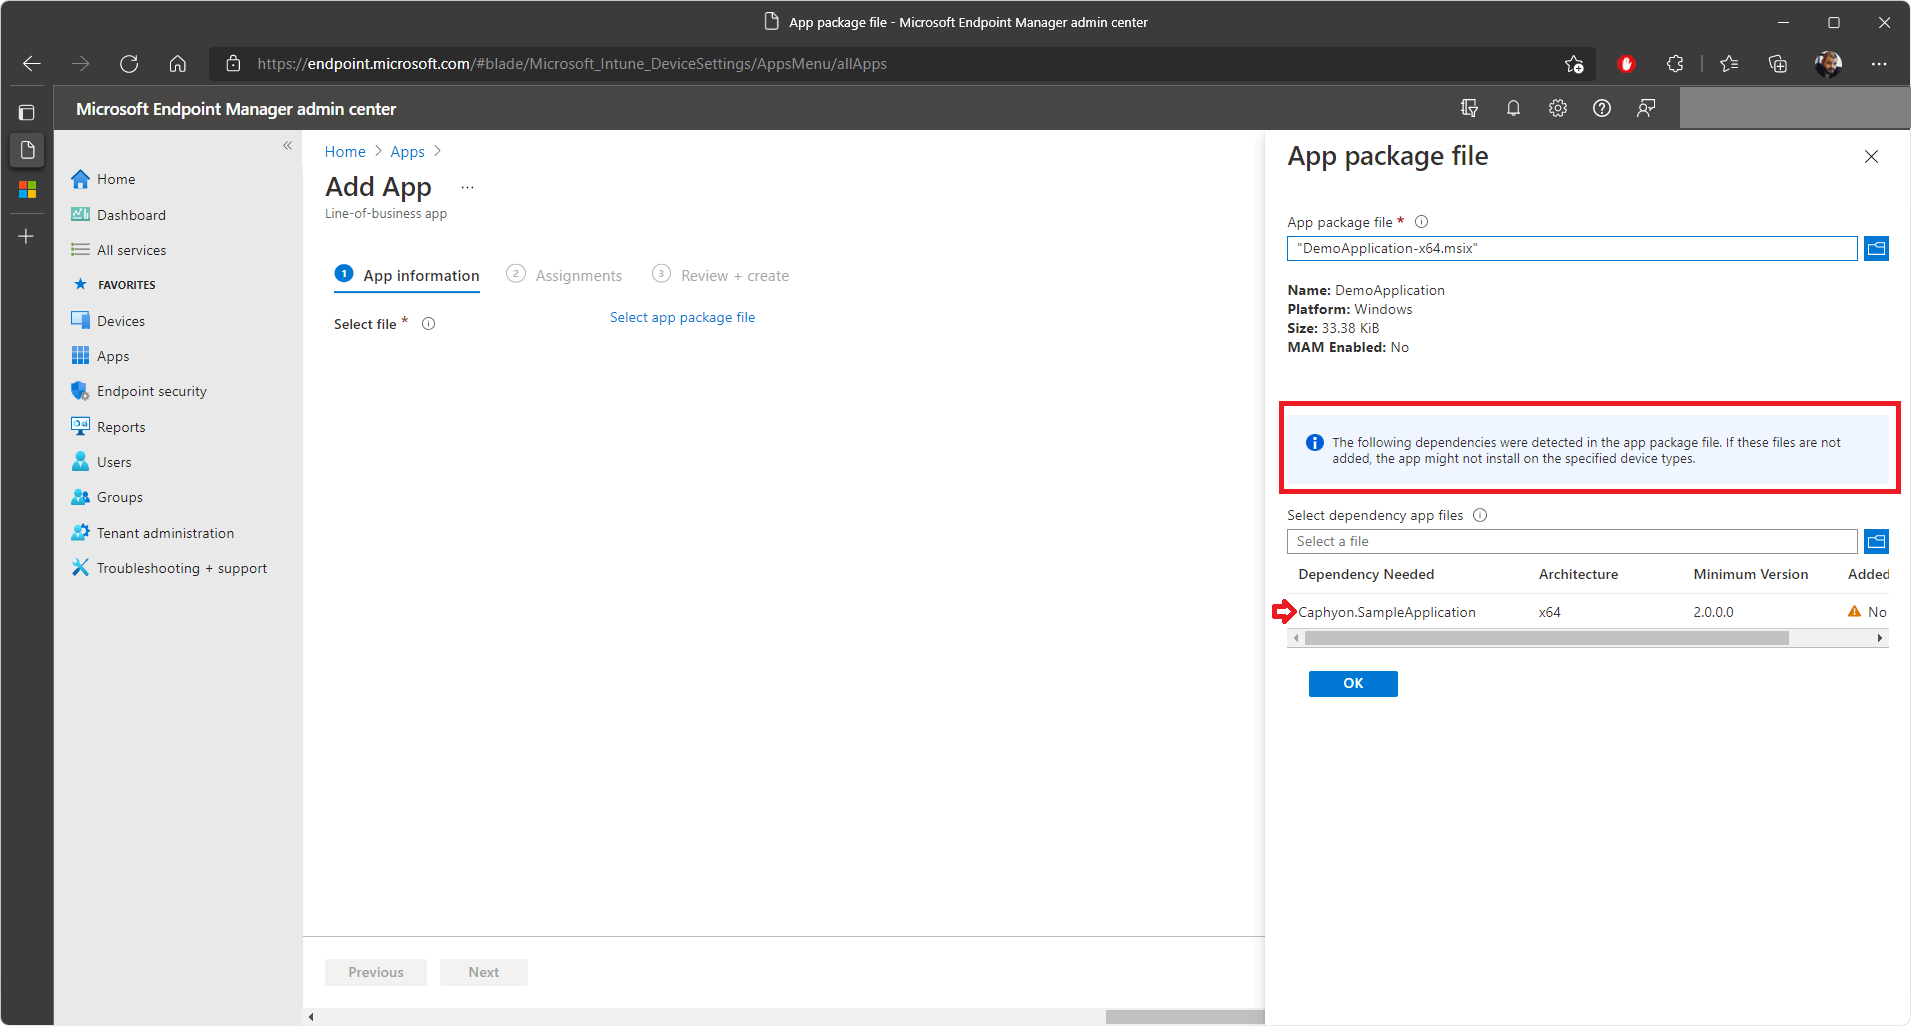
5. Once you select the MSIX package, click on “OK”. The “App Information” tab will appear.
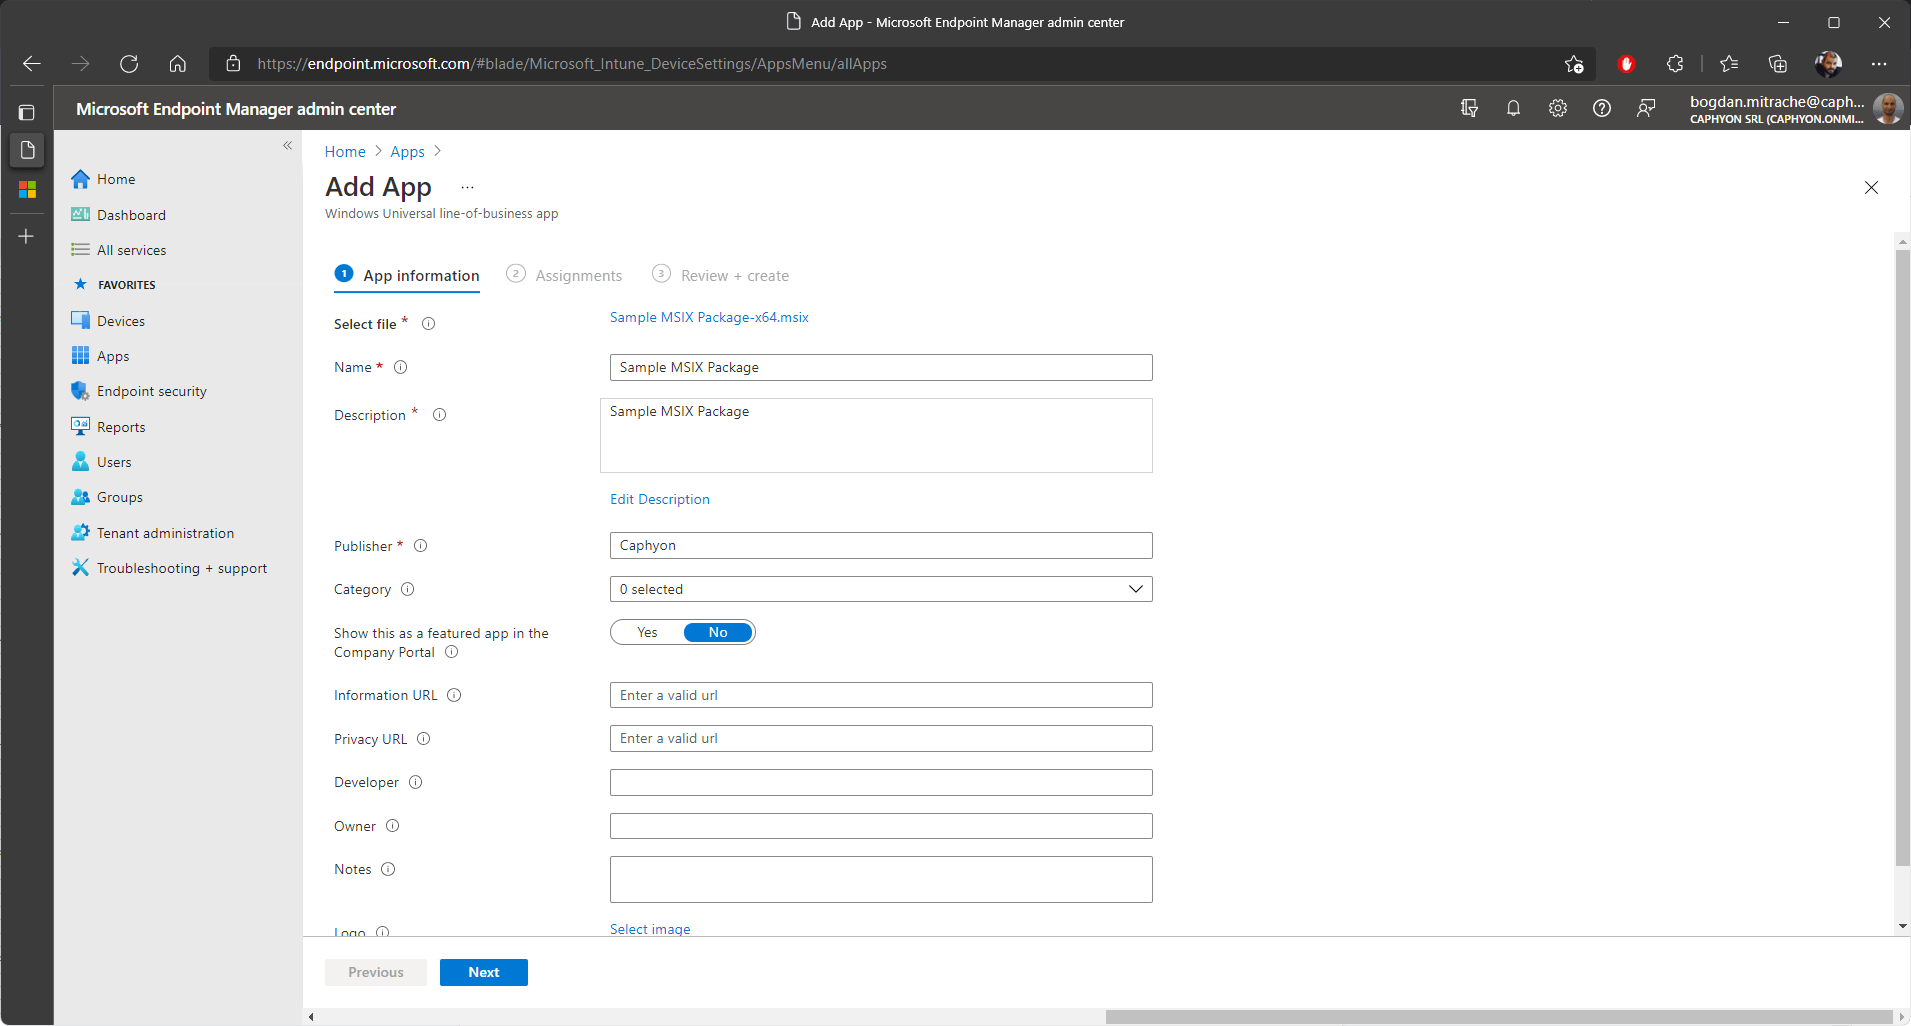
6. There, basic information such as Name, Description, and Publisher are automatically filled. You can add or change any additional information in this step and then click on “Next”.
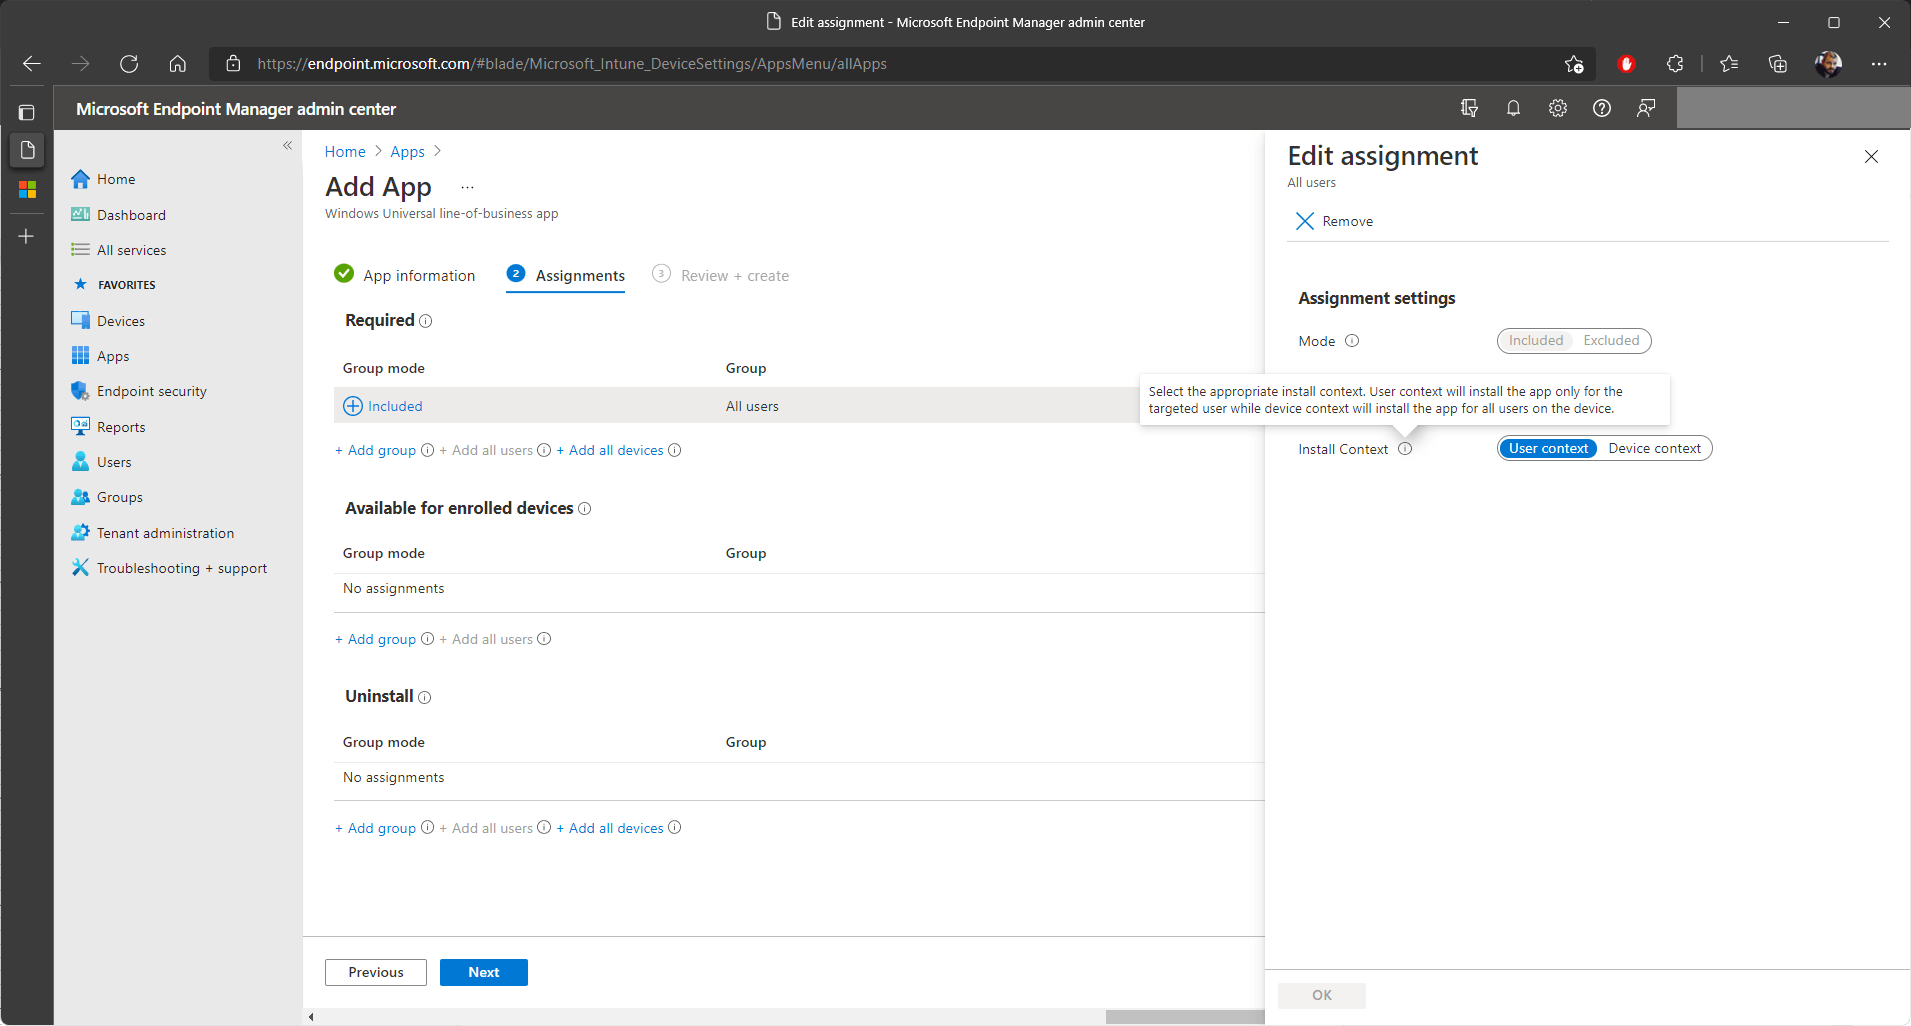
7. In the “Assignments” tab, select the groups for the following actions:
- Required: This will trigger an automatic installation on the specified collections/users.
- Available: This will make the application available for installation in the Company Portal.
- Uninstall: This will trigger an automatic uninstallation on the specified collection/users.
A nice touch: With LOB apps,if you select “Required” on a specified list of users (or all users), you have the option to install the application in “device context”, which will install the application for all the users on the device. This was also possible with SCCM and it’s nice to see that the option is available in Intune as well.
The “device context” can only be selected for “Required” and “Uninstall Groups”. For “Available” assignments, this option is greyed out.
8. Once you select the assignments, click on “Next”.
9. Review everything and if it’s correct, click on “Create”.
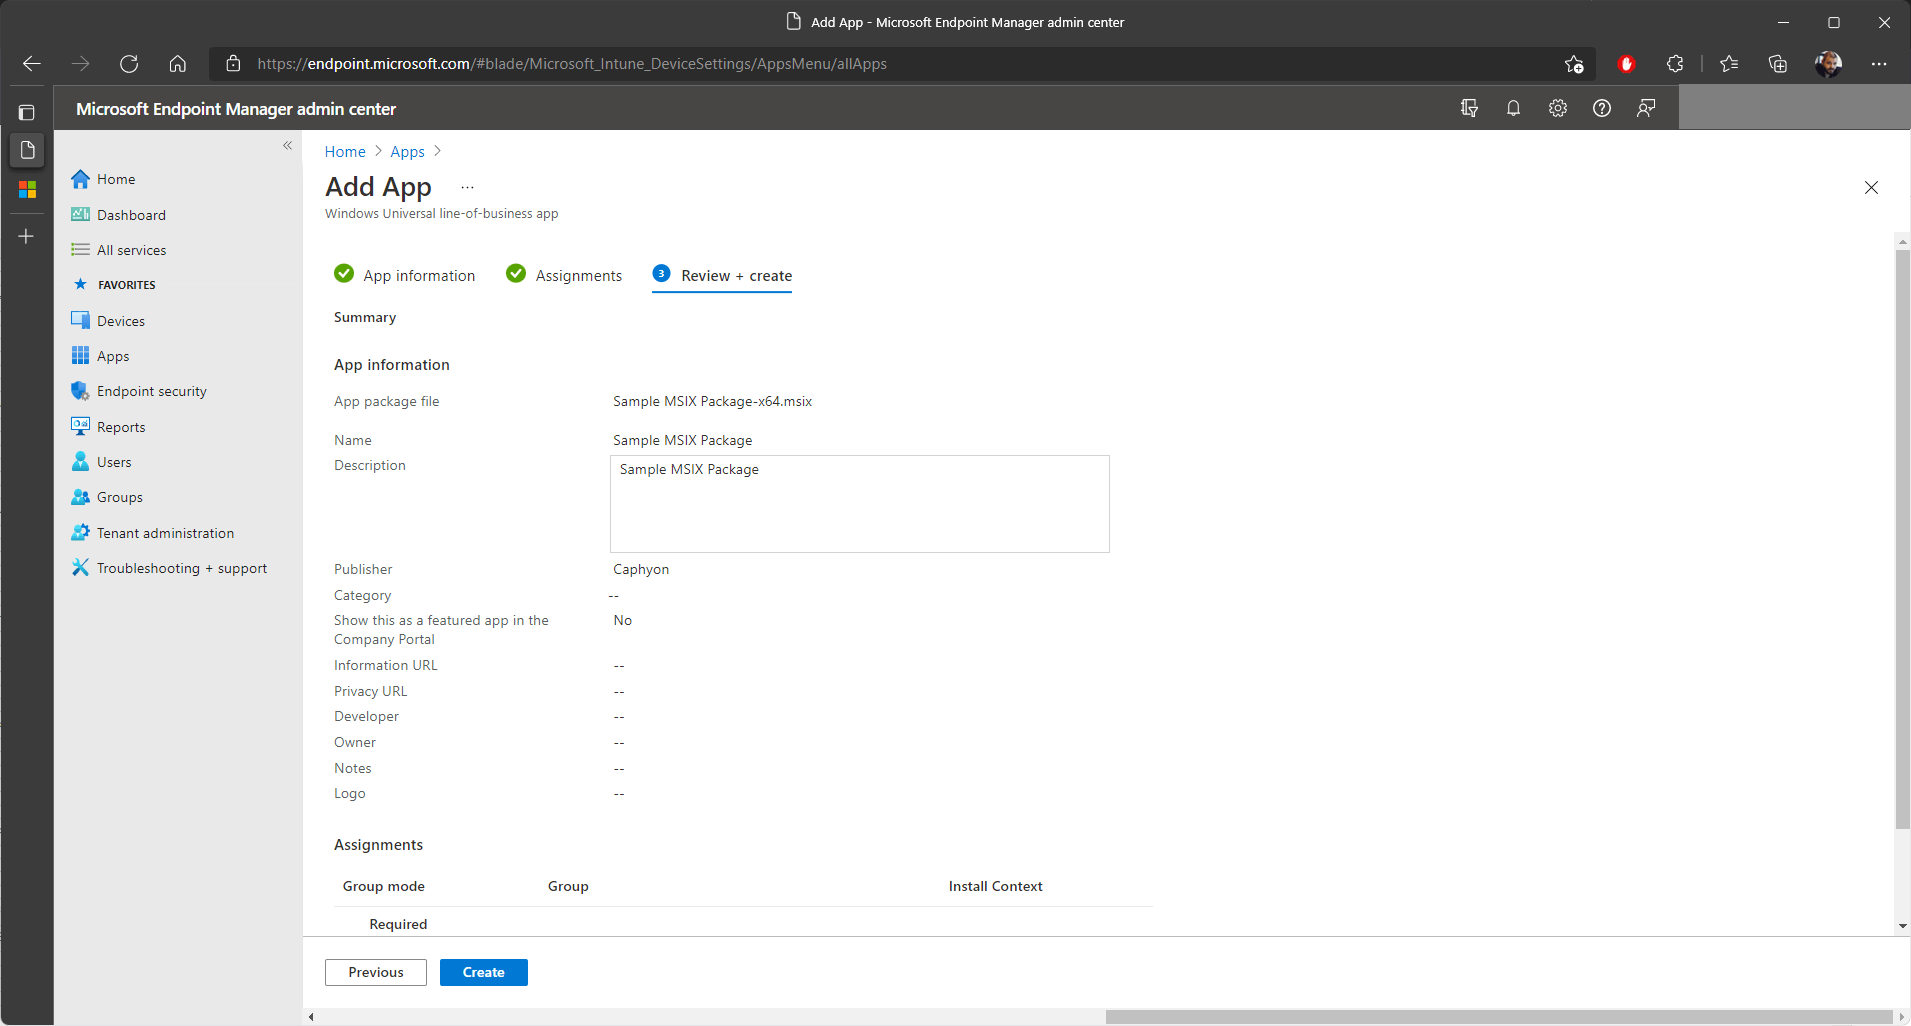
As you can see, creating a LOB app for an MSIX application is not that different from creating Microsoft Store apps. However, using LOB apps requires more effort in terms of the MSIX package and digital signing.
Option 3: Windows App (Win32) Deployment
The Store App and LOB apps options are suitable and reliable for specific scenarios – but they fall short in some instances. For example, when we need to perform more actions before installing an MSIX package. For these cases, we can turn to the “Windows App (Win32)” deployment model.
Imagine that before you install your brand new MSIX app, you want to delete a “settings” folder from the %appdata% or %localappdata% location where your standard (MSI/EXE) app stores its settings. You can use a PowerShell script for that.
A nice thing about MSIX/APPX packages is that Powershell also offers cmdlets for easy handling. You can also provision and remove MSIX packages per-machine by using cmdlets as explained here: How to Provision and Remove MSIX Packages Per Machine?.
A digital signature is required in this case, as these packages need to be signed before installation. The certificate must be trusted on all the machines that are targeted with the application.
An extra step that we must consider when it comes to the “Windows App (Win32)” deployment model is the mandatory detection method. We will touch on this topic in more detail later, but it’s necessary to consider the choice you will make in this area.
The last important step that we need to think about is that the “Windows App (Win32)” deployment method does not accept MSI, EXE, MSIX, VBScript, PowerShell or any other types of files. Instead, to create a “Windows App (Win32)” deployment type, you need an .intunewin file.
Note: If you want to know how to convert an installer (MSI, MST, VBScript, EXE, PowerShell) to .intunewin for Intune deployment check out this article.
After all we've mentioned above, let’s now jump into the Microsoft Endpoint Manager admin center and create a “Windows App (Win32)” deployment type.
1. Once in MEM, navigate to Apps > All Apps:

2. Click on “Add” and select “Windows app (Win32)”
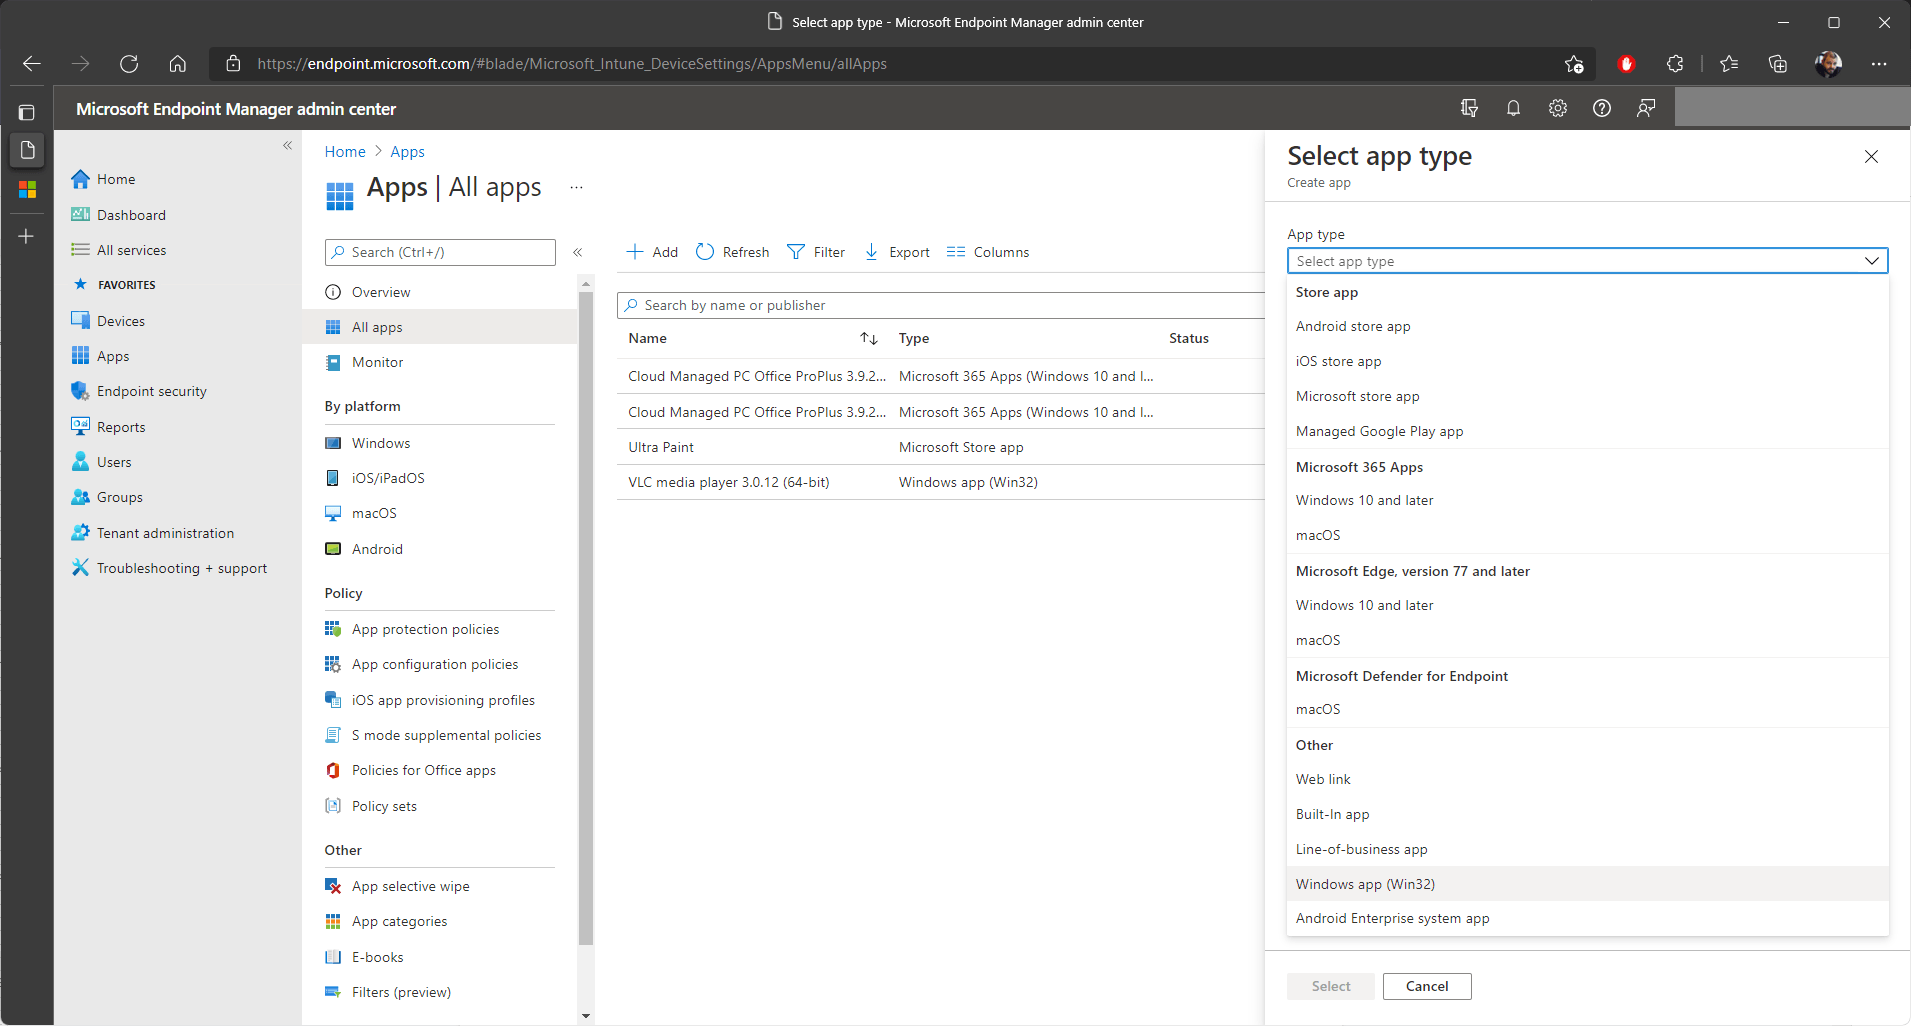
3. Next, click on “Select app package file”.
4. In the dialog that appears on the right side, browse to your .intunewin file.
5. Once you select your file, click “OK”.
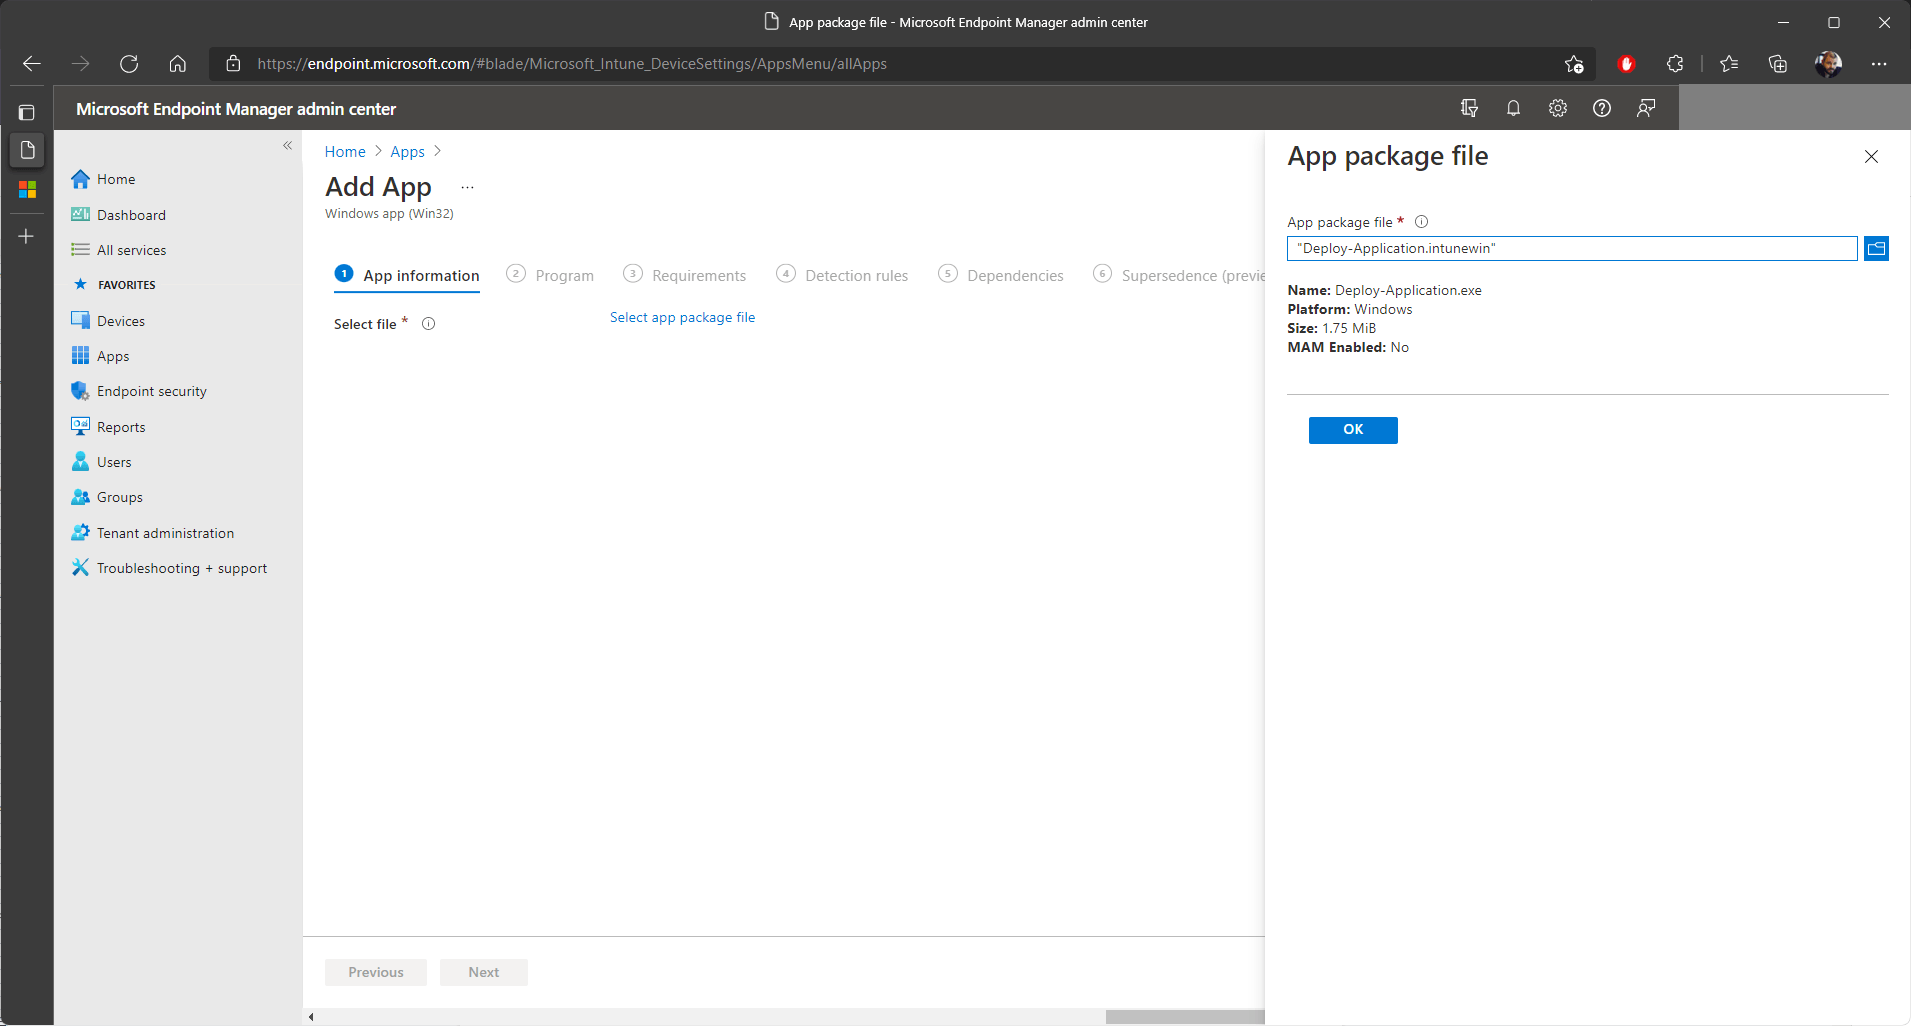
6. After you select the .intunewin package, click on “OK” and the “App Information” tab will appear.
7. There, basic information such as Name, Description, and Publisher is automatically filled.
8. Add or change any additional information in this step and then click on “Next”.
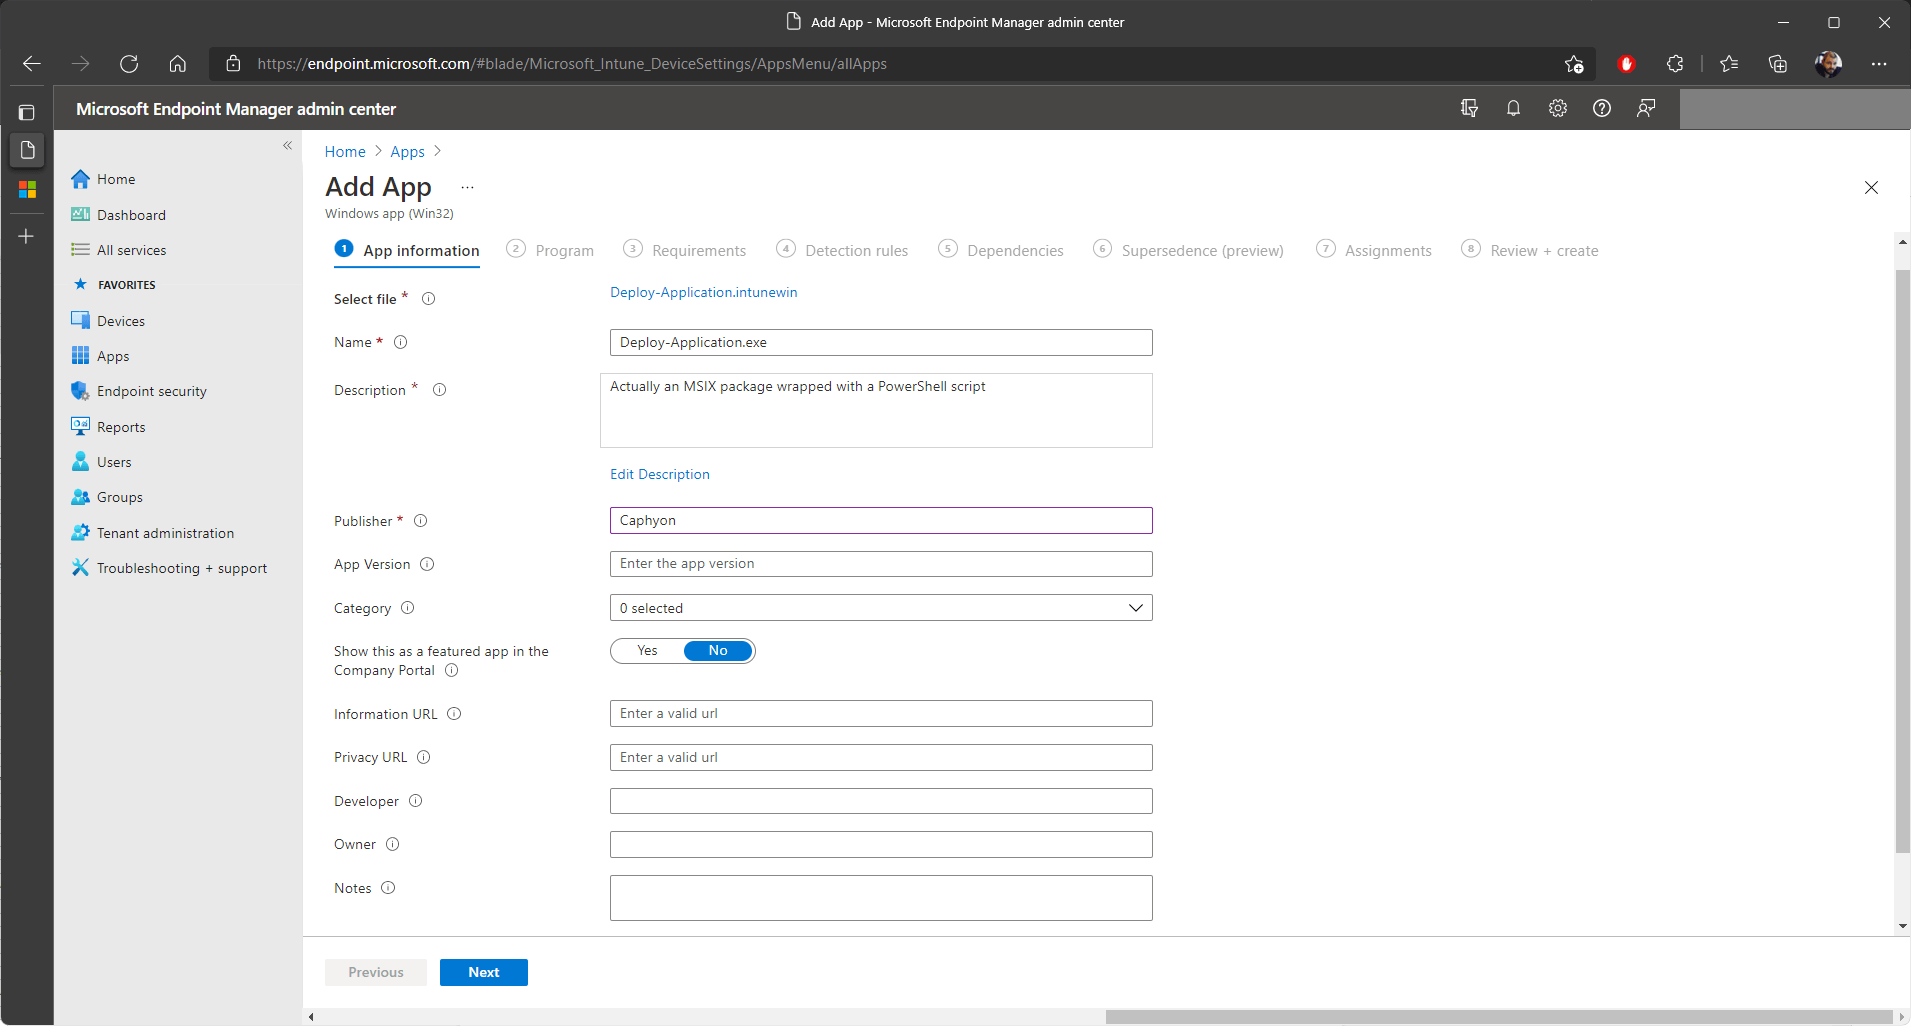
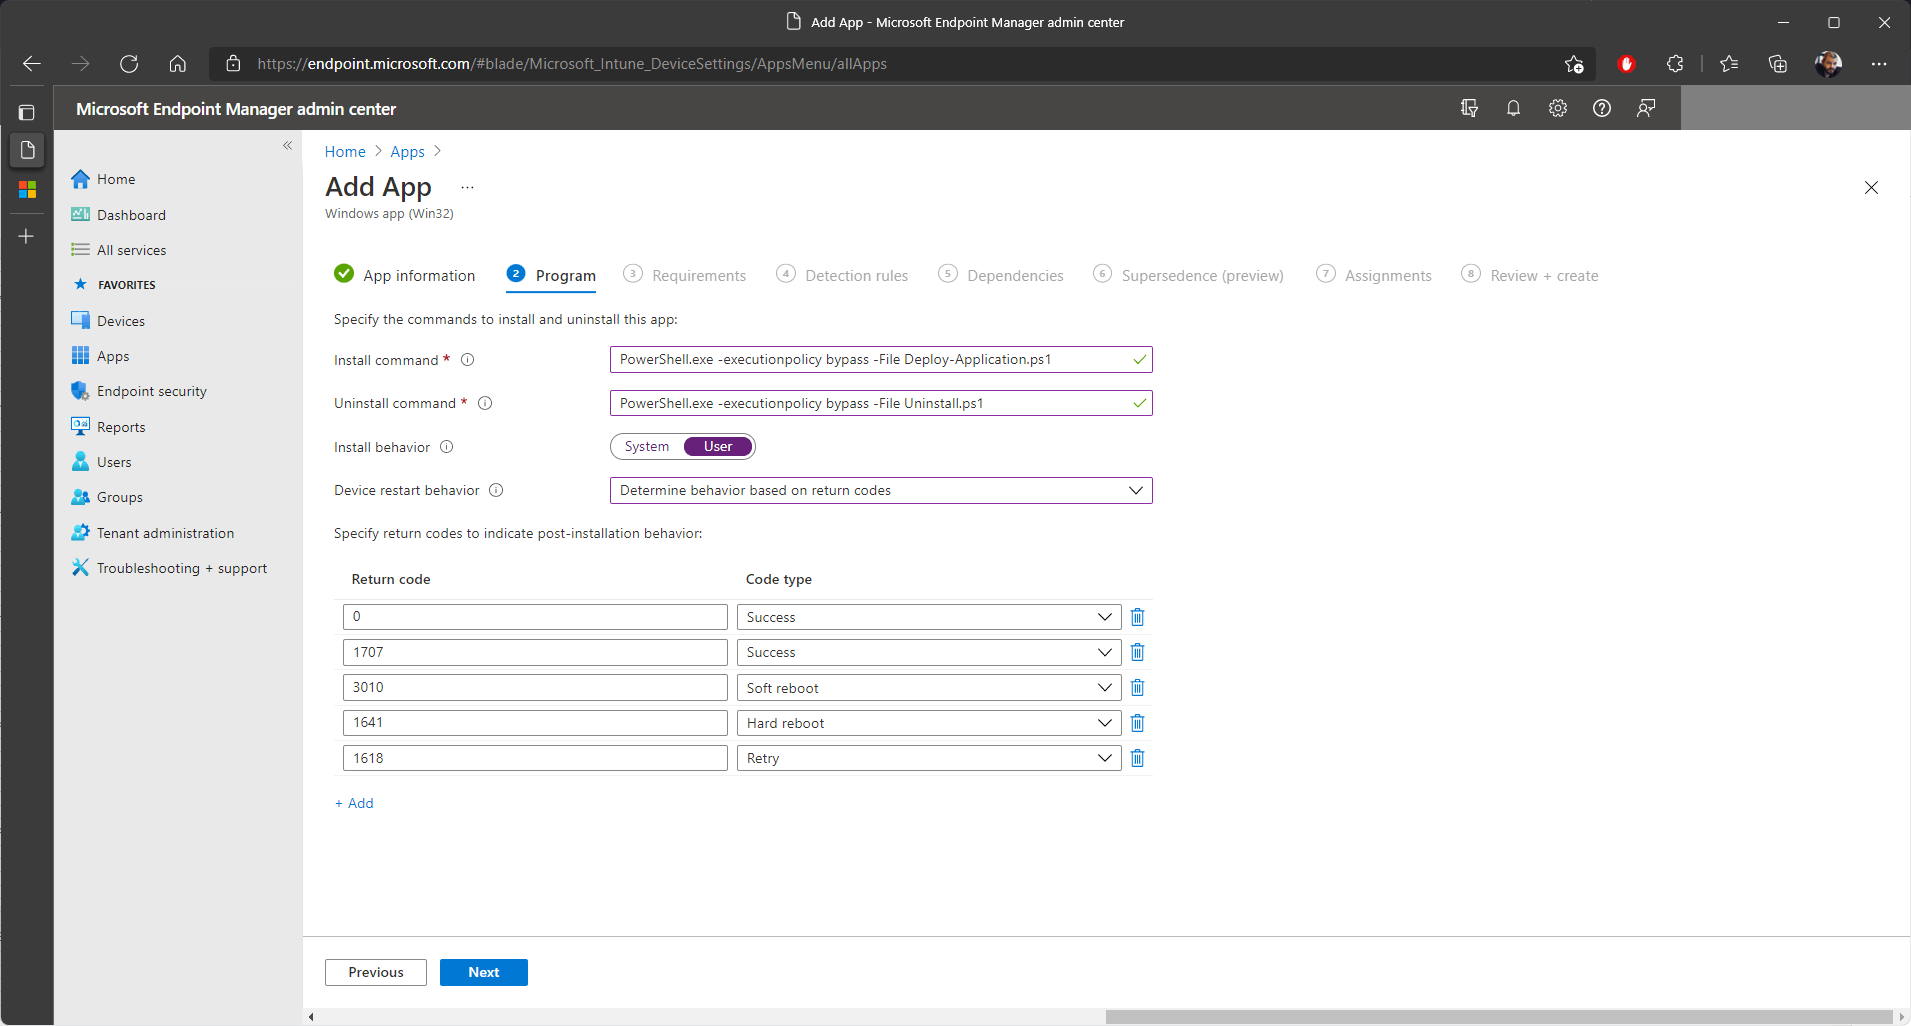
When we get to the “Program” tab, we need to perform a few steps. First, you must input the install and uninstall commands manually.
In our case, the MSIX is wrapped with a PowerShell script that handles the installation and uninstallation steps. The installation script also performed additional tasks before the installation of the MSIX package.
If you have a PowerShell script like we do in this example, the installation command line is:
PowerShell.exe -executionpolicy bypass -File SCRIPTNAME.ps1
If you have an uninstallation PowerShell script, the uninstallation command line is:
PowerShell.exe -executionpolicy bypass -File SCRIPTNAME.ps1
Next, the “Install behaviour” is something very important that must be chosen correctly. As we are aware by now, MSIX packages are designed to be installed per-user, so in this case, the “Install behaviour” will be “User”.
However, the “Install behaviour” should be defined as “System” in the following cases:
1. When the PowerShell script is performing per-machine actions (deletion of files in restricted locations such as “Program Files”, deletion of services, etc).
In this case, the install behaviour should be set to “System”, but keep in mind that if we select this behaviour, the MSIX package will not be visible for the user, meaning that the MSIX package should be installed per-machine as explained in this article.
2. When you install an MSIX package per-machine, because it requires elevated permissions.
In our case, the script only deletes some files in the %appdata% folder and installs the MSIX package per-user, so we are choosing “User” for the “Install behavior”.
The last step is to select the “Device restart behavior” which usually is set to “Determine behavior based on return codes”.
Once all the steps are configured accordingly, click “Next”.
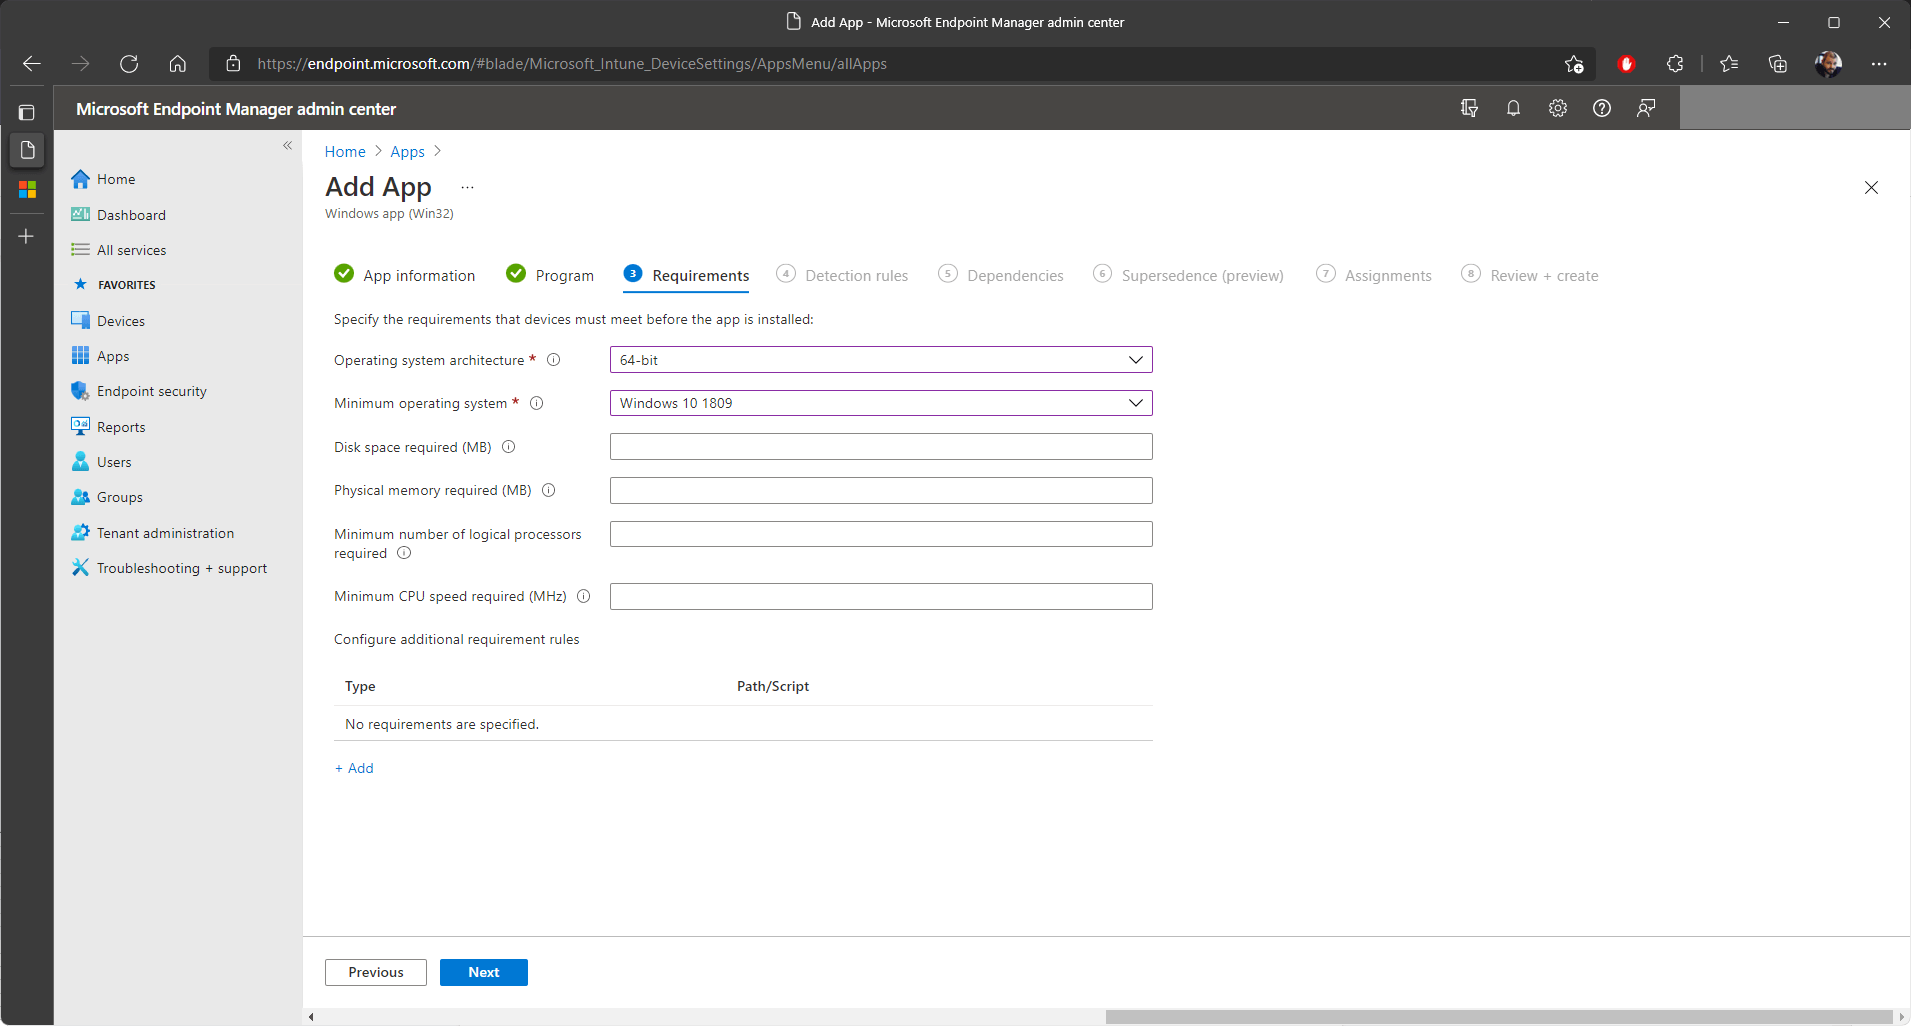
In the “Requirements” tab, select the “Operating system architecture” and “Minimum Operating System”. We went with 64-bit and “Windows 10 1809”. Additionally, include any extra requirements for your application and click on “Next”.
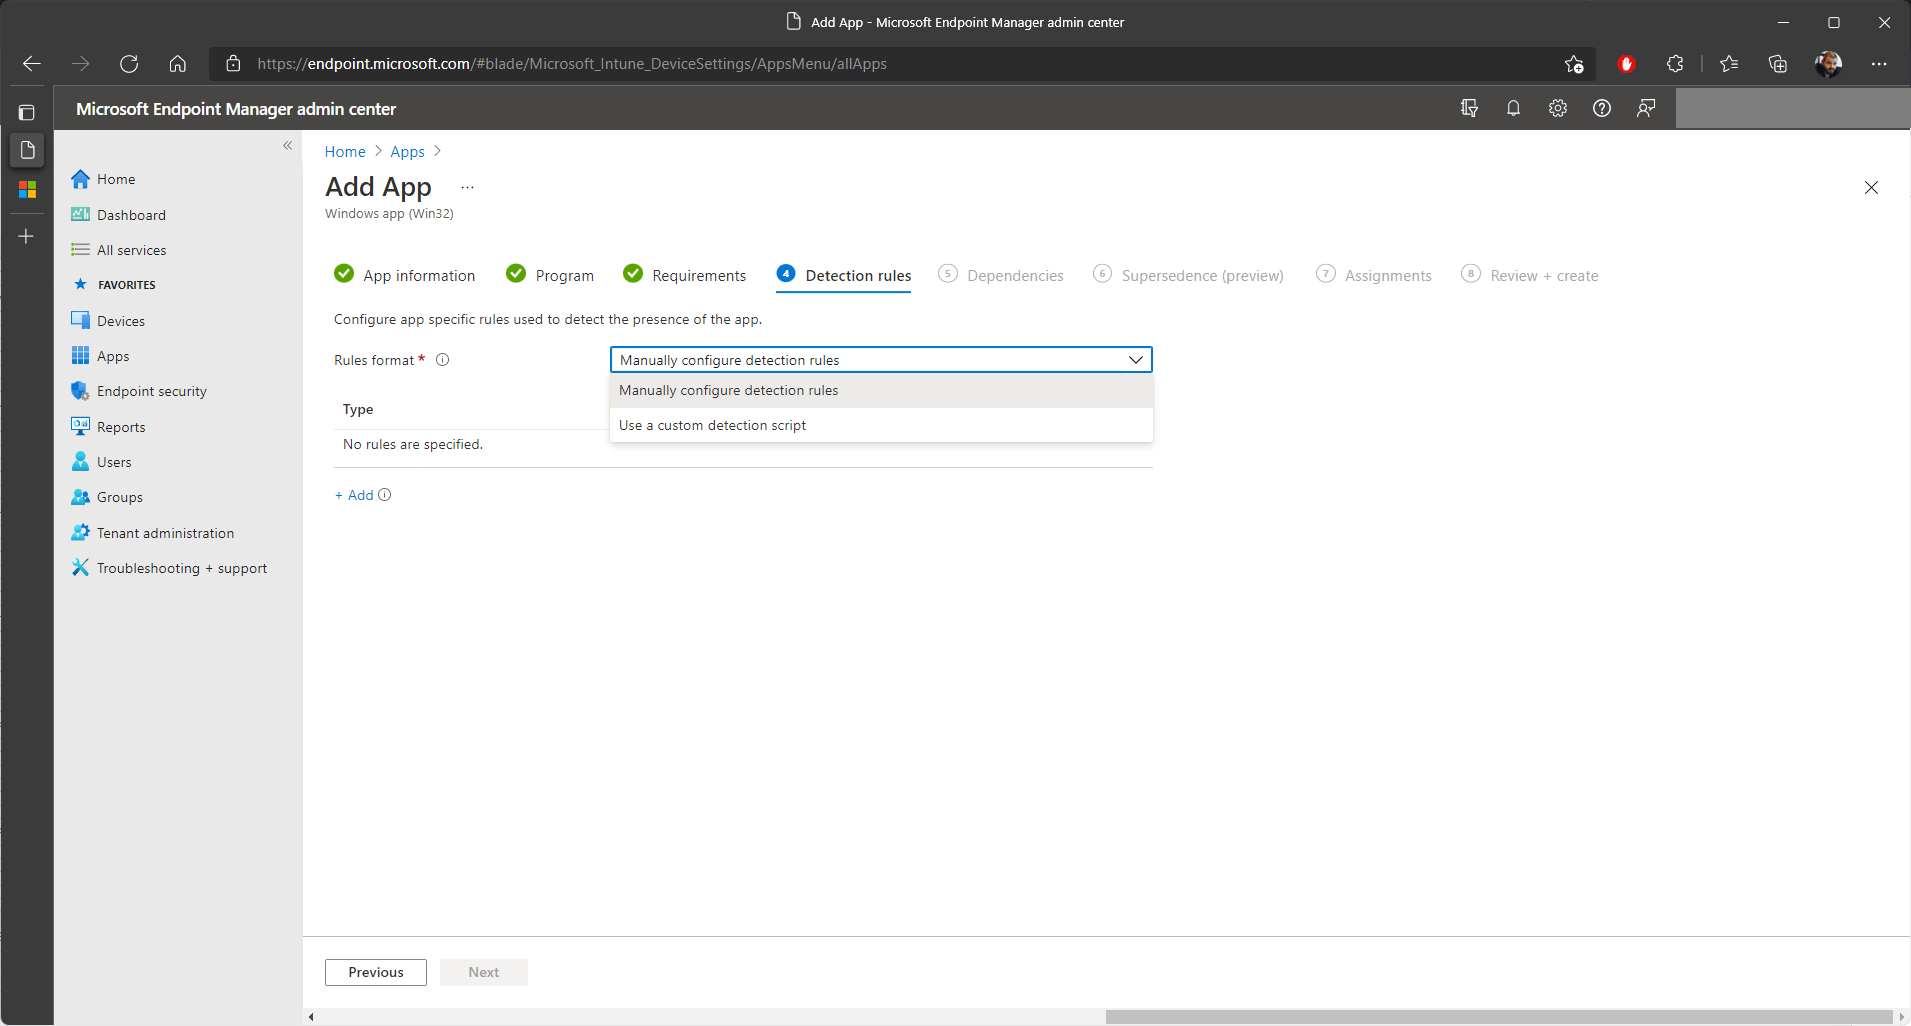
Reaching the “Detection rules” tab, it's important to further elaborate on the detection methods that we previously mentioned before jumping into the “Windows App (Win32)” deployment method.
Choosing the right detection method is quite important and we need to think about the best suited way to detect if the MSIX package was successfully installed on the machine.
Intune offers two rule formats:
- Manual detection rules: “Manually configure detection rules”
- Custom detection script: “Us a a custom detection script”
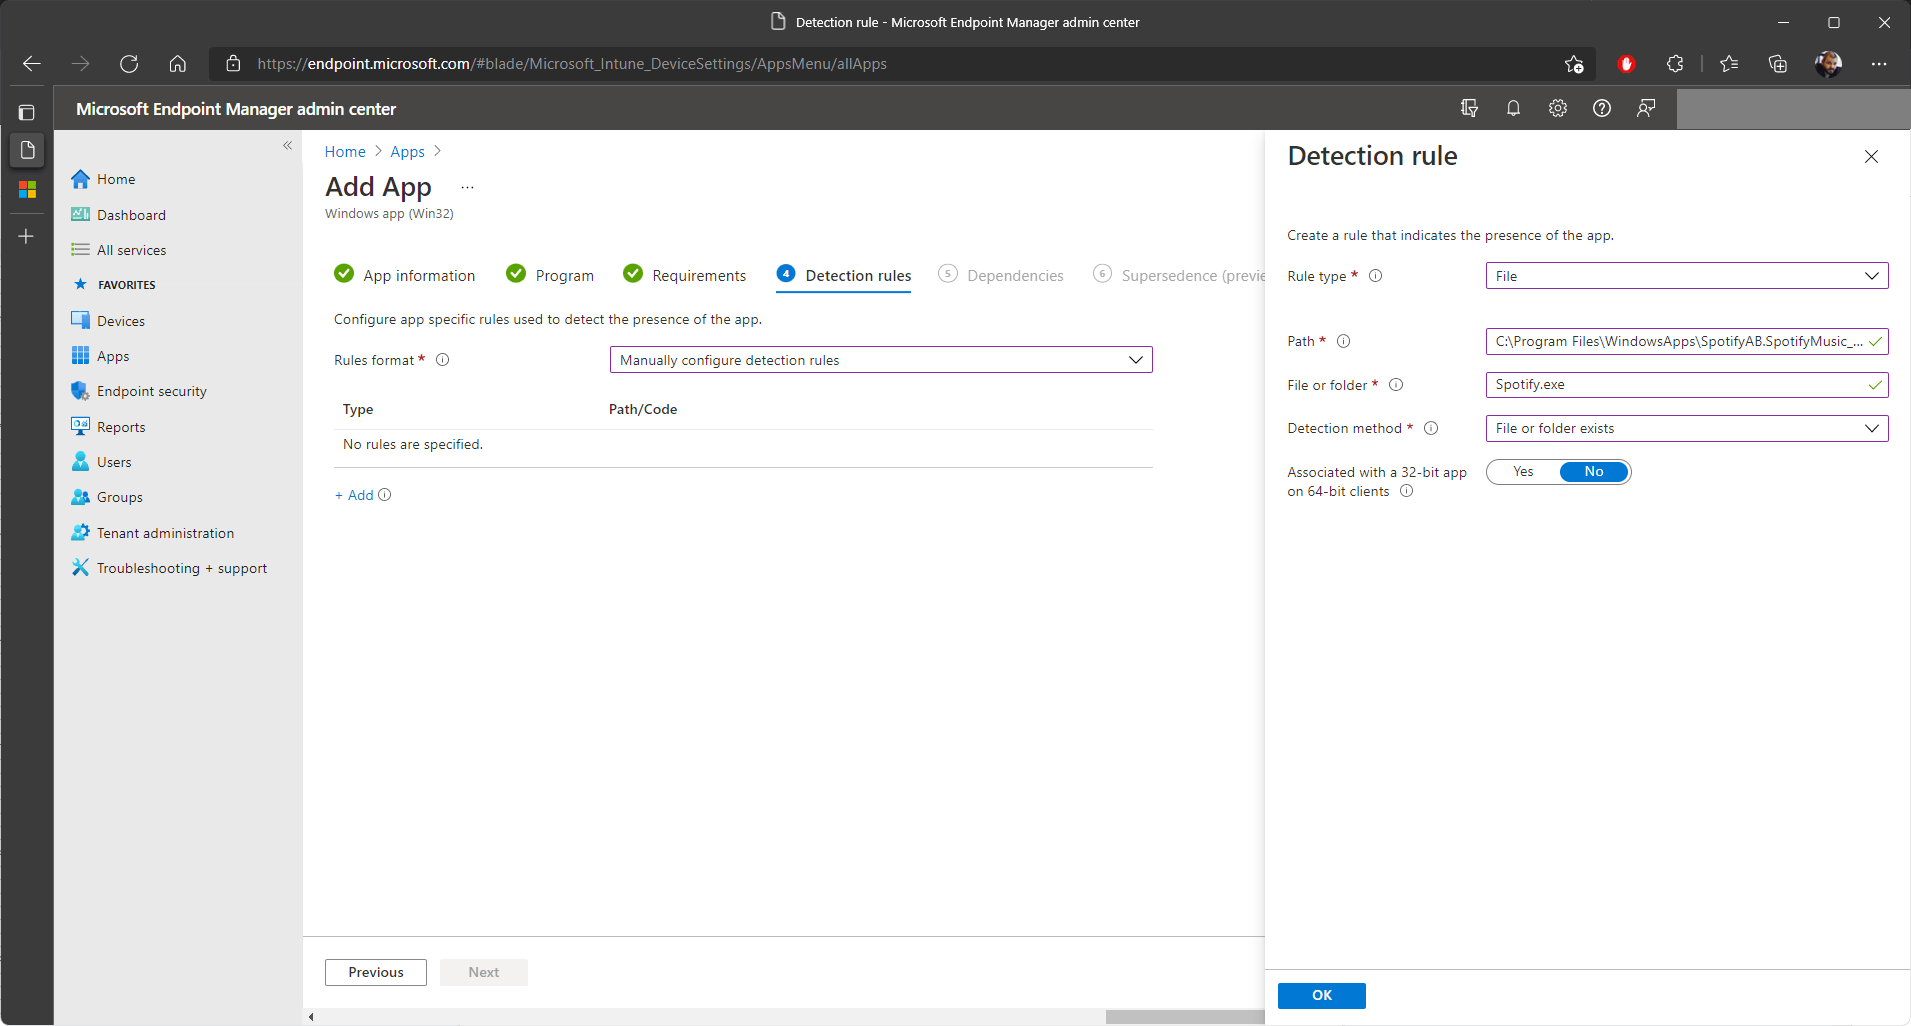
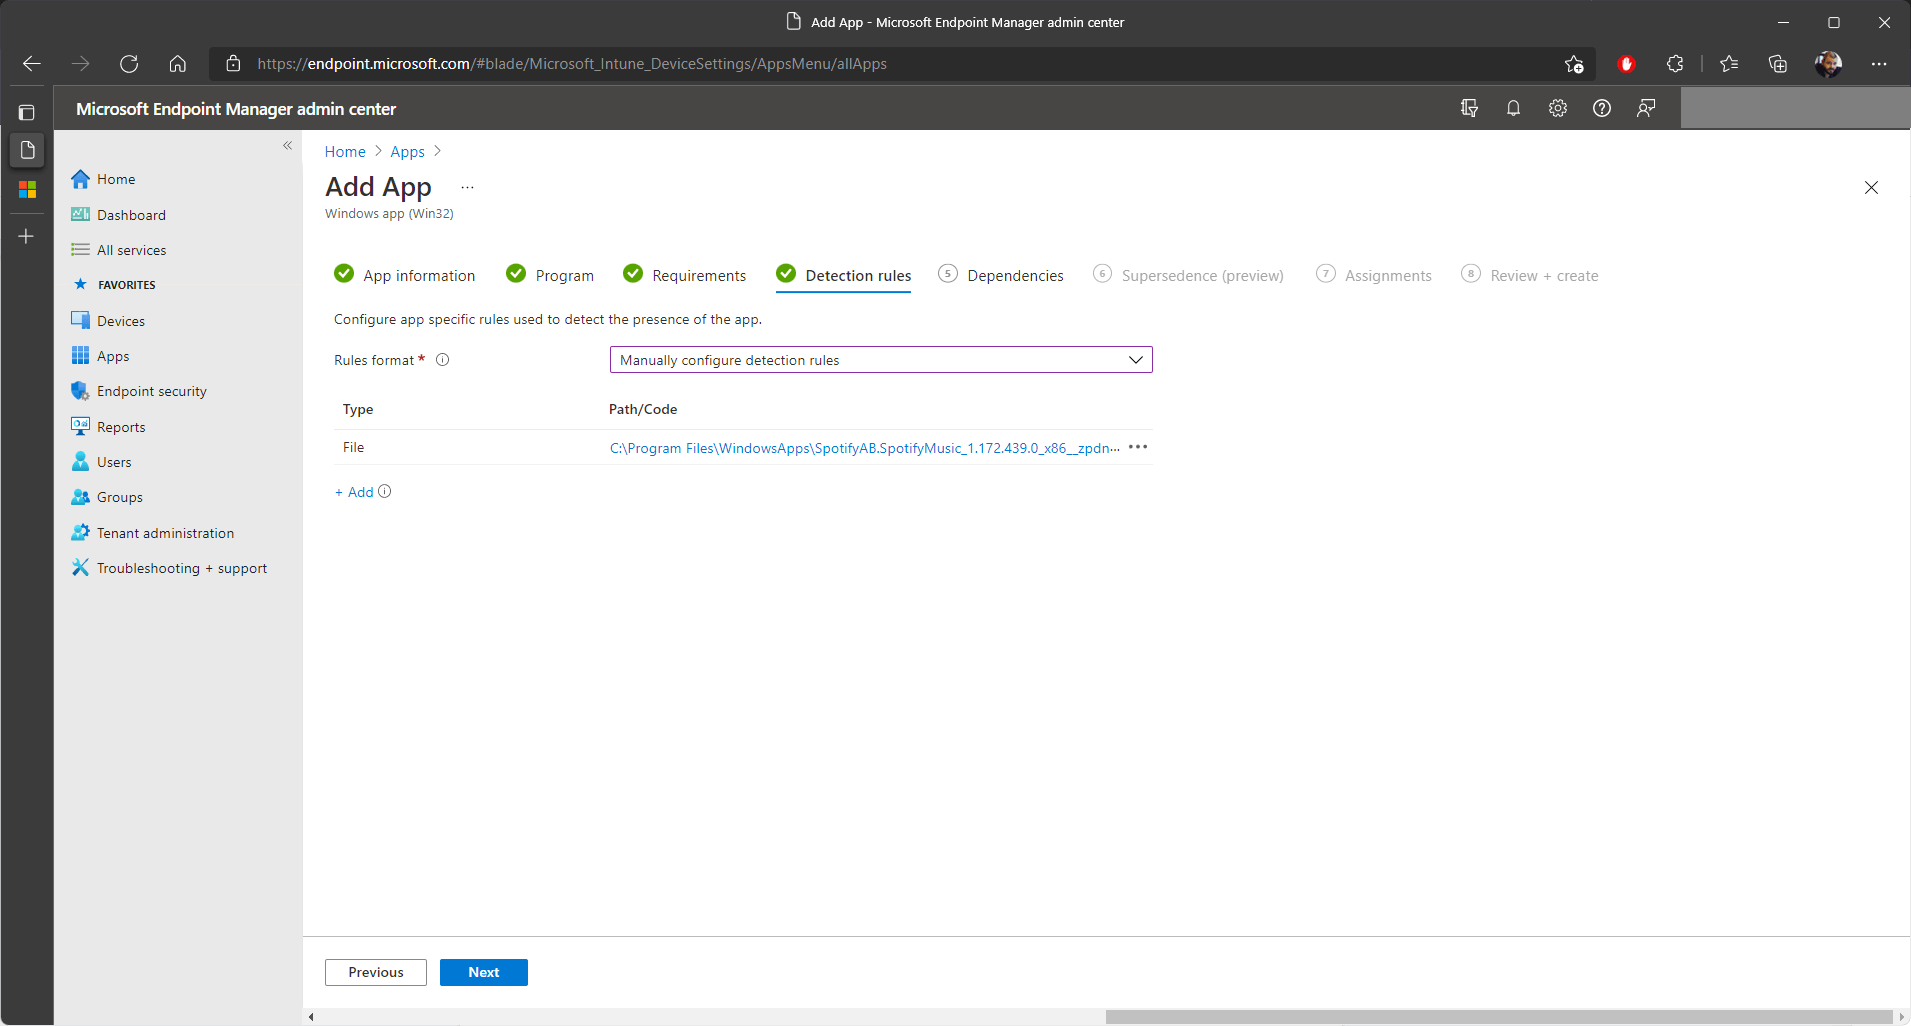
The manual detection rules offer the following three options:
- MSI
- File
- Registry
How manual detection rules work for MSI, File and Registry
Each of these options work like this:
1. MSI: We can create a custom MSI (containing only a registry or a file) that is installed per-user or per-machine (according to the installation style of the MSIX package) and install it after we install the MSIX package. The product code can then be placed as a detection method.
This detection method is heavily connected to the previously selected “Install Behavior”. If we select an “Install Behavior” for “User” but try to install an MSI per-machine, the installation will fail.
It is best to keep the detection method, “Install Behavior”, and MSIX installation type the same. For example, if we deploy an MSIX per-user, the install behavior should be “user” and the detection method in this case should be a per-user installed MSI.
2. File: This method only works if the MSIX package is installed per-machine, so that every user will have it provisioned after the installation is finished.
If this is the case, we can place a random file that during the installation.
As we are aware, MSIX places all files under %Programfiles%\WindowsApps and follows a strict rule in terms of folder naming:
%ProgramFiles%\WindowsApps\PublisherName.AppName_AppVersion_architecture_hash.
If you know a specific file that your MSIX places on the machine, the location will be the same no matter where the package is installed, and we can use it as a detection method.
For example, we can use a file like:
C:\ProgramFiles\WindowsApps\SpotifyAB.SpotifyMusic_1.172.439.0_x86__zpdnekdrzrea0\Spotify.exe.
To access the VFS of an MSIX package, you can use the free tool Hover from Advanced Installer.
3. Registry: As in the case of the MSI detection method, we can place a registry according to the MSIX installation type (per-user/per-machine). If we install the MSIX per-user, we can place a HKCU registry key. If we install the MSIX per-machine, we can place a HKLM key.
This detection method is linked to the previously selected “Install Behavior”. The installation will fail if we choose “Install Behavior” for “User” yet try to create a HKLM key.
It's recommended to stick with the same detection method, “Installation Behavior”, and MSIX installation type. If we deploy an MSIX per-user, for example, the “Installation Behavior” should be “user” and the detection technique should be a per-user registry entry (HKCU).
As you can see, selecting a manual detection rule is not simple and it depends on your specific scenario.
The best advice I would give is to set everything to “System” and do everything per-machine if you have any operations that modify the system, or to set everything to “User” and do everything per-user if you don’t have operations that modify the system.
The custom detection script is probably the most advanced rule format because it enables IT Pros to create detection rules that can check almost anything that can be scripted, as long as the output is correct.
The custom detection script also lets you choose how to run the script (32 or 64 bit context).
The rules of detection scripts are:
Exit Code | Data read from STDOUT | Detection State |
|---|---|---|
0 | Empty | Not Detected |
0 | Not Empty | Detected |
Not 0 | Empty | Not Detected |
Not 0 | Not Empty | Not Detected |
Here, what we care about is for Intune to run the script successfully to detect any output of the script – the script's output is not all that important. For example, let’s run this script and see what it returns.
$exists = Get-AppPackage -name “Caphyon.SampleMSIXPackage”
If ($exists){
Write-host “Hey look, it’s installed”
}What we did here is run the Get-AppPackage cmdlet to check if the MSIX package is installed, and if it returns the string: “Hey look, it’s installed”, it means that Intune interpreted the MSIX installation as successful.
This output can also be found in the IntuneManagementExtension log.
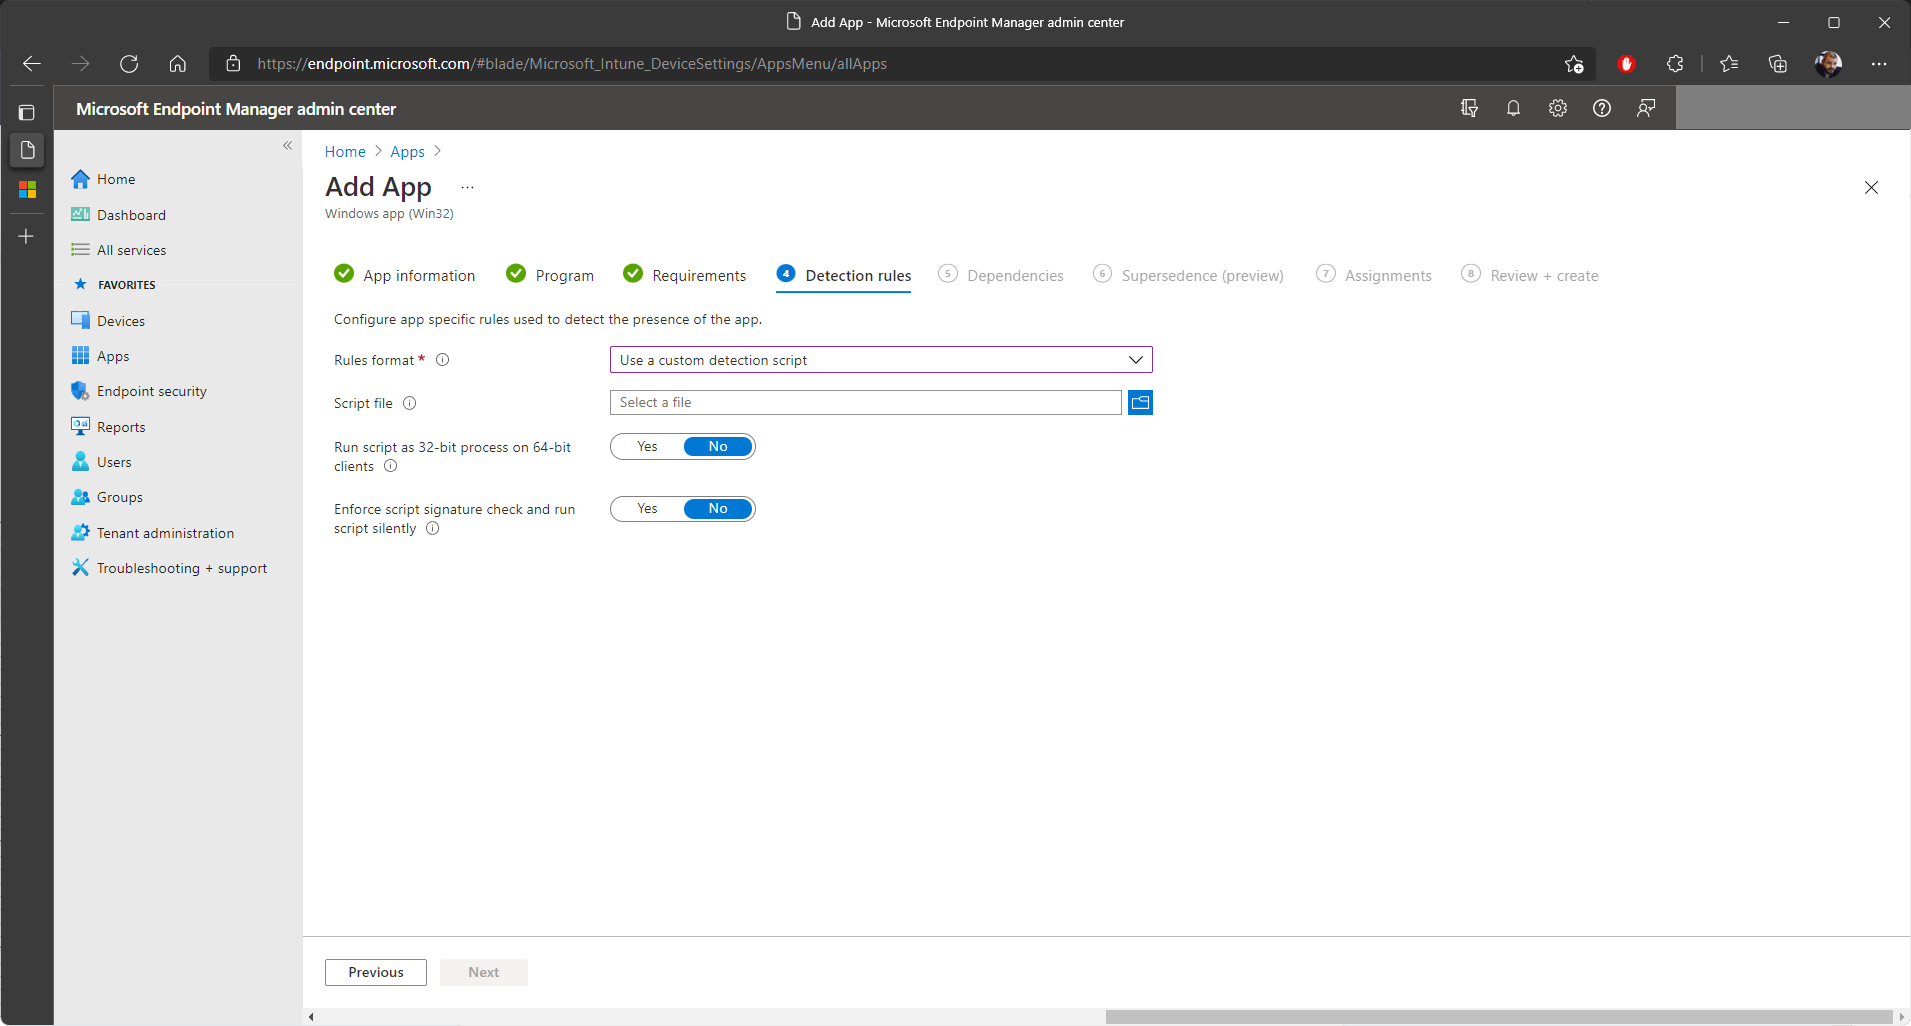
While the detection method seems like something trivial, it is something that must be carefully thought out in the initial stages of the package creation process.
Once you select the detection method, click “Next”.
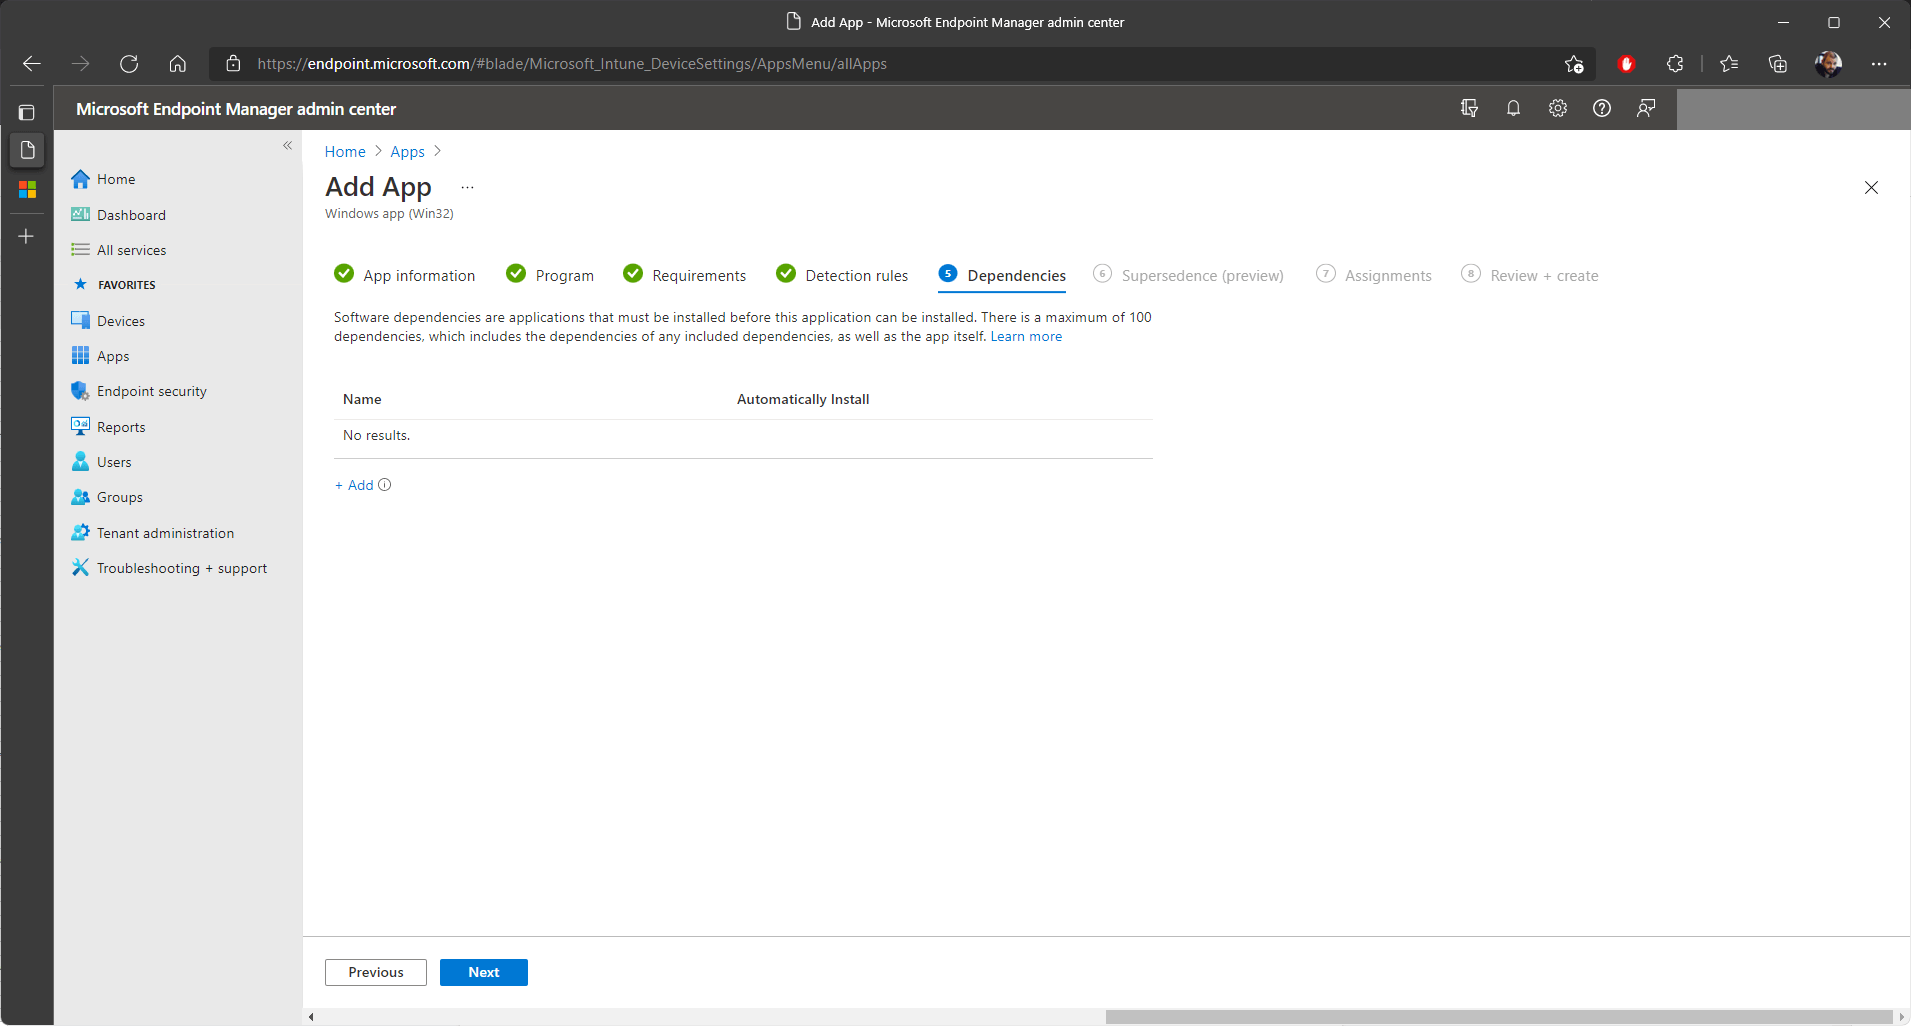
In the “Dependencies” tab, unlike the LOB apps deployment method, Intune does not automatically detect if the MSIX package needs any dependencies, so we need to add them manually before.
If no dependencies are needed click “Next”.
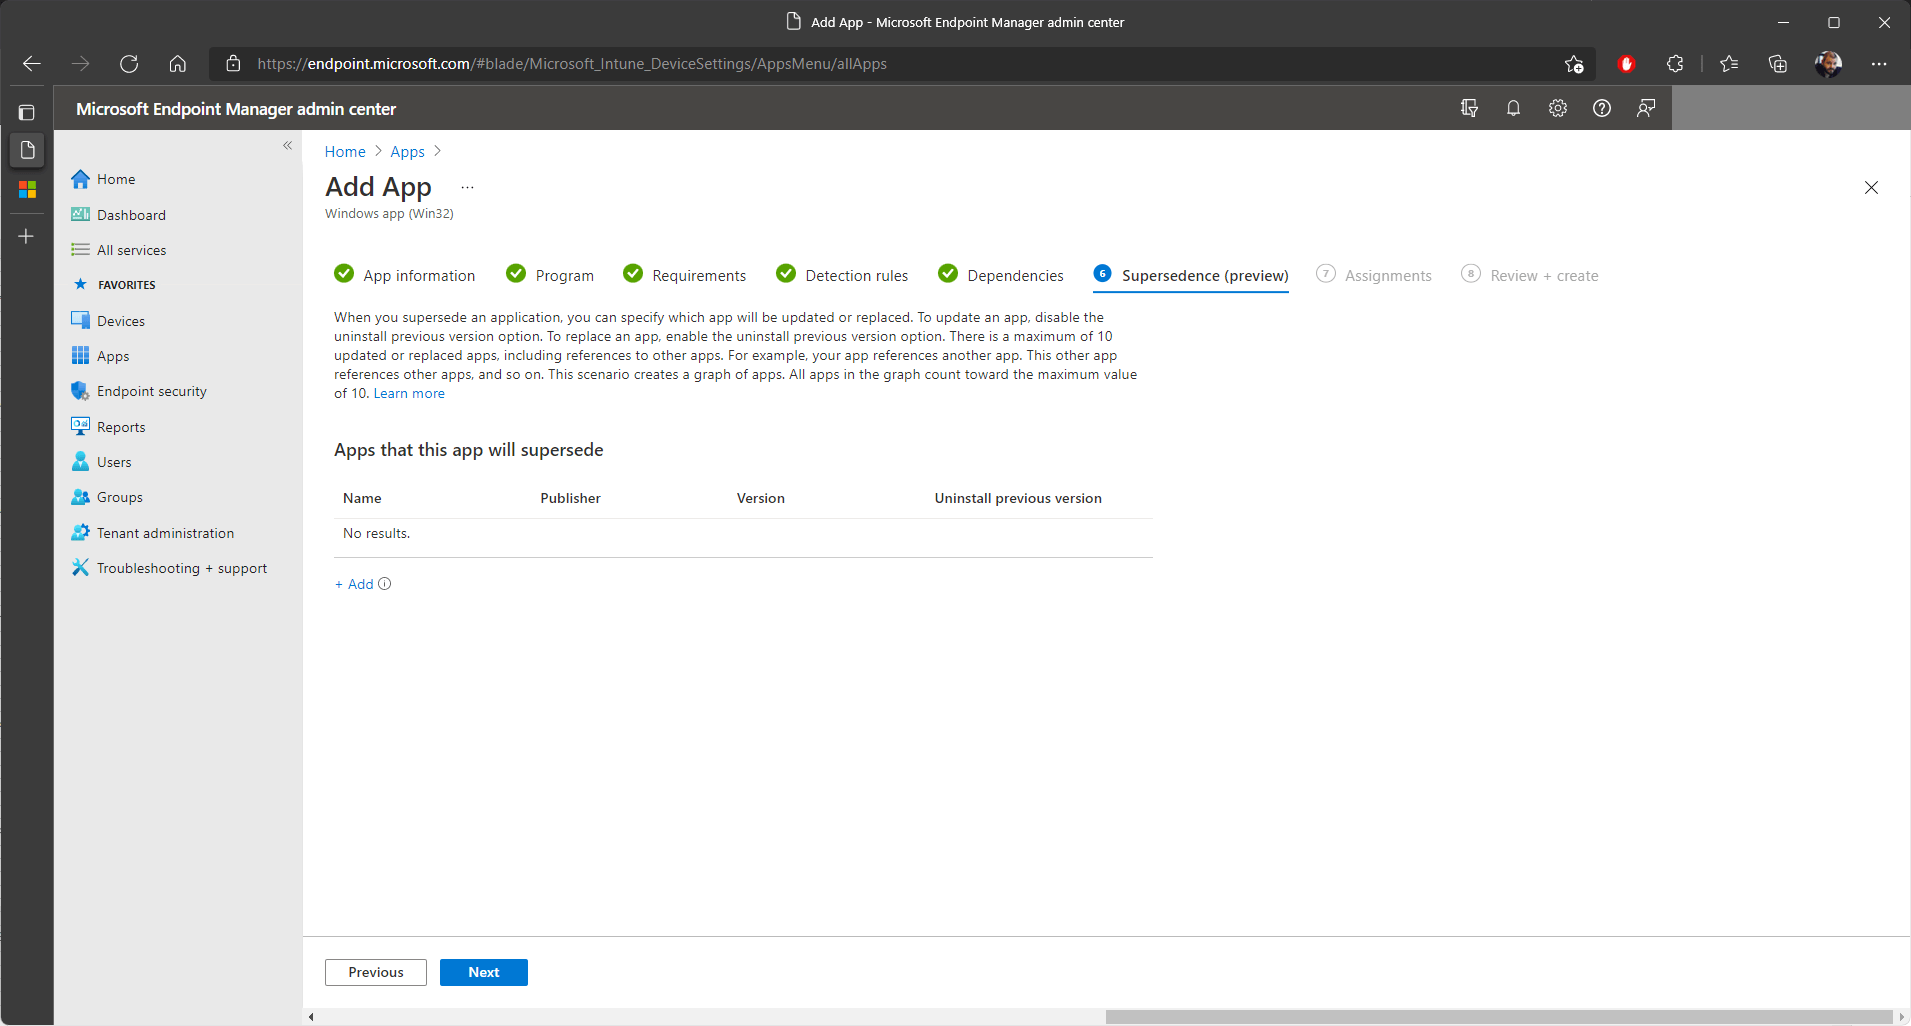
If you have an app that you want to supersede, add it in the “Supersedence” tab.
Click “Next”.
In the “Assignments” tab, assign the app as you wish (required, available, or for uninstallation).
Once configured, select “Next”.
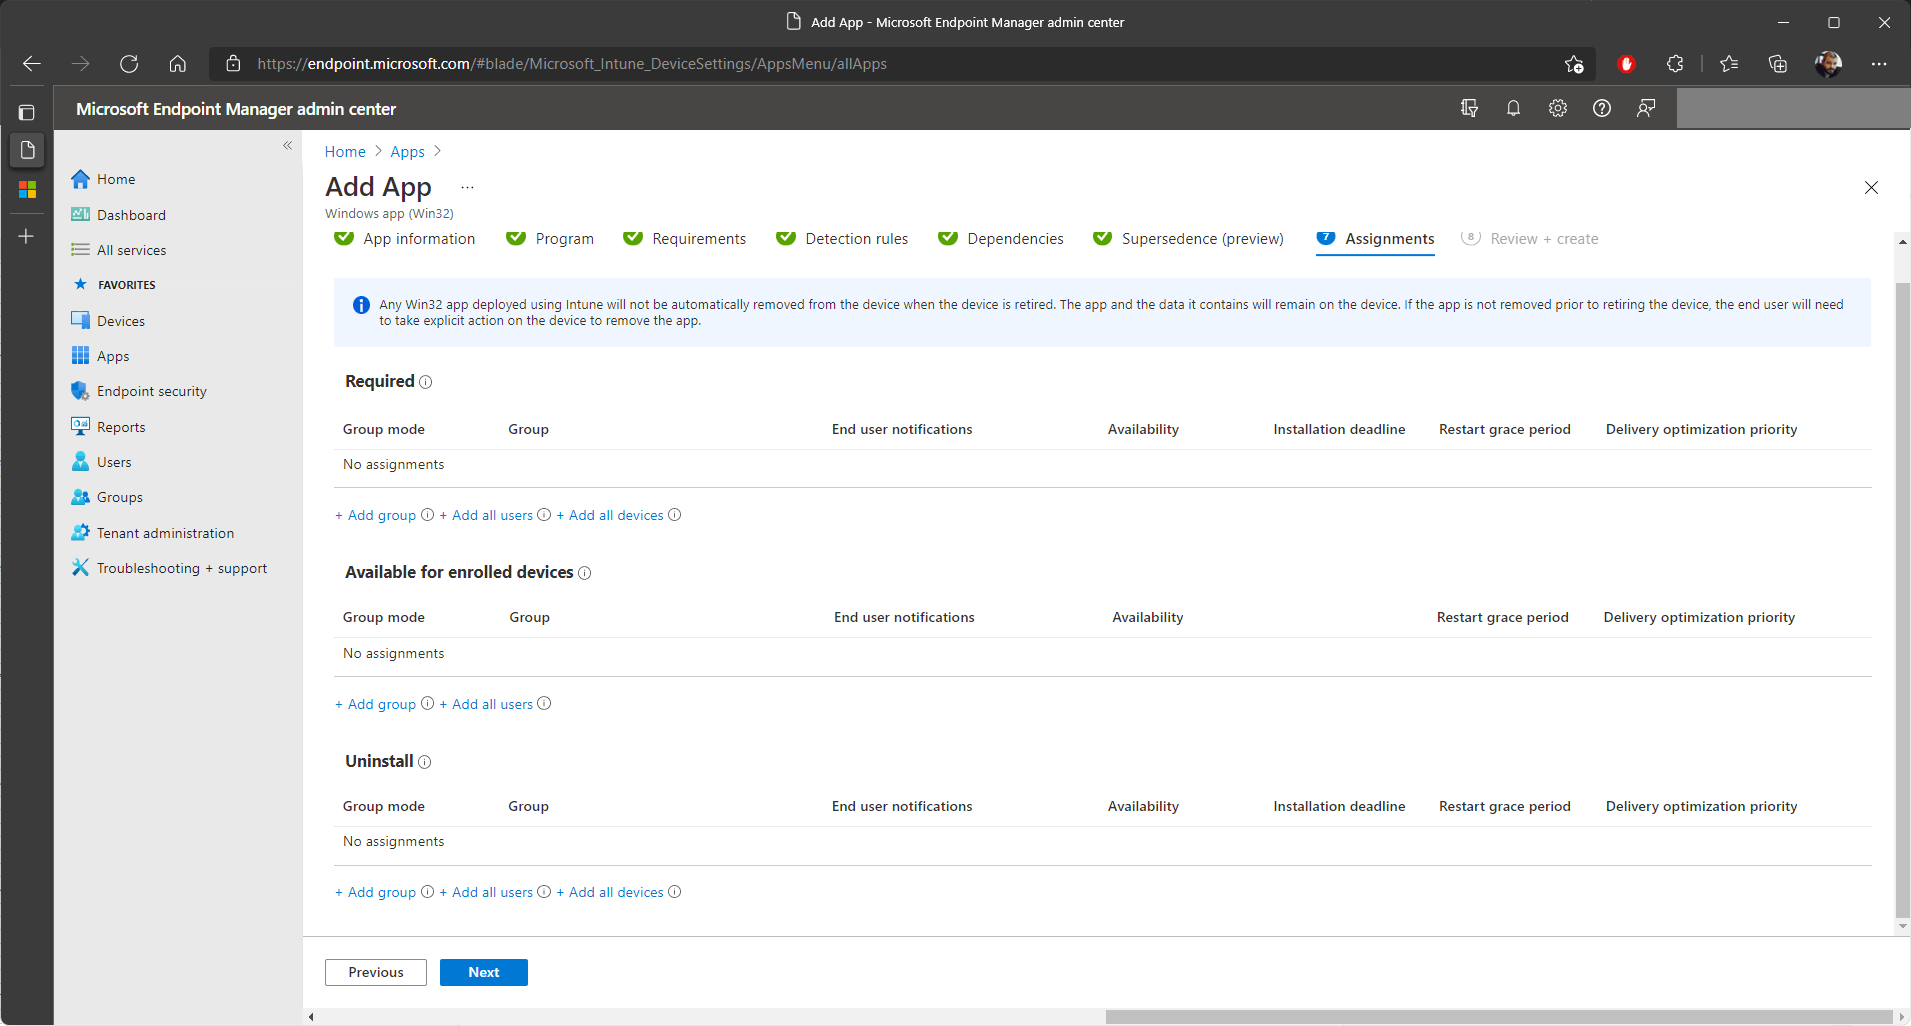
When we get to the “Review + Create” tab, it means that you successfully passed all steps and configured the application. Take a last peek at everything and once everything seems ok, click “Create”.
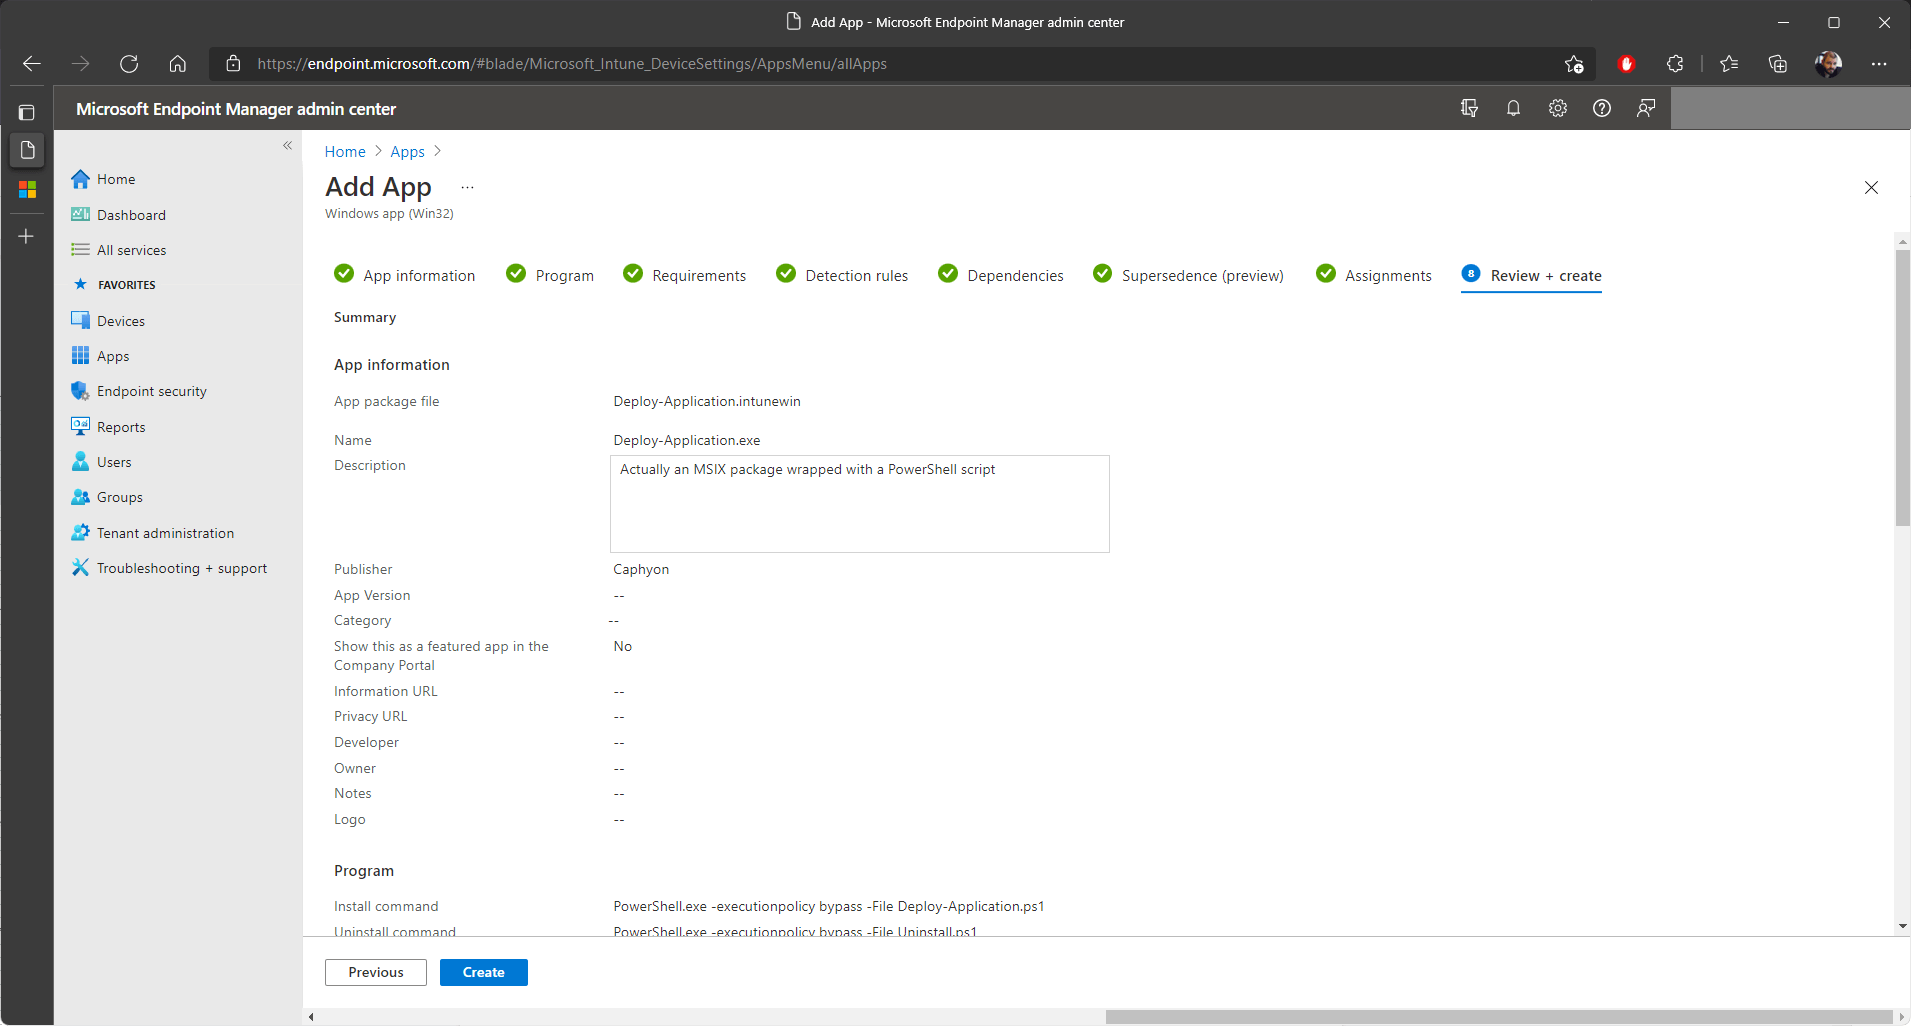
And that is it, you have successfully created an “Windows App (Win32)” deployment type for your MSIX Package.
Conclusion
Intune offers multiple solutions when it comes to MSIX integration into the infrastructure, from the most basic usage of Microsoft Store Apps, to the more difficult Windows App (Win32) deployment type.
We are curious, have you started implementing MSIX/APPX packages into your infrastructure with Intune? What is your preferred deployment method?
Subscribe to Our Newsletter
Sign up for free and be the first to receive the latest news, videos, exclusive How-Tos, and guides from Advanced Installer.