Custom Actions in Wise Installer vs Advanced Installer
Wise Installer was one of the most popular software tool used for creating application installers. It’s discontinued from 2013, but until then not many changes were added to it since the original launch. However, it’s still used to this day by many users in the world. Custom action offer the possibility to extend the logic of the installer by adding scripts, executables, dll’s and many more, so let’s have a look on how custom actions are added in Wise vs Advanced Installer.
The Wise Way
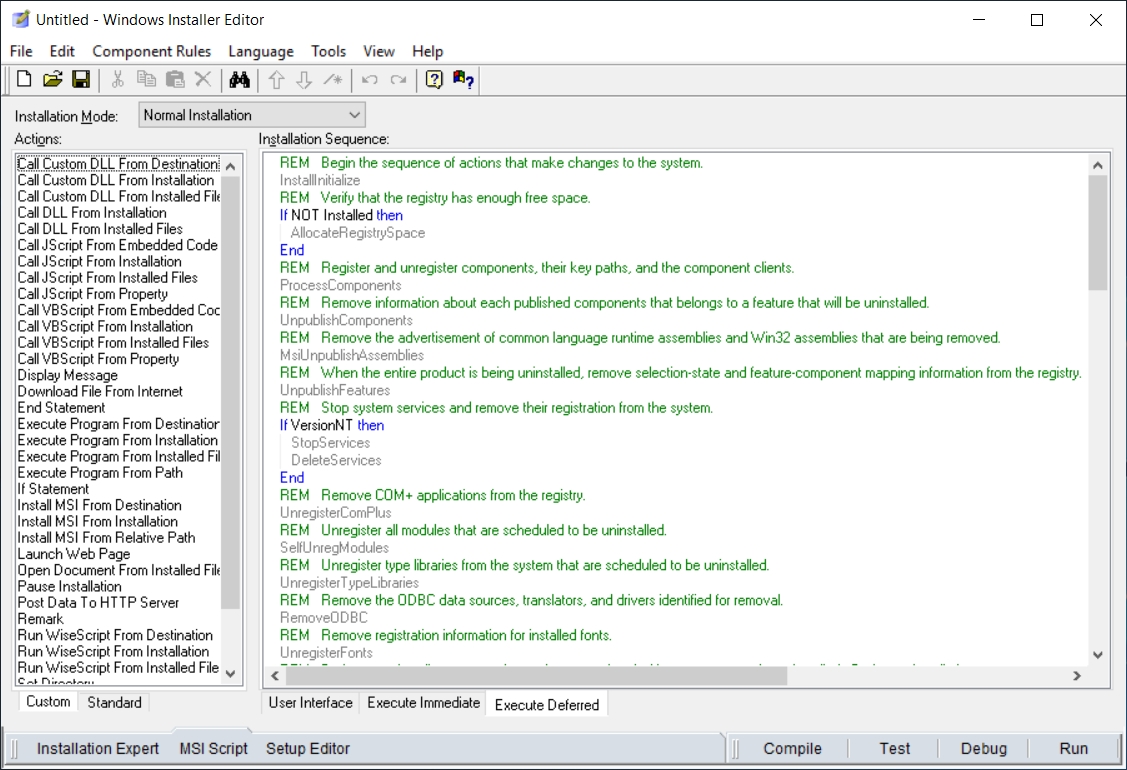
In order to add Custom Actions to any MSI using Wise installer, once the project is open, navigate to MSI Script located in the bottom left.

As we can see, in the left pane you have all the actions that you can add into the project. In the right pane you have the Installation Sequence where you place the actions
There are three types of executions in a package: User interface, Execute Immediate and Execute Deferred.
For more in-depth knowledge about sequences you can check our article here.
Let’s say we want to Call a VBScript from Installation that it has a Deferred execution, run only at uninstall, and before the InstallFinalize:
- Click the Execute Deferred tab
- Scroll to the bottom
- Click on a space before InstallFinalize
- From the left pane double-click If Statement
- In the pop-up type REMOVE~="ALL". This sets the custom action to run at uninstall
- Click below the new added If Statement
- From the left pane double-click Call VBScript from Installation
- In the Call VBScript from Installation window type a name for the custom action
- Browse and select your vbscript file
- In the Properties tab -> In-Script Options select Deferred Execution - System Context
- Click OK
And this is how you add a custom action in Wise. You can add any type of custom action you desire with the method described above.
The Advanced Installer Way
Let’s take the same situation as above and try to add VBScript custom action with Advanced Installer.
In order to achieve this you must:
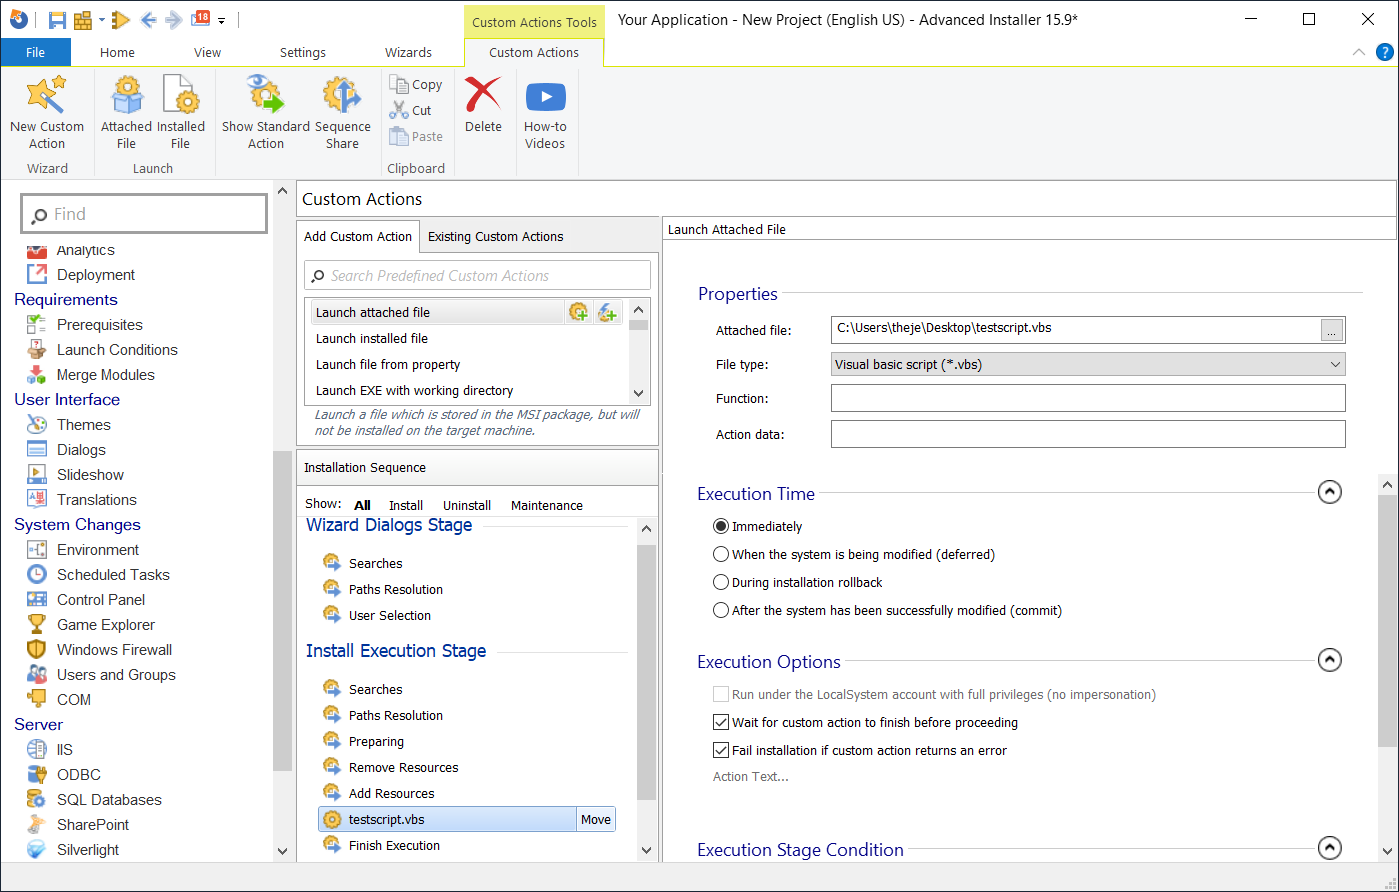
- Navigate to Custom Actions
- Add a Custom Action - Launch attached file
- Browse to your VBScript
- Click When the system is being modified (deferred)
- Check Run under the LocalSystem account with full privileges
- In the Execution Stage Condition check only Uninstall
- Move the Custom Action before Finish Execution

That’s it, with a few clicks in Advanced Installer you can add your Custom Actions easily.
Subscribe to Our Newsletter
Sign up for free and be the first to receive the latest news, videos, exclusive How-Tos, and guides from Advanced Installer.