How to create a Setup.exe file in Visual Studio
Visual Studio is a powerful development tool that provides an environment for creating a wide range of applications. One of its notable features is the ability to create Setup.exe files, which greatly simplifies the deployment process for end-users.
In this article, we will guide you through a step-by-step tutorial on how to create a Setup.exe file for a Windows Forms application using Visual Studio. Additionally, we will explore a different approach using Advanced Installer, an alternative tool for software packaging and installation.
Add Microsoft Visual Studio Installer Projects extension
To get started with this tutorial, you will need the Microsoft Visual Studio Installer Projects extension. This extension allows us to create the Setup.exe for our application.
To install the extension, follow these steps:
1. In Visual Studio navigate to Extensions → Manage extensions.
2. In the Online section, search for the extension and download it.

3. The extension will be installed after you close the Visual Studio IDE. Once the installation is complete, you can reopen Visual Studio and continue with the tutorial.
Add the setup project to your application
Now that you have successfully installed the extension and assuming that you’ve created the Windows Forms application, we can proceed to add the Setup Project:
1. Right-click on the project solution → Add → New Project.
2. From the templates list, choose Setup Project.
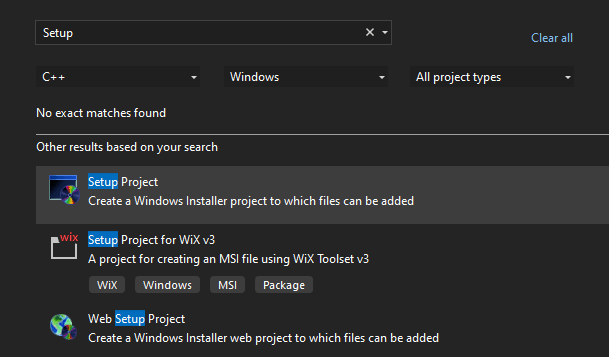
3. Provide a name for the project and then create it. Then, you should see it in the Solution Explorer.
Add the project output
Once the Setup Project is created, the next step is to include the necessary files and dependencies of your application within the project. To do this, follow the steps below:
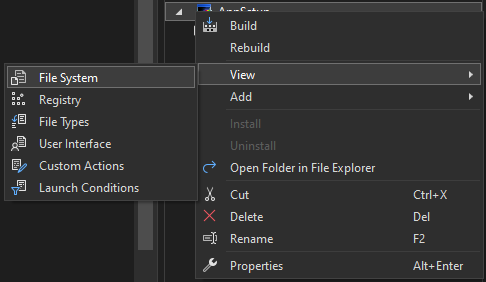
1. Right-click on the Setup Project, and navigate to View → File System.
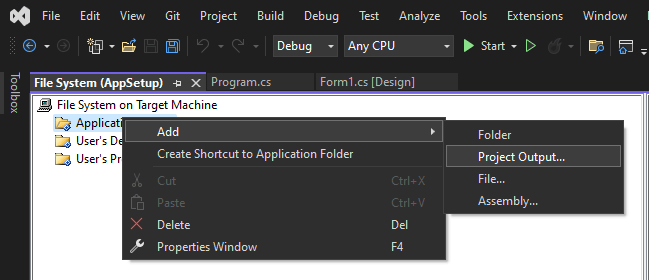
2. Right-click on the Application Folder, and select Add → Project Output.
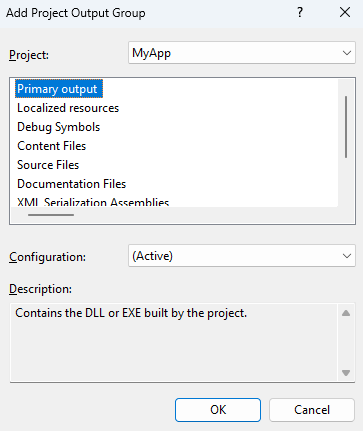
3. In the opened dialog, choose the Primary output option.
Edit the product details
To customize the settings and information associated with your software, edit the product details of your application package. To do this, select the Setup Project and navigate to the Properties view. Here, you will find various fields that you can modify according to your scenario.
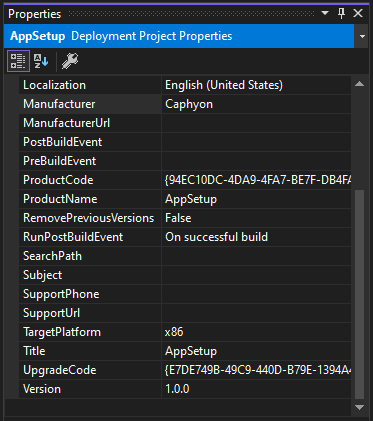
Create shortcuts for the application
Application shortcuts offer numerous benefits, including easy access and improved usability. By providing shortcuts, users can quickly access your application, enhancing their overall experience. Moreover, shortcuts present a branding opportunity by increasing the recognition of your application.
Here is how you can create a desktop shortcut:
1. Right-click on the setup project → View → File System.
2. Navigate to the Application Folder in the left view.
3. In the right view, right-click on the Primary output from MyApp → Create Shortcut to Primary output from MyApp.

4. Set a name for the shortcut and then add it in the User’s Desktop folder from the left view. By doing this, you can guarantee that the shortcut will be placed directly on the user's desktop once the application installation process is complete.
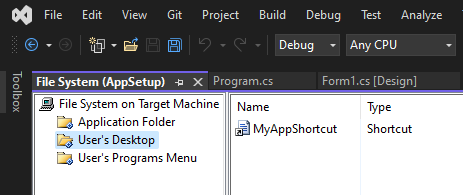
To create a shortcut for the Program Menu, follow the above steps, but instead of placing the shortcut in the User’s Desktop folder, make sure to place it in the Program Menu folder.
Customize a shortcut with an icon
If you want to customize a shortcut with an icon, the first step is to import the icon to the Application Folder:
1. Right-click on the Application Folder → Add → New file.
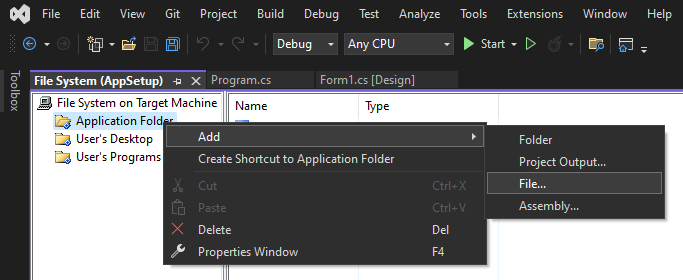
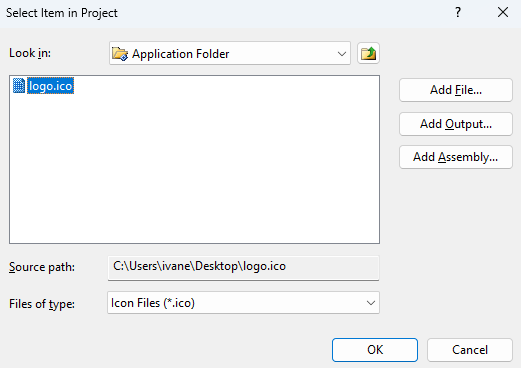
2. In the opened dialog, browse for the icon you want to be displayed for the shortcut.
3. Once the icon is added, select the shortcut for which you want to add the icon.
4. Go to the Properties view → Icon field.

5. Browse to the Application Folder and select the icon.
Add launch conditions
Launch conditions are used to verify the compatibility of an application with a target system, determining whether it can be successfully installed. By defining proper launch conditions, you ensure your application will run effectively and smoothly.
To add launch conditions to your installation package, follow these steps:
1. Right-click on the setup project → View → Launch Conditions.
2. Right-click on the Launch Conditions folder → Add Launch Condition.
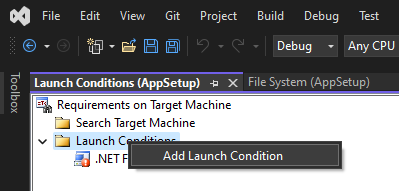
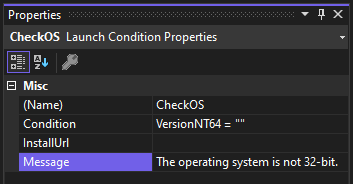
3. Once the condition is created, navigate to the Properties view and specify the condition.
For example, we want to install the package exclusively on 32-bit (x86) machines, so we can use the following condition: VersionNT64 = "". This condition checks if the VersionNT64 property is undefined, which indicates that the target machine is not a 64-bit operating system. Additionally, we have the option to include a message to be displayed if the condition is not fulfilled.
Install Prerequisites
Prerequisites play a significant role in installation packages as they ensure that a target machine has all the necessary resources for software to run properly. To add Prerequisites, follow the next steps:
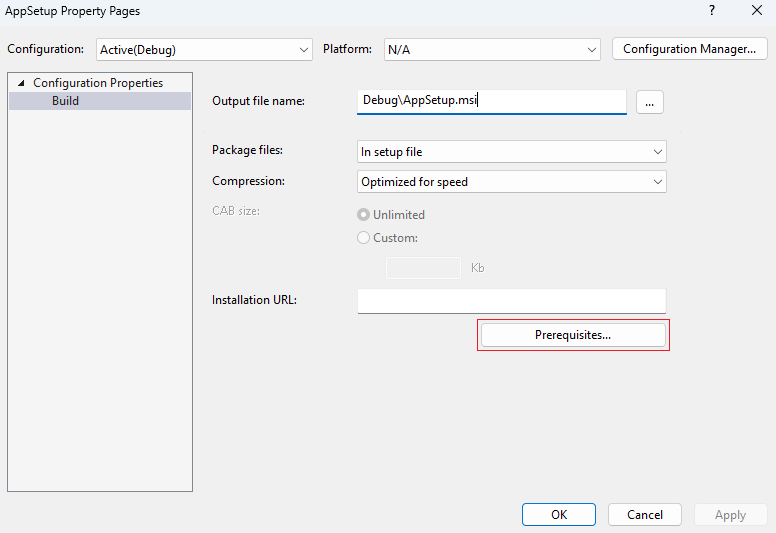
1. Right-click on the setup project and select Properties.
2. Click on the Prerequisites button in the opened dialog.
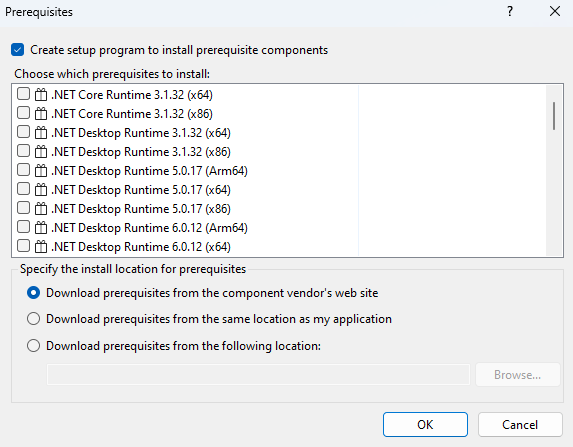
3. In the Prerequisite dialog, you can check the prerequisite you want to install and specify the install location for each of them.
Add Registry keys
Including registry keys to an installation package is important for proper functioning of the application. This ensures the application will operate according to its specifications.
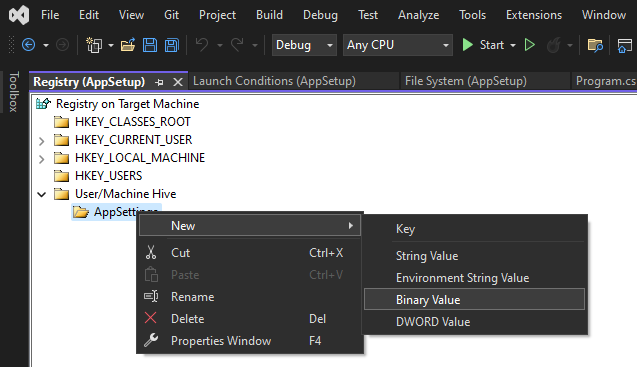
- To add a registry key, begin by navigating to go to the Registry view: right-click on the setup project → View → Registry.
- To create a new key, right-click on a desired hive, select New Key and set a name for the key.

- To add a key value, right-click on the created key and choose the value type. Then, proceed to the properties view to configure the key accordingly.
Install the application
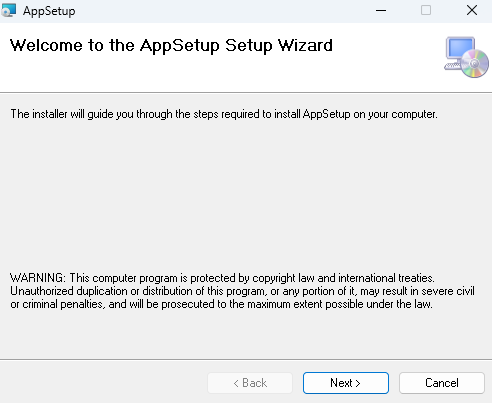
Once you have configured the setup project according to your requirements, you need build it to generate the Setup.exe. So, navigate to the Debug or Release folder within the Setup Project (based on your selected mode) and run the package to install the application.
How to use the Advanced Installer extension for Visual Studio to create a Setup.exe
If you are looking for a more efficient solution for creating installation packages, you can try the Advanced Installer extension. The extension is available on the Visual Studio Marketplace and to install it just follow the next steps:
1. In Visual Studio navigate to Extensions → Manage extensions.
2. In the Online section, search for the Advanced Installer for Visual Studio extension and download it.
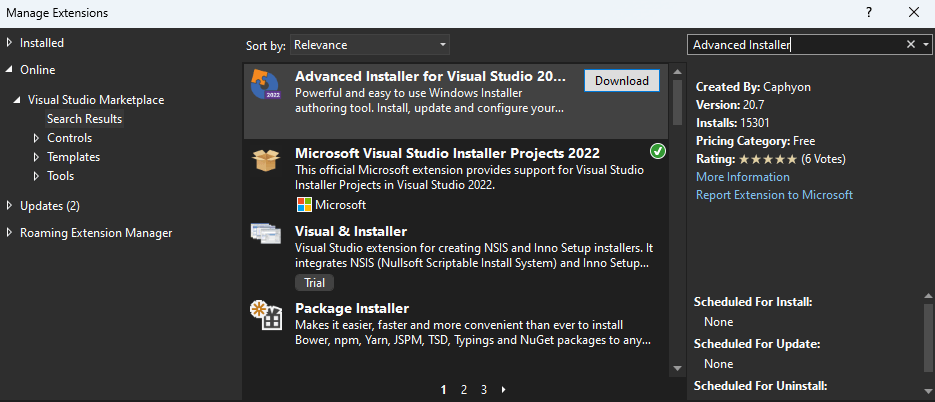
3. The extension will be installed after you close the Visual Studio IDE. Therefore, close it, and once the installation is complete, reopen it.
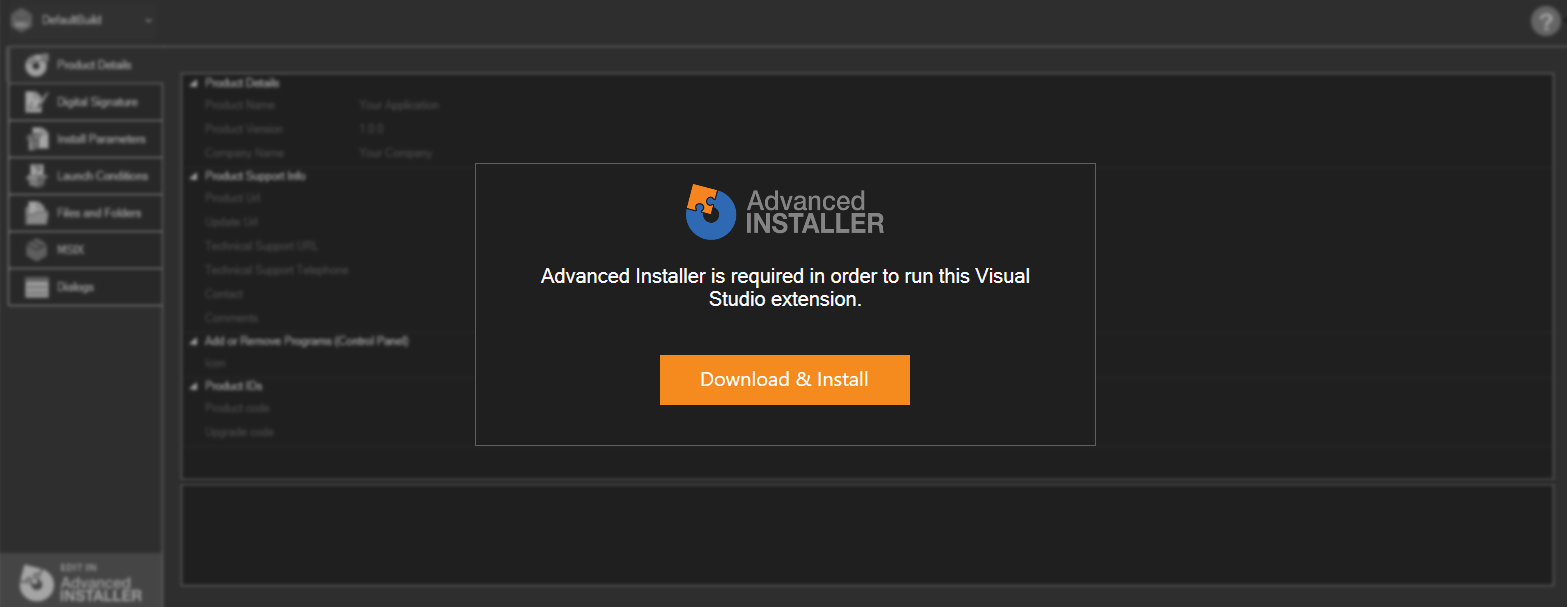
When creating the installer project in Visual Studio, you need both the extension and Advanced Installer installed on your machine. If you create the installer project and Advanced Installer is not already installed, no need to worry. Simply go ahead and create the project, and once it is created, the extension can download and install Advanced Installer.
Assuming you’ve already created a Windows Forms application, let’s see how to create the installer project by using the Advanced Installer Visual Studio extension.
1. Right-click on the project solution → Add → New Project.
2. From the templates list, choose Advanced Installer Project.
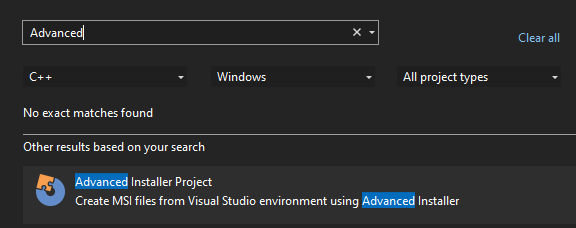
3. Provide a name for the project and then create it.
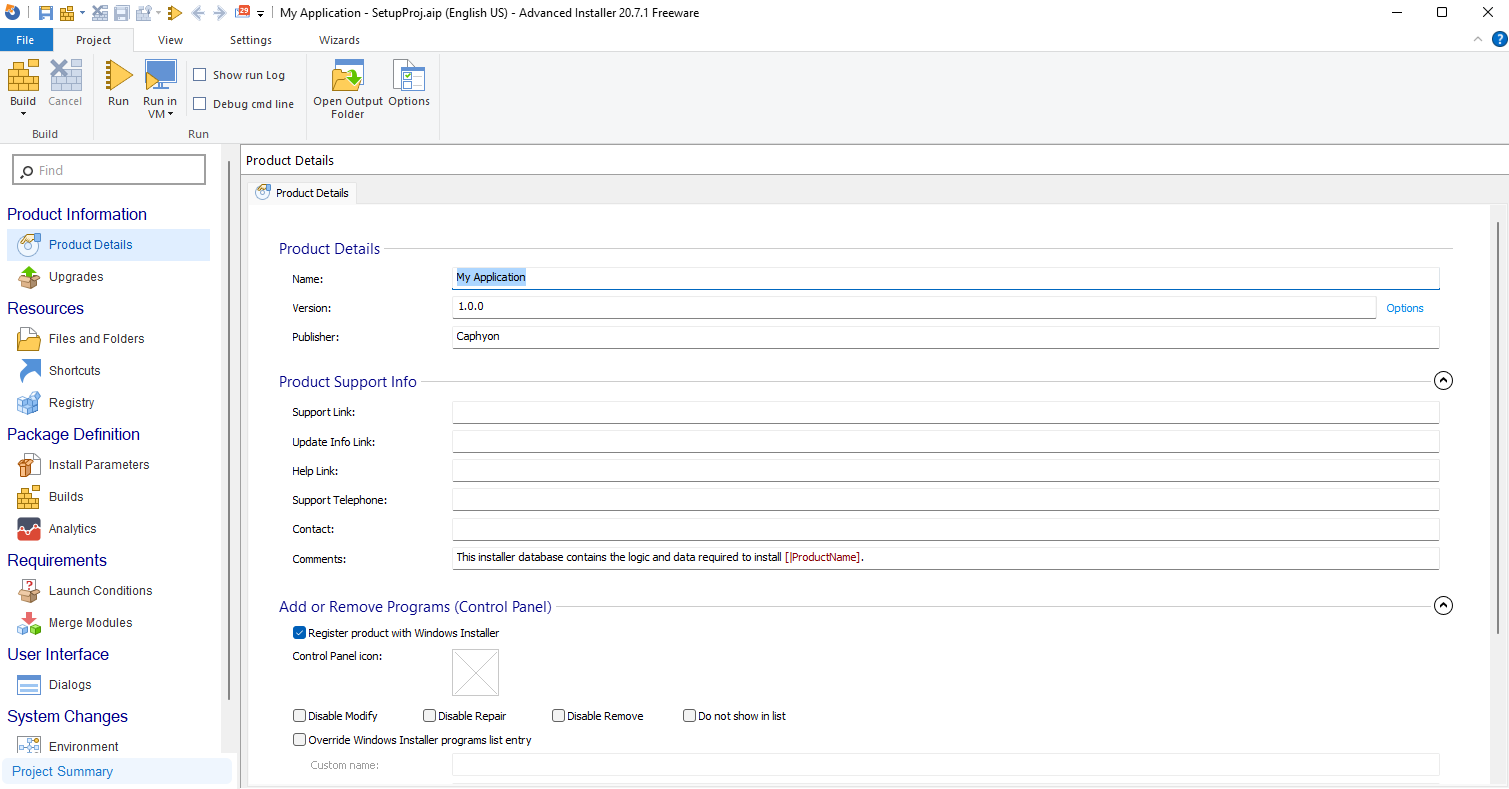
The Advanced Installer Project includes a viewer that allows you to quickly access and modify essential information about your installer. To access this viewer, select the project's .AIP file in the Solution Explorer.

To unlock additional features, you need to open the installer project in Advanced Installer by using the [Edit in Advanced Installer] button, located in the bottom left corner of the viewer.
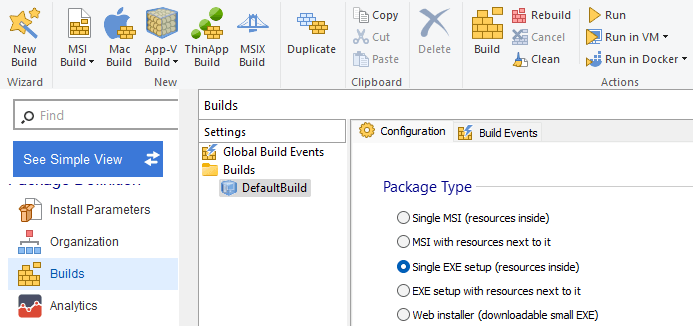
To create the package as a single EXE file with all resources included in it, navigate to the Builds page. Here, locate the Package type sections and check the Single EXE setup (resources inside) option.
After making the edits in Advanced Installer, save the project and exit.
When returning to Visual Studio, you will be prompted to reload the Advanced Installer Project files, ensuring that all your modifications are included.
Next, build the installer project to create the Setup.exe file. Navigate to the installer project folder to find the file and run it to install the application.
Conclusion
Visual Studio provides developers with a robust platform for creating a wide range of applications, including the ability to generate Setup.exe files for simplified deployment. This article has guided you through a comprehensive tutorial, covering essential steps such as installing the necessary extensions, adding a setup project, customizing product details, creating shortcuts, incorporating registry keys, and adding launch conditions and prerequisites.
However, if you desire more advanced customization and comprehensive features, the Advanced Installer extension for Visual Studio offers an efficient solution. With its intuitive viewer and additional functionalities, you can fine-tune your installer project, including creating a single EXE file with embedded resources.
Find here more details about Advanced Installer’s Complete Integration with Microsoft Visual Studio.
