How to Create an MSIX Package for WinForms Application
As an IT professional, you might have come across Windows Forms (WinForms) when building applications on Windows. WinForms is a free and open source GUI class library included in the .NET Framework that has been heavily used since its release in 2002.
Unlike batch programs, WinForms is an event-driven application that waits for user input before executing something.
If you are still creating applications using the Windows Forms GUI, you don’t need to worry about compatibility with MSIX.
In this article, we'll be discussing methods that you can use to export your WinForms application as an MSIX package.
How to use Visual Studio to create an MSIX package for WinForms?
One of the methods of converting your WinForms application to an MSIX package is by using Visual Studio.
When working with Visual Studio, you need to have access to the source code of the application in order to convert it to MSIX.
Let's assume we have a simple “Hello World” application.
Follow these steps to export your application as an MSIX package:
1. Once you open the “Hello World” project, add a new Windows Application Packaging Project (you don’t need to add any code to it as this will be considered the “packaging project”).

2. When you’re adding the new project, you need to select the target and minimum OS versions that your MSIX package should use for installation.
It's important to carefully consider which OS versions are best suited for your application to function properly. Never set the minimum OS version lower than the Windows 10 Anniversary Update.
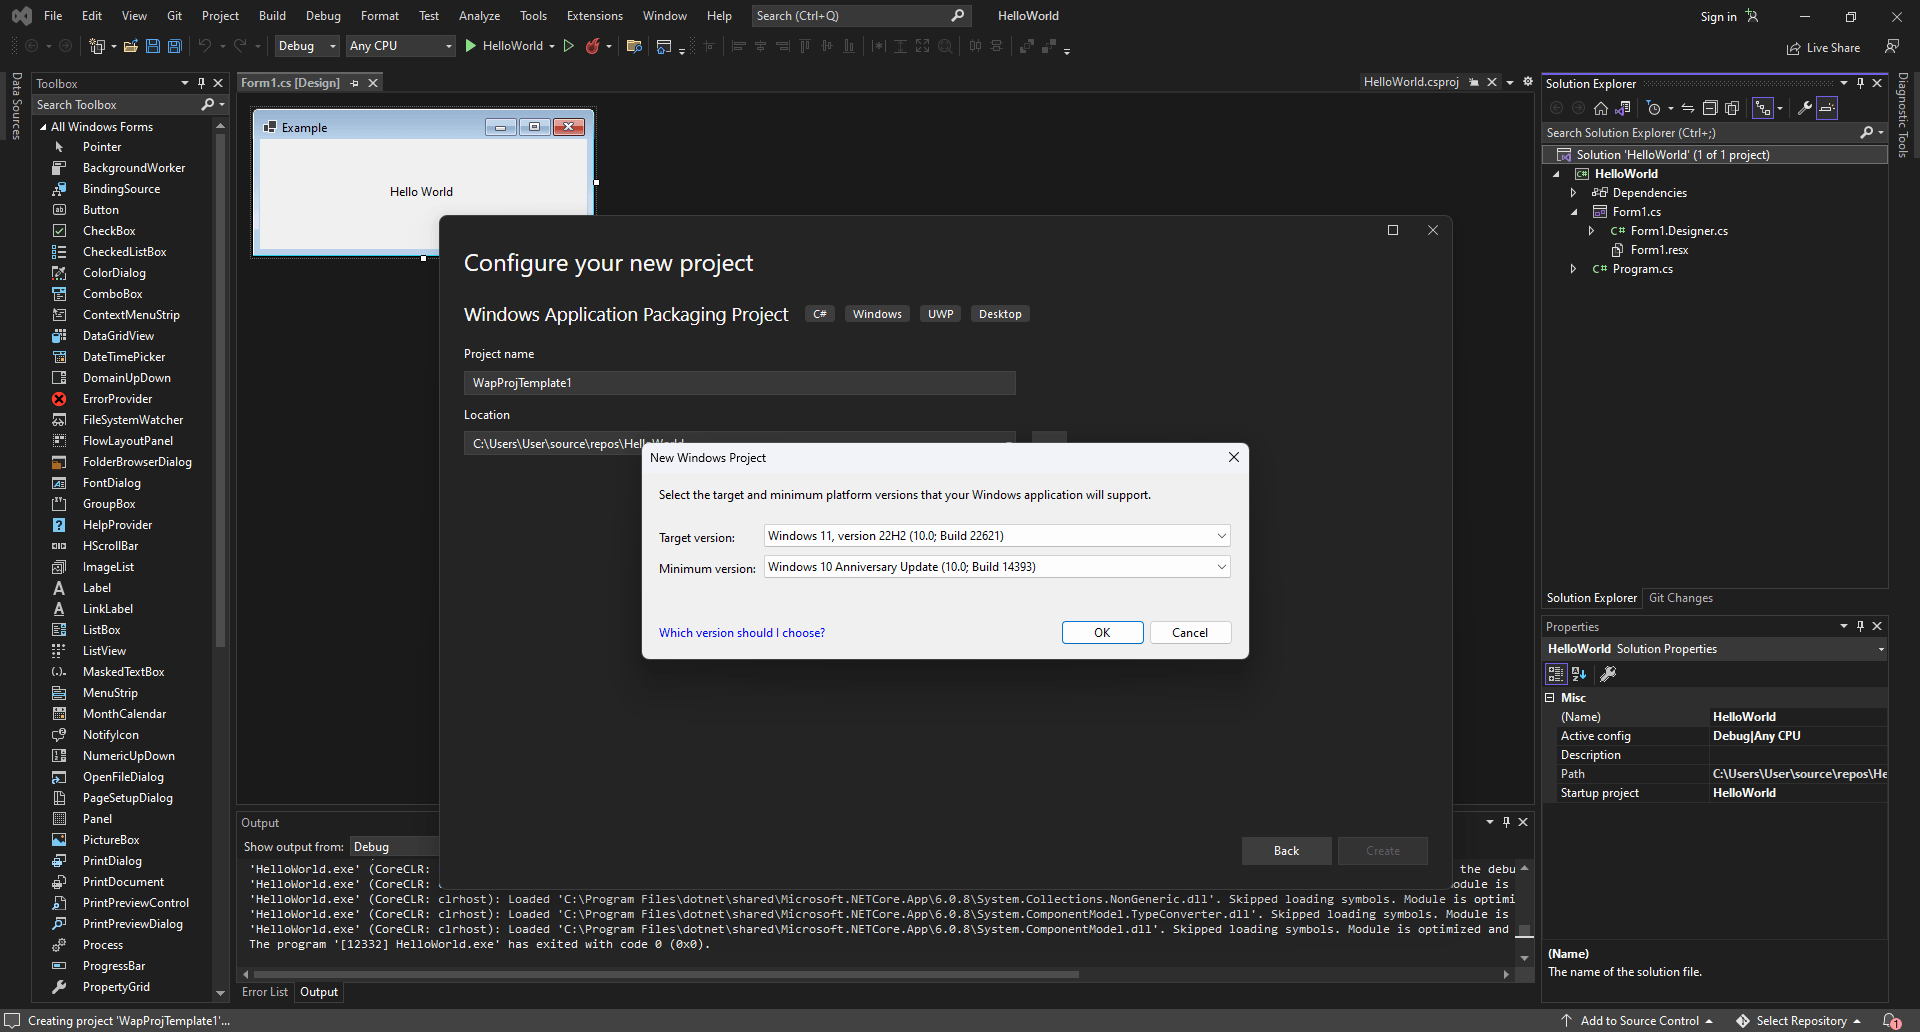
3. Next, in the Solution Explorer, right-click the Dependencies folder and choose Add Project Reference.
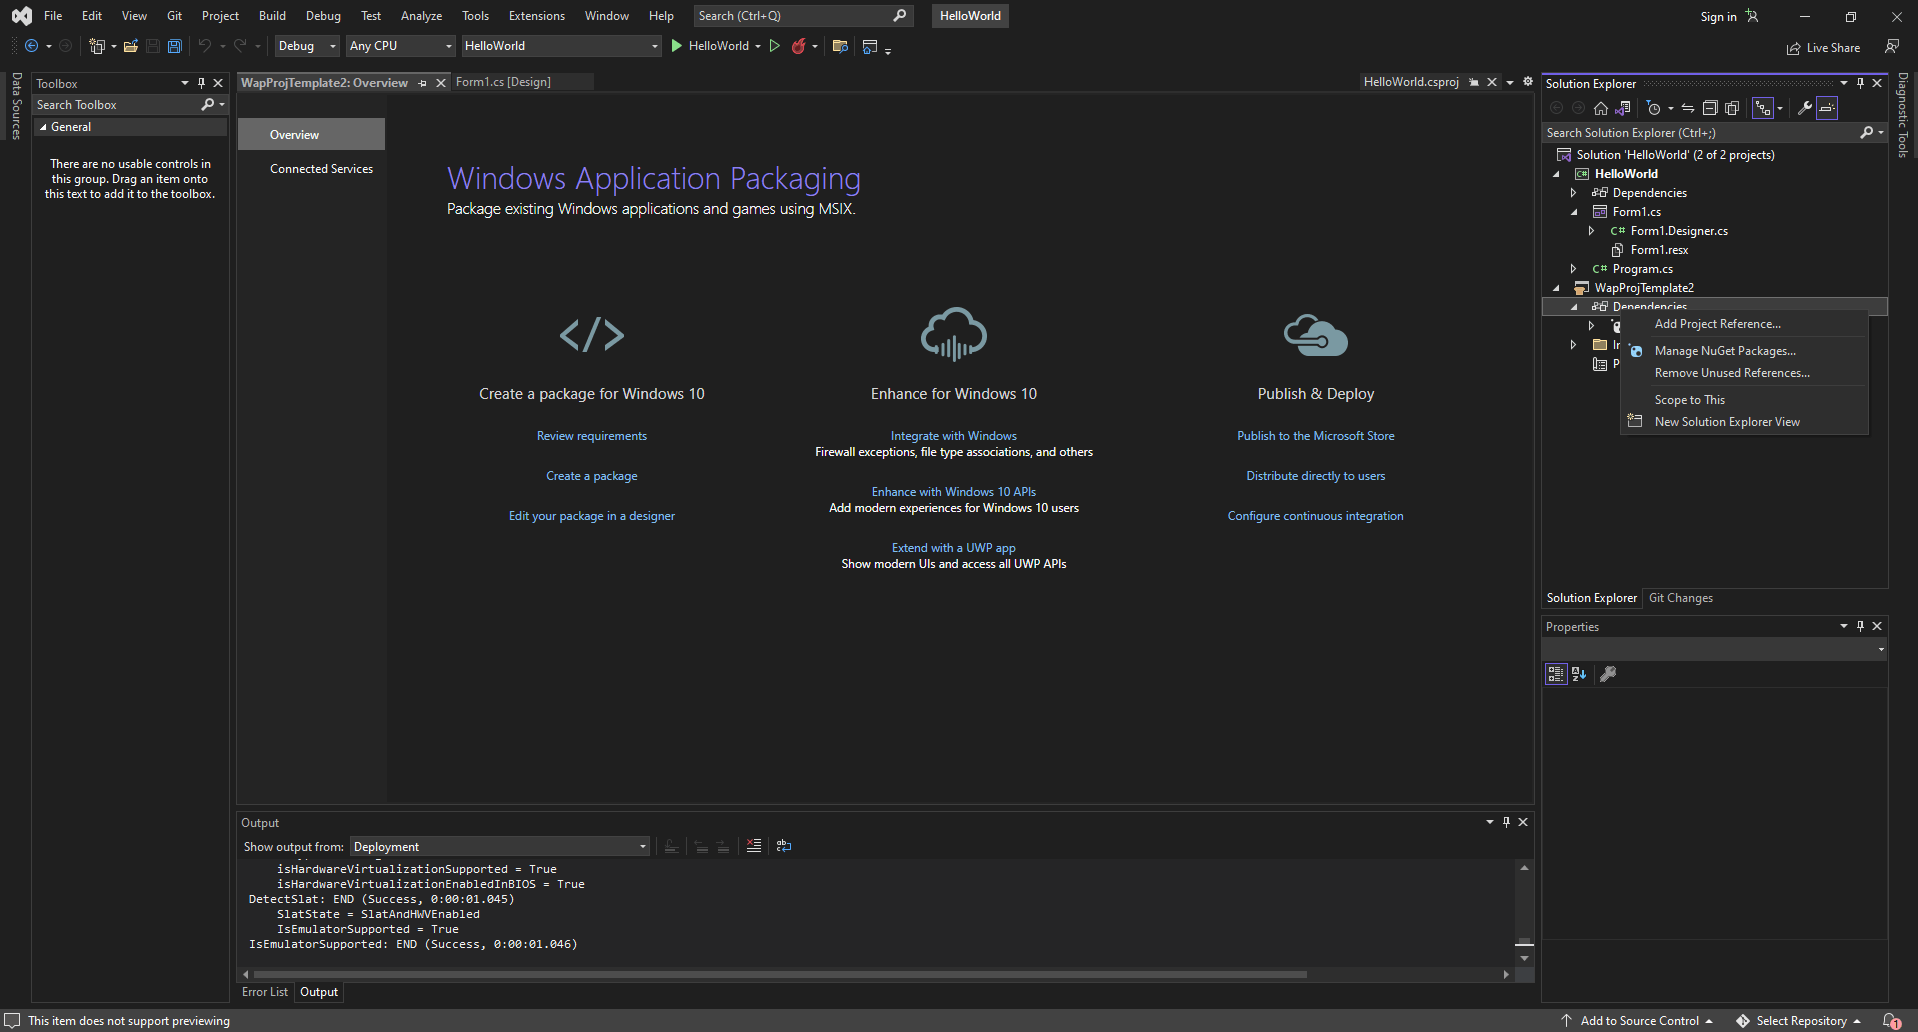
4. In the new dialog, select your Windows Forms application and click OK.
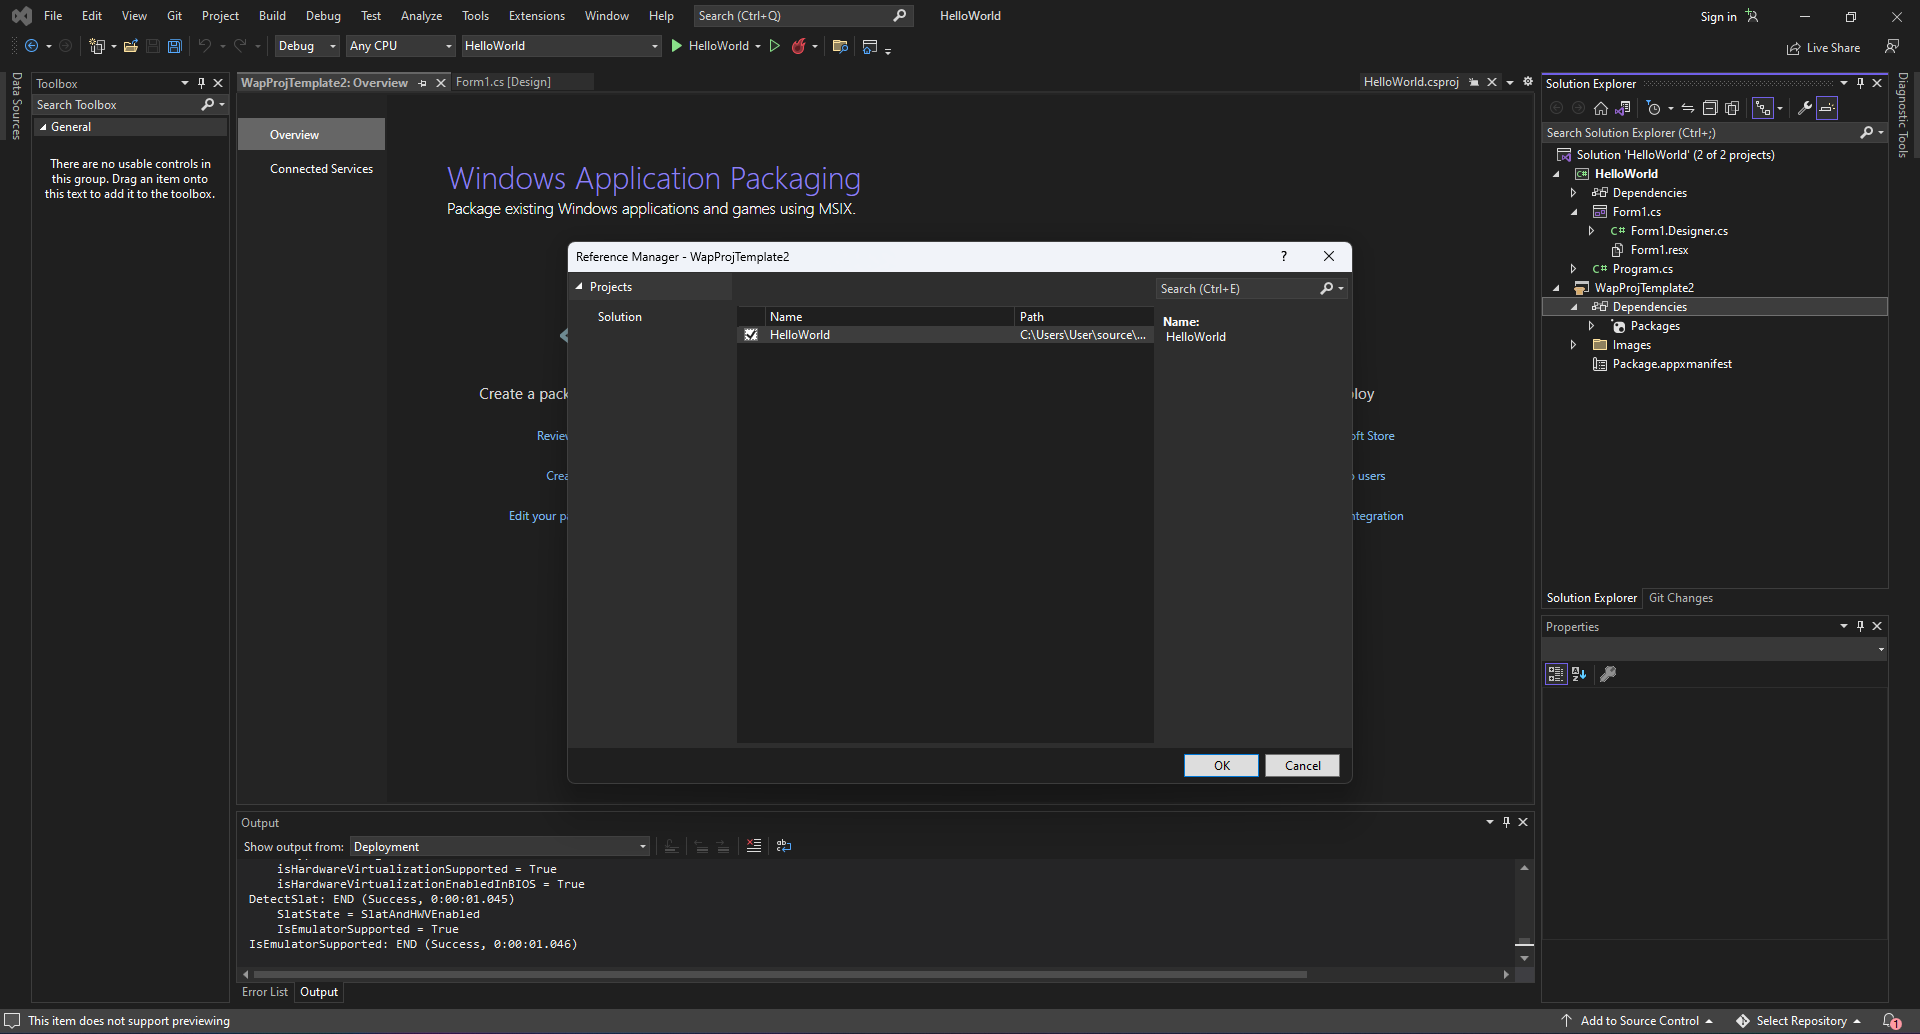
5. Once you've added your WinForms application to the packaging project, you can easily check to see if it's there:
5.1. Open the Solution Explorer in Visual Studio.
5.2. Expand the Dependencies folder and then the Applications subfolder.
5.3. You should now see your application listed. In this example, we named it "HelloWorld".
Keep in mind that while you can include multiple desktop applications in your package, only one of them can be set to start when users click on your app tile.
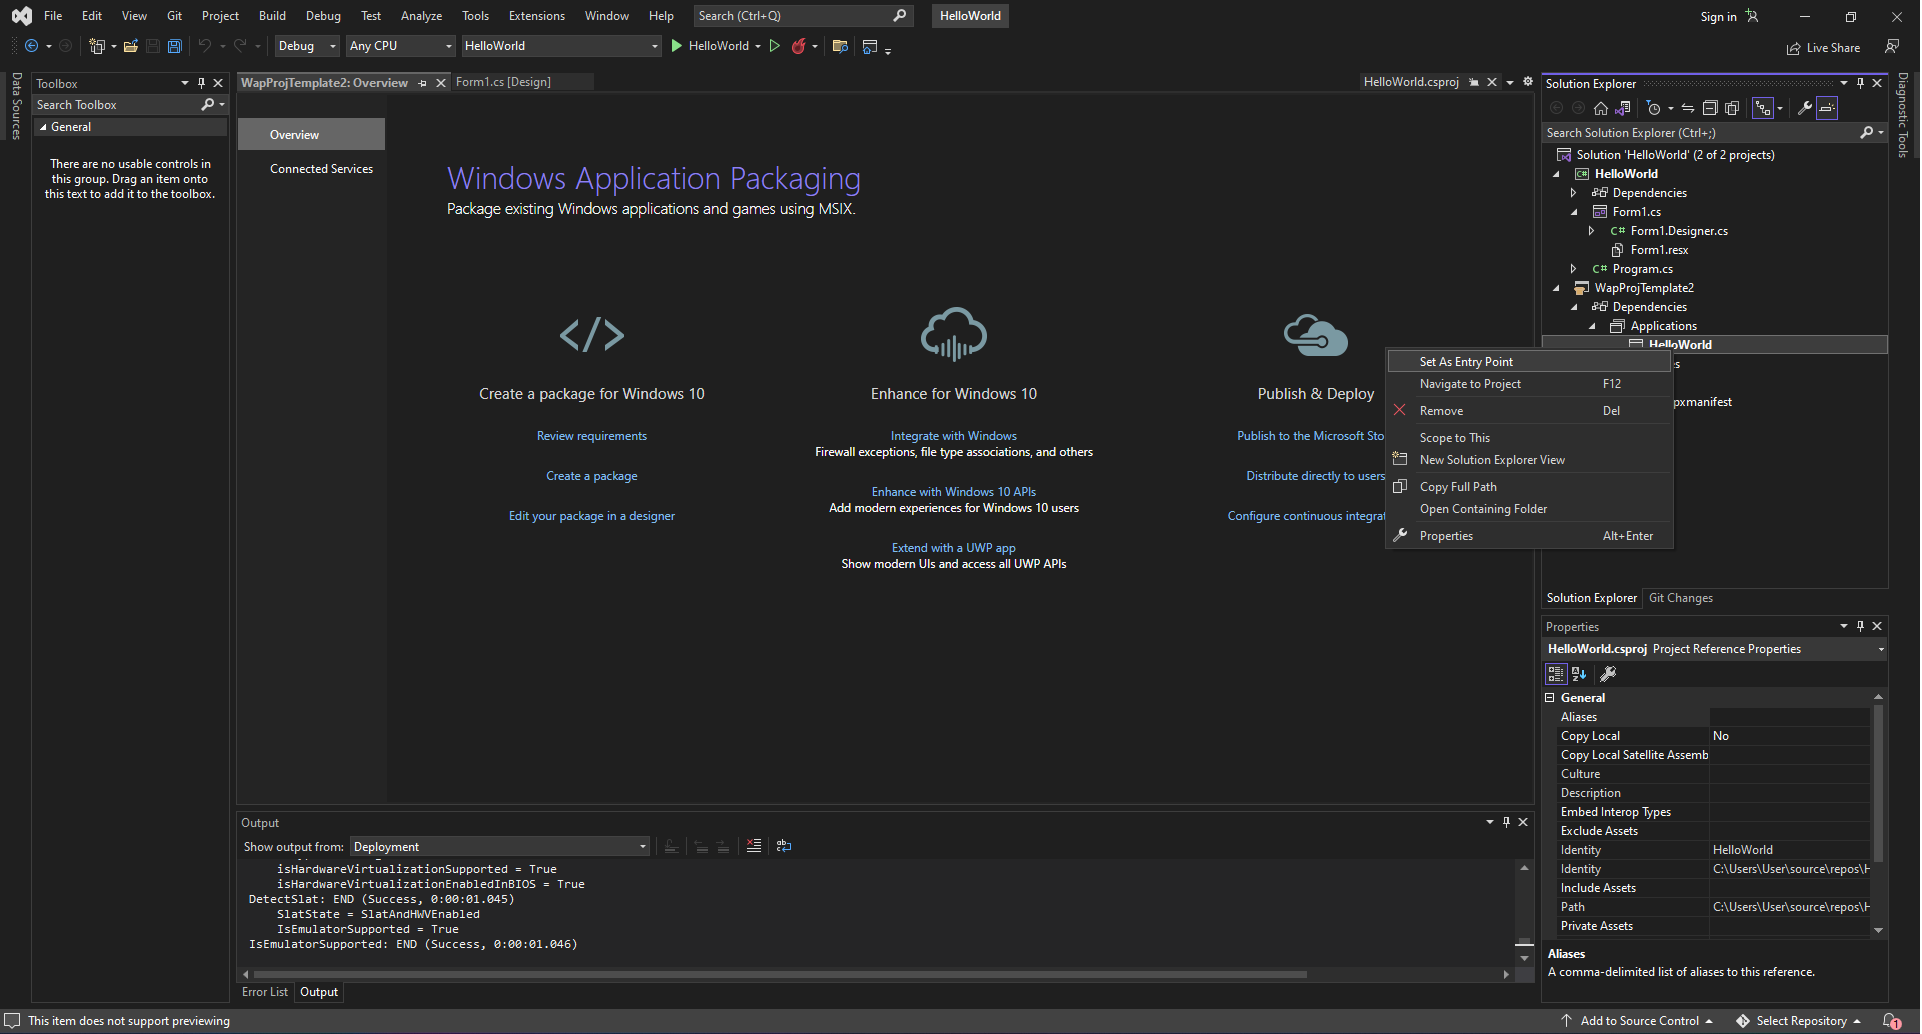
6. In the Applications subfolder, right-click the application that you want users to start when they choose the app's tile, and then choose Set as Entry Point.
We are almost there! To finish exporting the MSIX package, you'll need to make a few more configurations in the package .appxmanifest file. This file is where you can declare all the necessary settings for your package.
7. To modify the necessary package settings, simply double-click on the package .appxmanifest file in the Solution Explorer. Here you can view and edit general information like the package display name, entry point (previously defined), and description.
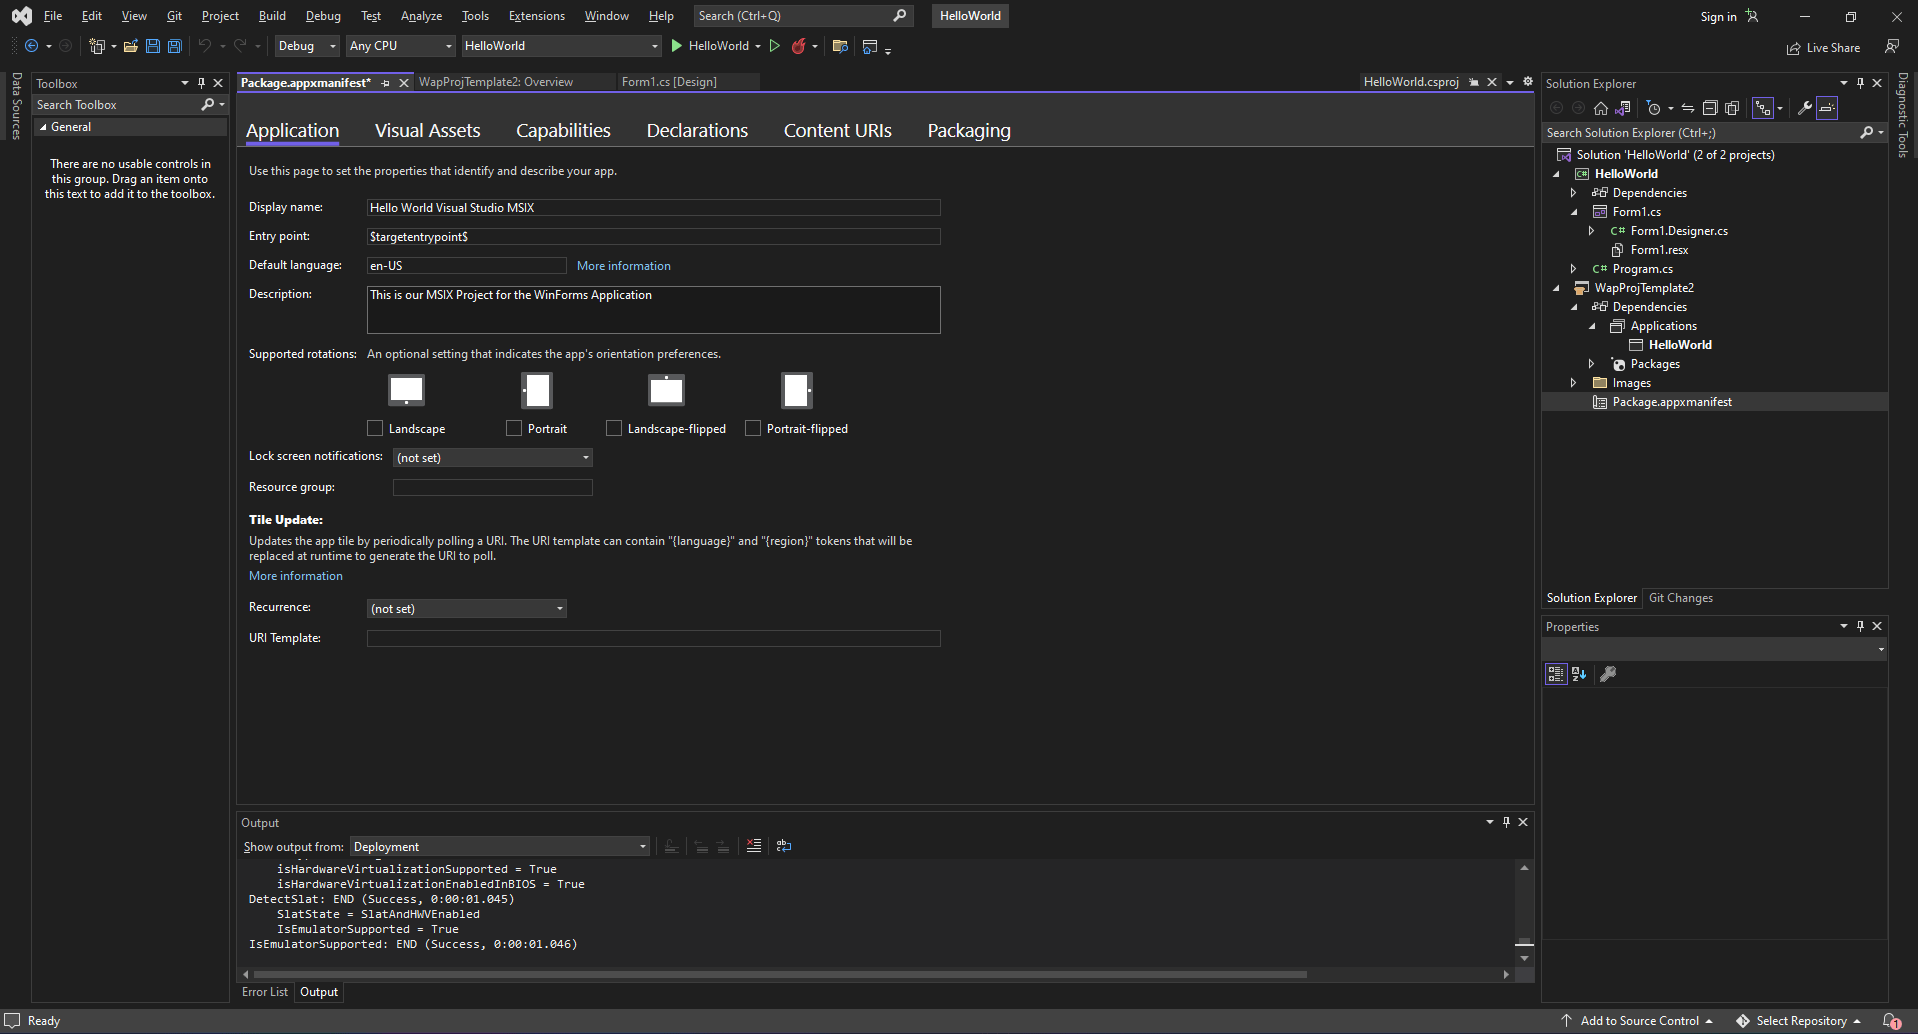
The Visual Assets tab allows you to import and define all the required images for your package, but we'll skip this step along with others like Capabilities, Declarations, and Content URIs. We will jump straight to the Packaging tab.
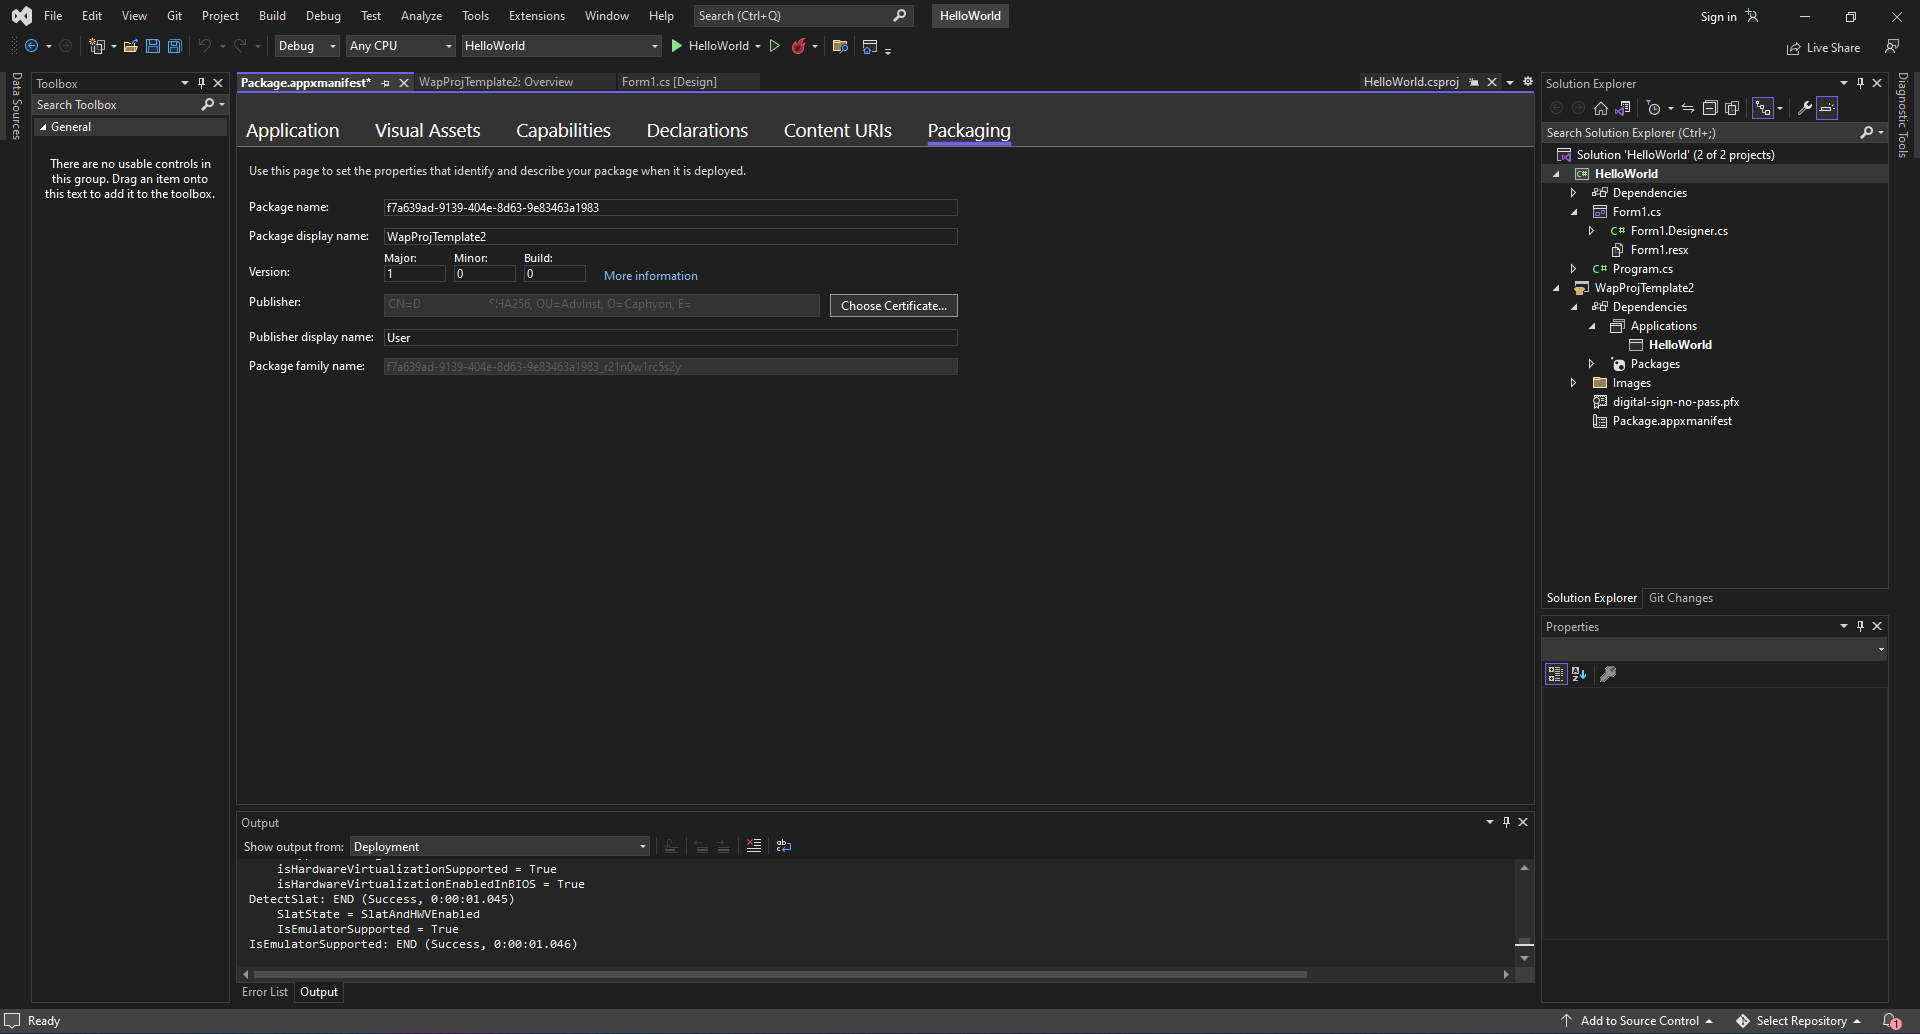
8. In the Packaging tab, under the Publisher, we need to provide a certificate which will be used to generate the Publisher tab.
Keep in mind that in order to install MSIX packages, a certificate is MANDATORY.
9. The final steps to build the MSIX package are to right-click the “packaging project” and select Publish > Create App Packages.
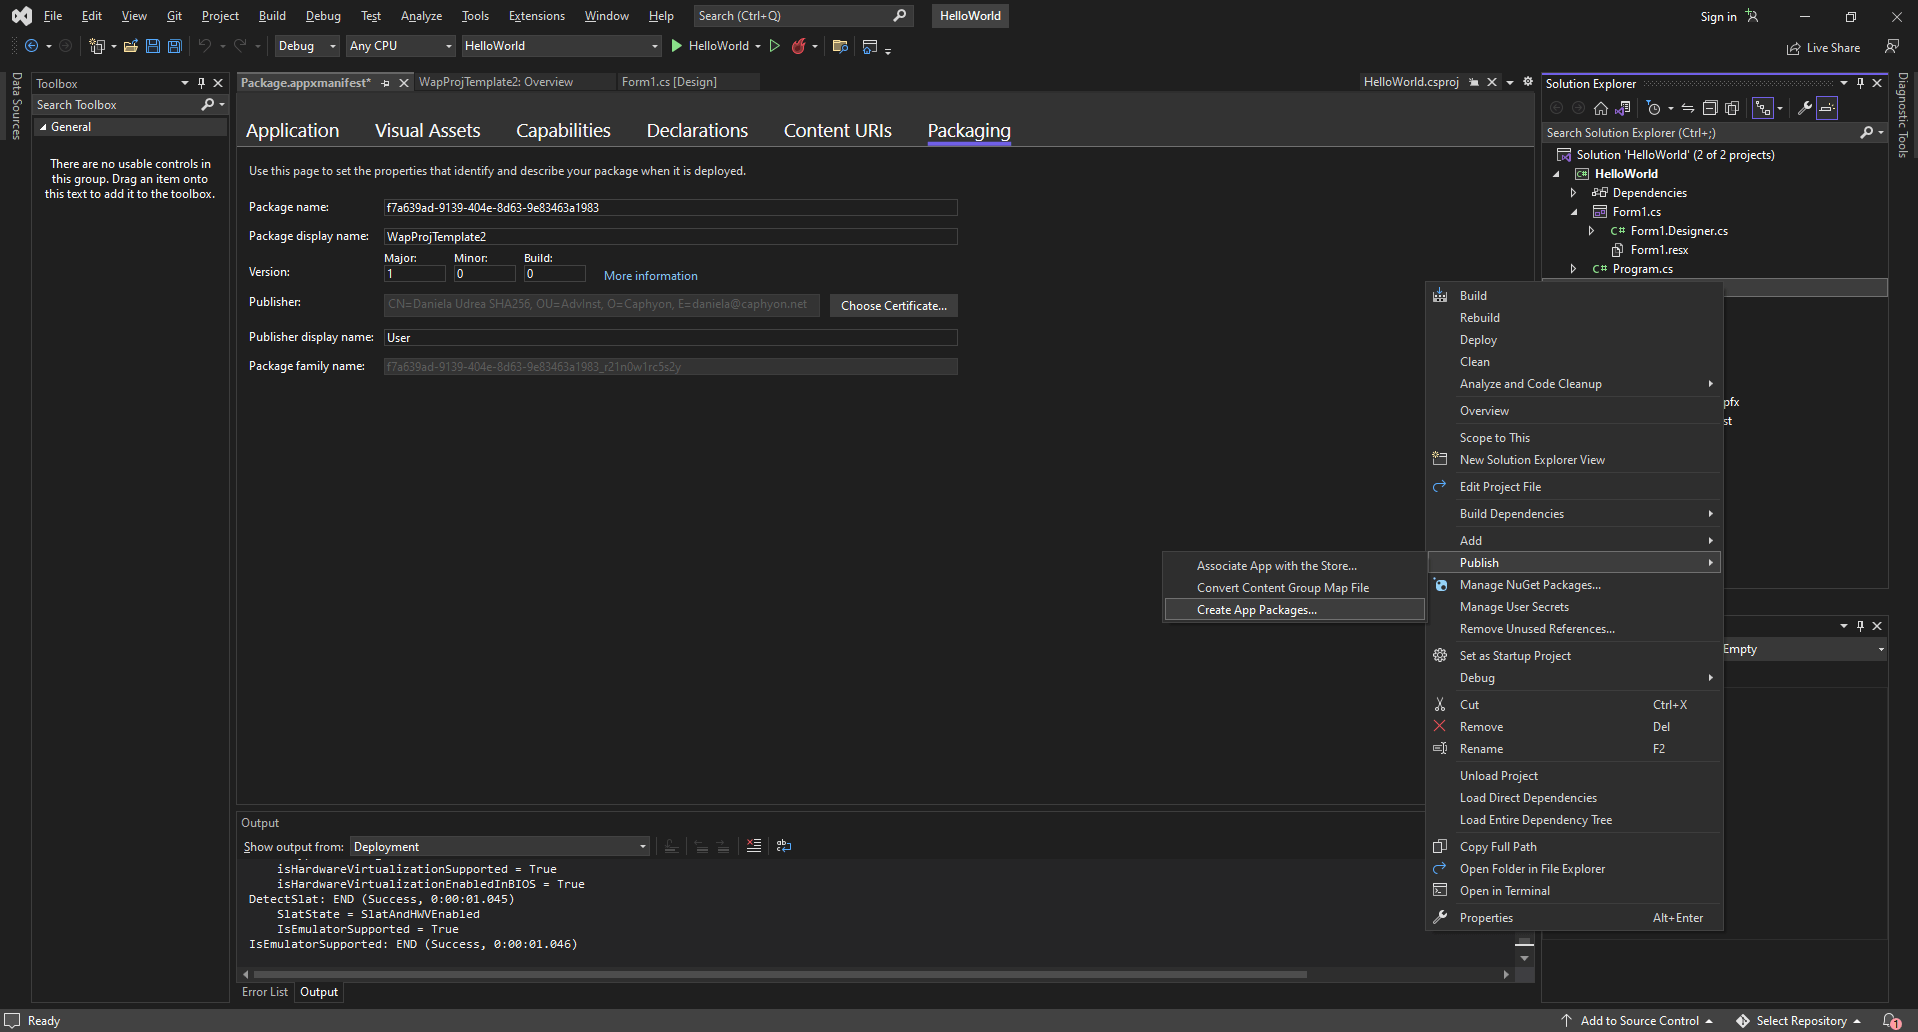
That’s it! Now, you should have your MSIX package exported.

To create MSIX packages, the minimum version of your application must be the latest Windows 10 SDK version 1809 (build 17763). If you choose a lower minimum version than that during the creation of the Windows Application Packaging Project, the output will be an APPX package.
For a wider range of options and multiple output builds, you can use the free Visual Studio extension of Advanced Installer.
How to Convert your WinForms to MSIX using Advanced Installer Packaging Tool?
If you are not the developer of the WinForms application, it means you are in one of the following scenarios:
- You have the resulted output of the build
- You have another type of package (EXE, MSI, etc)
No matter which scenario you're in, you can use Advanced Installer Repackager to easily convert your WinForms app to MSIX.
An easy overview of the steps would be to first start the Repackager.
Try Advanced Installer Repackager through the Advanced Installer’s 30-day free trial!
To convert your WinForms application to MSIX using Advanced Installer, follow these steps:
1. Open “Repackage Installation” to start your Repackager.

2. Select your installer or select "Session Monitoring" if there is no installer and you just want to wrap the raw source files into a packaging format.
3. Then, the Repackager launches the installer on your computer or a virtual machine, captures the system changes, and saves the results as a session.
4. Finally, it generates an Advanced Installer project that can be customized to create a new installer.
We have touched the repackaging topic with MSIX in multiple articles on our blog, so check them out.
If you have an MSI installer you can import it in Advanced Installer using our dedicated wizard - it will be automatically converted to an MSIX if desired without needing to repackage the installation.
Conclusion
To summarize, packaging a WinForms application as an MSIX package can enhance its security, reliability, and deployment convenience. You can use the Advanced Installer Repackager to convert an existing WinForms app to an MSIX package, even if you are not its original developer.
Once you have the resulting project, you can customize and configure the new MSIX installer using Advanced Installer. It's important to carefully consider the target and minimum OS versions and keep in mind that only one desktop application can be designated as the entry point for the MSIX package.
With these tips and tools, you can create a high-quality MSIX package that provides a better user experience and helps streamline the deployment process.
Feel free to suggest future article topics in the comments below. Your input is greatly appreciated!
