How to create an MSIX package for a native AOT app
Struggling with creating an MSIX package for a native Ahead-Of-Time compilation (AOT) application? You're not alone. With AOT apps becoming more popular, it's essential to streamline this process.
The AOT technique translates the source code into machine code during the build process, before program execution. This strategy helps you to improve the performance and security of your applications.
The adoption of native AOT applications has risen in diverse fields lately. But how does one create an MSIX package for such an application?
In this article, we’ll go through how to create an MSIX for a native AOT application using Visual Studio.
Add the Advanced Installer for Visual Studio Extension
Before going through this tutorial, install the “Advanced Installer for Visual Studio” extension. You can find it on Visual Studio’s marketplace.
To install your extension, follow the next steps:
- Open Visual Studio → go to Extensions → Manage Extension.
- In the Online section, look up for Advanced Installer for Visual Studio.
- Download the extension and close Visual Studio to allow the extension to be installed.

How to create the installer project
Now that you have your Advanced Installer extension for Visual Studio installed, and your native AOT application ready, let’s create the installer project:
1. Right-click on the project solution → Add → New Project.
2. Choose the Advanced Installer Project template from the templates list.

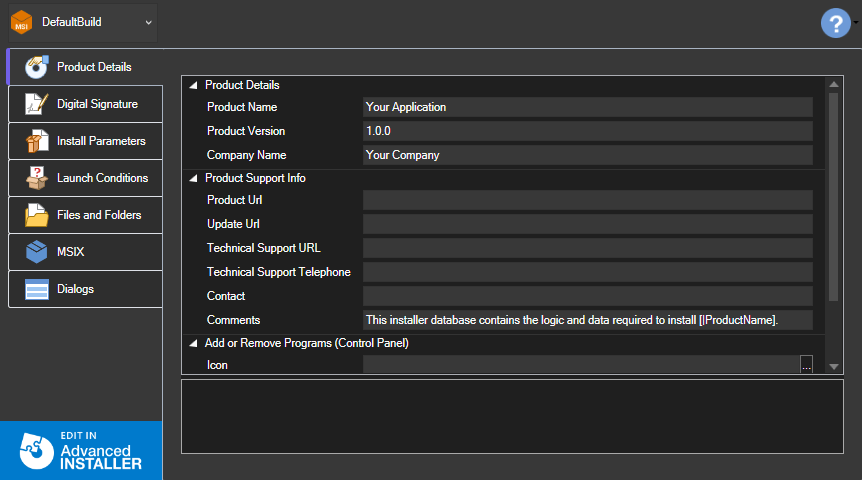
3. Once you've set up the project, select the .AIP file. This opens the Advanced Installer Project viewer, making it easy for you to access and tweak your installer's basic information.

How to Add the Project Output
The next step is to add the project output. To do this, go to the Files and Folders tab in the viewer and simply use the Add Project Output button. Here, there are two possible scenarios:
- If you have a folder publish profile, select it.
- If not, create a new one:
- Publish the app to a local folder.
- After creating the publish folder, open all settings. Alter the deployment mode to 'Self-contained' and, for the target runtime, choose the win-x64 option for a 64-bit Windows app configuration.

- Remember, there's no need to publish now – it will happen during the Advanced Installer Project's build process.
- Just return to the Files and Folders tab, click on Add Project Output again, and select the newly created publish folder.
How to add the MSIX build
When you create an Advanced Installer Project, it comes with a DefaultBuild that generates an MSI package. So, we only need to add an MSIX build.
To add an MSIX build:
- Go to the MSIX tab in the viewer;
- And click on the ‘Add UWP MSIX Build’ button.
Please note that adding an MSIX build is available starting with the Professional edition of Advanced Installer.
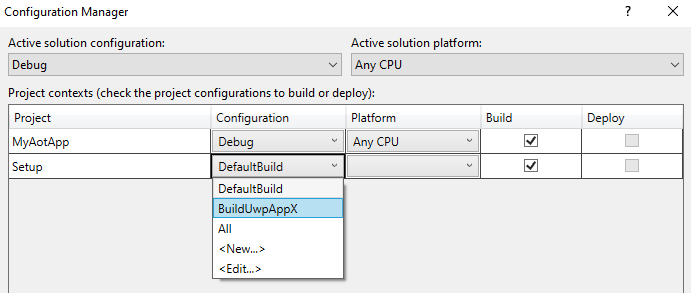
Once the MSIX build is added, you need to switch the installer project configuration:
- Navigate to the Build menu → Configuration Manager.
- Switch the installer project configuration from DefaultBuild to the newly added MSIX build.

How to digitally sign the package
We’re almost there, let’s digitally sign your package for validation purposes. This final step ensures users that your application is secure and comes from a trusted source.
Here’s how to do it:
- Go to the Digital Signature tab and enable signing.
- From here, you'll need to load your existing certificate. You can either select it from a local file on your disk or import it from the store.
- Don't have a certificate yet? No worries! Simply hit the 'Create' button and you'll be on your way to making one.

Build and install
Once all the steps are completed, it's time to build the project and generate the MSIX package. Then, head to the installer project folder to execute the MSIX and install the application.
And, that’s it!
Ready to start packaging your own AOT apps? Grab your 30-day free trial of Advanced Installer today!
Conclusions
This is how you can create an MSIX package for a native AOT application. We hope you find this tutorial useful.
For a more practical look at the process, check out this video tutorial:
