How to create a Windows installer for a C# application
C# is a widely used programming language for developing various applications - from desktop apps to games and websites.
But how do you create an installer for a C# application? This is what we will show you in this article. First, let’s see how to create the installer using Visual Studio. After that, I’ll present an alternative solution using Advanced Installer.
How to add the Setup Project
Before delving in, make sure you have the Microsoft Visual Studio Installer Project extension:
- Navigate to Extensions → Manage Extensions.
- Search for the extension and download it.
- Close and reopen the Visual Studio IDE for the extension to be installed.
Once the extension is installed, let’s create the installer. For our tutorial, we've used a C# Windows Forms app.Now, it’s time to add the Setup Project that will help us generate the installer package:
- Right-click on the project solution → Add → New Project.
- Choose Setup Project from the list of templates. Once created, you will find it listed in the Solution Explorer.

Add Project Output to the Setup Project
After you add the Setup Project to your solution, remember to specify the project you’re creating the installer for:
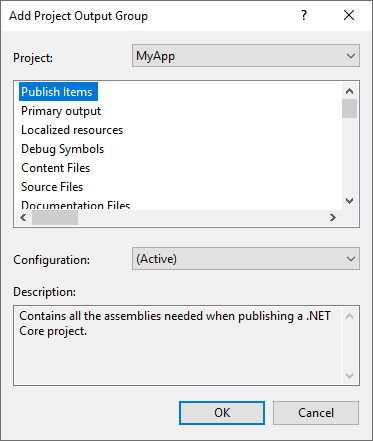
- Right-click on the Setup project → Add → Project Output.
- In the opened dialog, choose the C# project (in our scenario, it is MyApp), select Publish Items and click ‘OK’.

How to create Shortcuts for your application
For an easy access to your application, here's how to create a desktop shortcut:
1. Right-click on the Setup project → View → File System.
2. Open the Application Folder.
3. Right-click on the Primary output from MyApp → Create Shortcut to Primary output from MyApp.

4. Rename the shortcut and place it in the User’s Desktop Folder. If you want a shortcut for the Programs Menu, repeat the steps above, but place the shortcut in the User’s Programs Menu folder.
For information on how to edit the product details, add launch conditions or install prerequisites, check out our article on How to create a Setup.exe file in Visual Studio.
Build and Install
Once the Setup Project is configured, you need to build it to create the installer package. After the build is complete:
- Go to the Debug/Release folder of the Setup Project (depending on your configuration).
- Run the package to install the application.
How to use the Advanced Installer extension to create the installer
If you're seeking a more streamlined method to create an installer for a C# application, the Advanced Installer extension for Visual Studio has you covered.
1. Install the Extension
To install the Advanced Installer extension for Visual Studio:
- Go to Visual Studio Marketplace → Extensions → Manage Extensions.
- Search for Advanced Installer for Visual Studio extension and download it.
- Close the Visual Studio IDE and reopen it.
2. Craft the Installer Project
When your app is ready to be deployed, use the extension to create the installer project:
- Right click on the project solution → Add → New Project.
- From the list of templates, select Advanced Installer Project.

3. Modify Installation Details
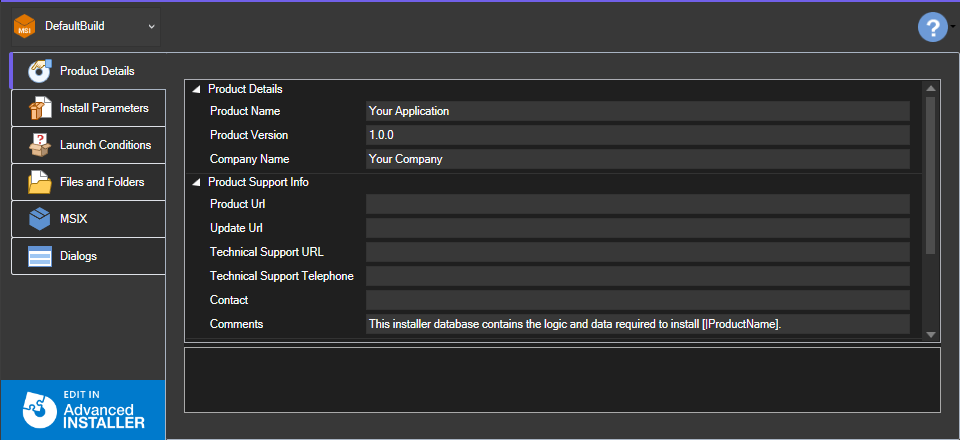
After you create the Setup Project select the AIP file to access the setup project viewer and modify basic information about the installer quickly. You can edit the product details, set install parameters or add launch conditions.

4. Harnessing Advanced Installer's Full Suite
You can also add the Project Output from the Files and Folder tab: click the ‘Add Project Output’ button, select the project files and click ‘OK’. To access all features for your installer package:
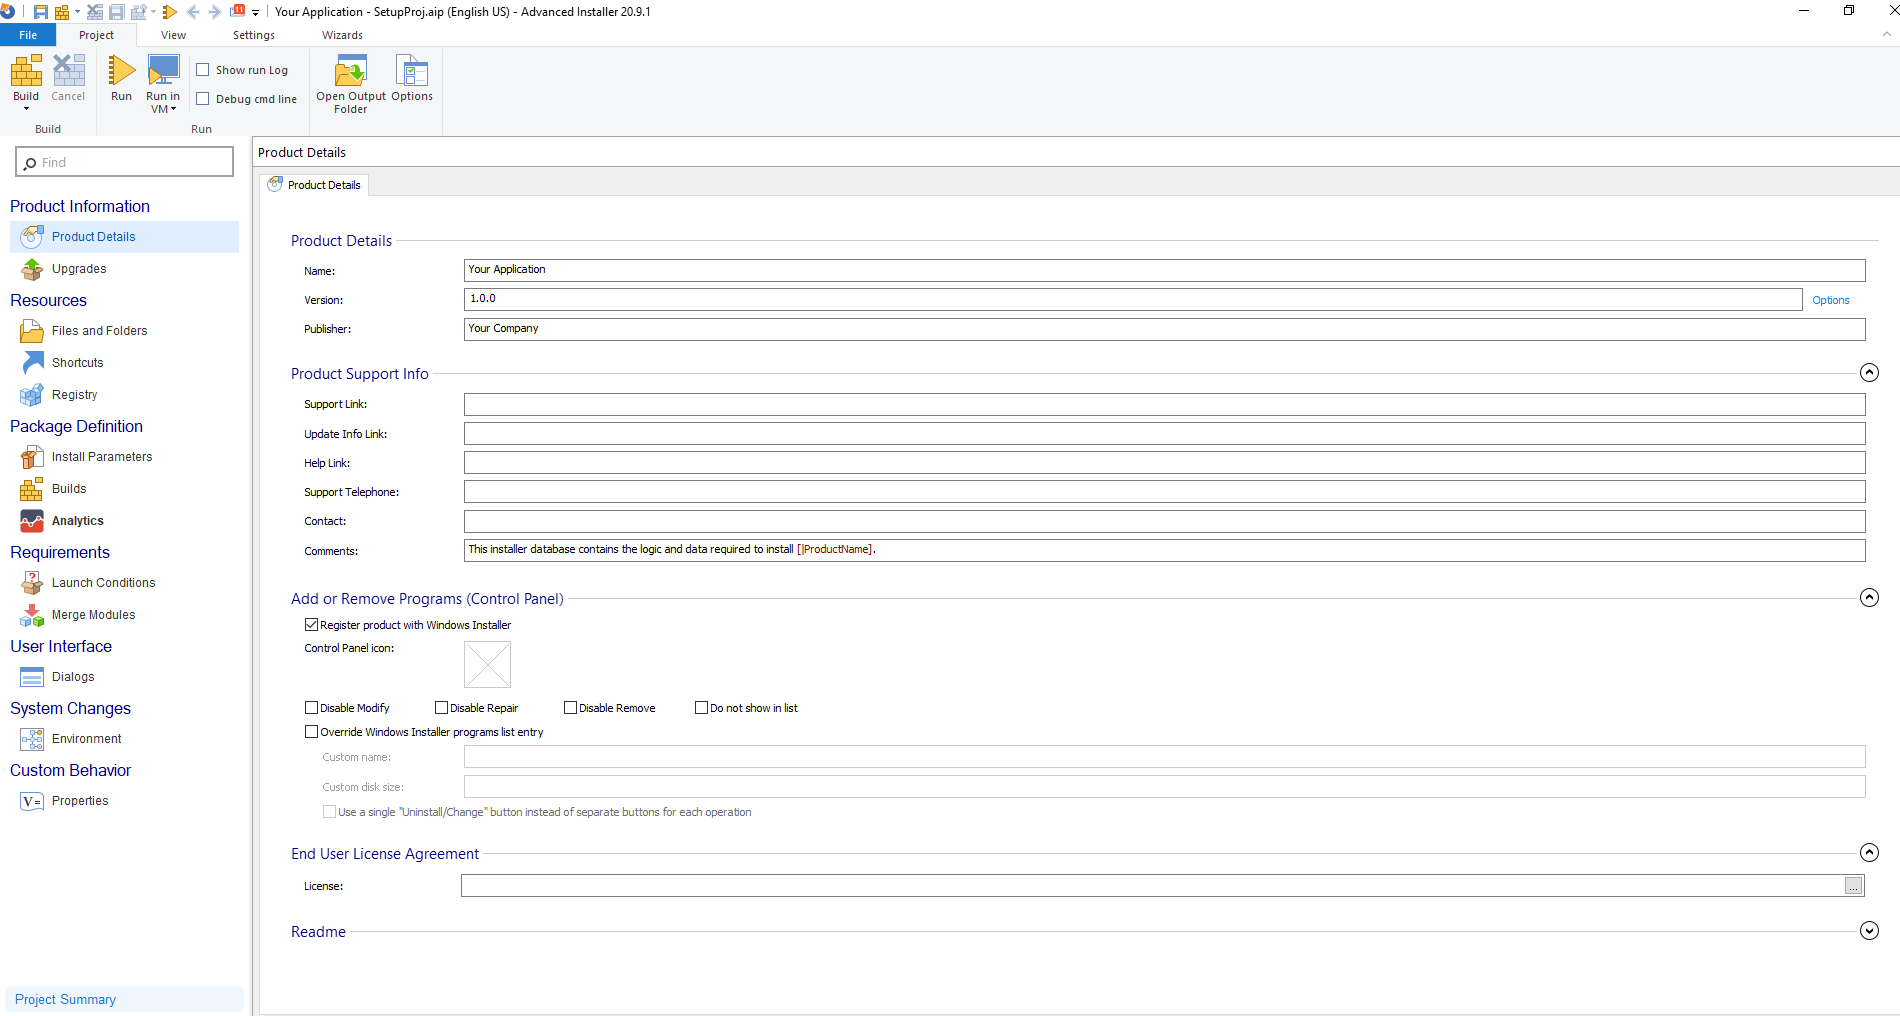
1. Open the project in Advanced Installer
2. Click on the ‘Edit in Advanced Installer’ button (in the bottom left of the setup project viewer).

3. After you edit the installer project in Advanced Installer save, and exit it.
4. Go back to Visual Studio, reload the installer project files which include all your changes.
5. Build the setup project to generate the installer package.
Conclusions
Creating an installation package with Visual Studio is a fairly straightforward process. However, you need to be aware that you’ll encounter limitations when configuring the packages.
For complete configuration and customization of a package, Advanced Installer is the option you need. Moreover, it offers an easy-to-use interface that simplifies the creation of installation packages.
