How to Configure Firewall Rules via MSI with Custom Actions
To enhance the security of your machines, it is crucial to properly define and configure the firewall rules, ensuring a safer environment.
There might be times when you need to add a specific executable as an exception to the Inbound or Outbound rules of the firewall to allow access.
In this article, we’ll have a look at how you can configure firewall rules via MSI using VBScript, Powershell, and Advanced Installer.
How to Define Firewall Rules with VBScript?
While VBScript allows you to use the “HNetCfg.FwAuthorizedApplication” object to define firewall rules, the simplest approach is to call the netsh.exe utility, which comes included with Windows.
The netsh.exe is a command-line utility that allows you to modify the network configuration of the currently running machine.
To change the netsh advfirewall context you can type the following advfirewall command in your cmd window:
netsh advfirewall firewall
You will be presented with various options, including:
?          	- Displays a list of commands.
add        	- Adds a new inbound or outbound firewall rule.
delete     	- Deletes all matching firewall rules.
dump       	- Displays a configuration script.
help       	- Displays a list of commands.
set        	- Sets new values for properties of an existing rule.
show       	- Displays a specified firewall rule.
To add a firewall rule, you can utilize the following command:
netsh.exe advfirewall firewall add rule name=FRIENDLYNAME dir=IN/OUT action=ALLOW/DENY program=PATHTOEXE enable=YES/NO profile=domain
Likewise, to remove a firewall rule, use the command:
netsh.exe advfirewall firewall delete rule name=FRIENDLYNAME
Practice time!
Let’s assume we have a HelloWorld.exe that we want to add to the inbound firewall and we want to allow all traffic.
1. Using VBScript, we can create the following code snippet:
Dim WshShell
Dim programPath2,ProgramPath3,ProgramPath4,ProgramPath5,ProgramPath6,ProgramPath7,ProgramPath8,ProgramPath9,ProgramPath10,ProgramPath11, programfiless, programfiles
Set WshShell = CreateObject("Wscript.Shell")
programfiless=WshShell.ExpandEnvironmentStrings("%ProgramFiles(x86)%")
programfiles=WshShell.ExpandEnvironmentStrings("%ProgramW6432%")
ProgramPath2 = programfiless & "\Program Files (x86)\Caphyon\Firewall App\HelloWorld.exe"
WshShell.Run "netsh.exe advfirewall firewall add rule name=HelloWorld dir=in action=allow program=" & chr(34) & ProgramPath2 & chr(34) & " enable=yes profile=domain ", 0, False2. Next, open Advanced Installer and navigate to the Custom Actions Page.
3. Locate the Launch Attached File option and specify the location of the VBScript.
4. Configure the custom action as it follows:
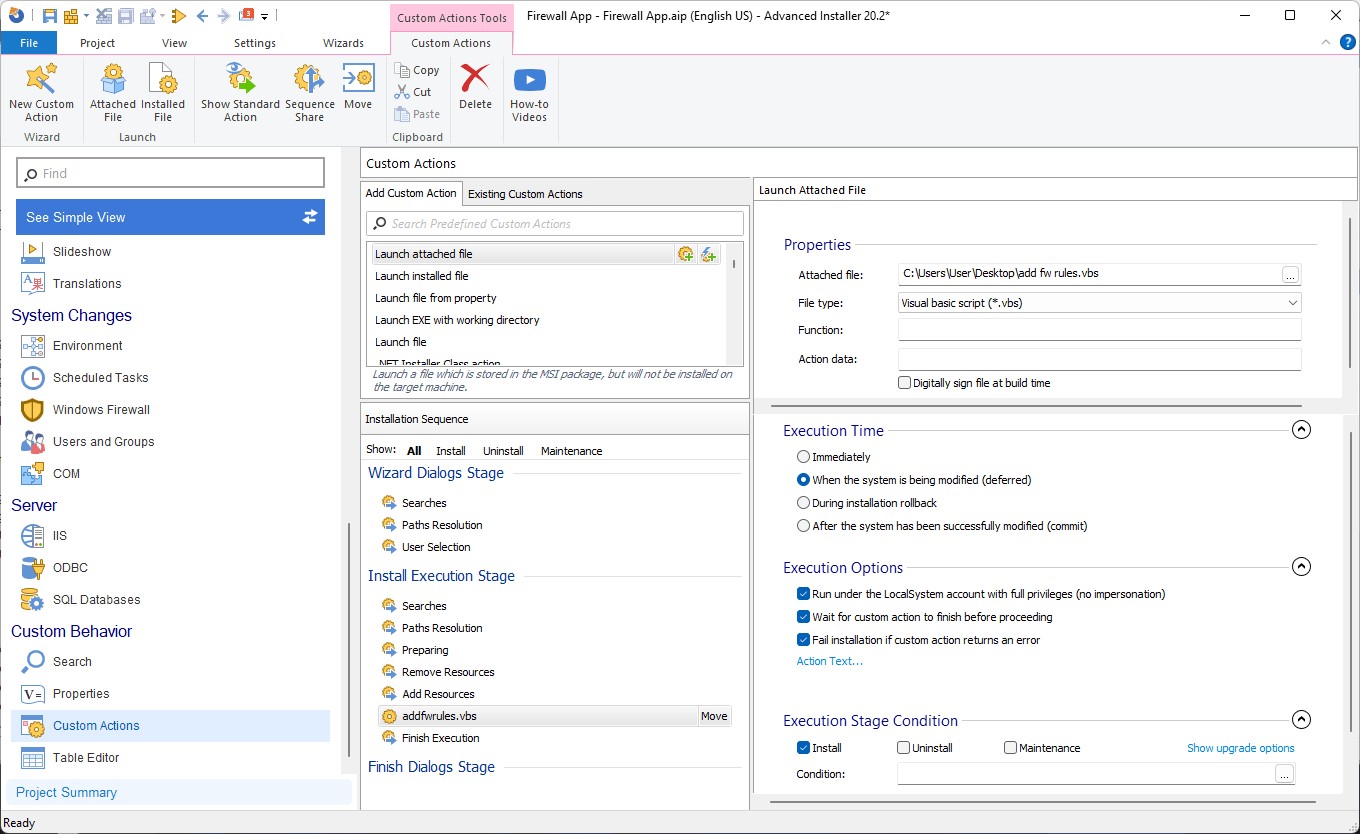
As a best practice, it’s important to remove the firewall rule during the uninstallation. To do that, we need another Custom Action and a different VBScrit to remove our rule.
The VBScript code for removal is as follows:
Dim WshShell
Set WshShell = CreateObject("Wscript.Shell")
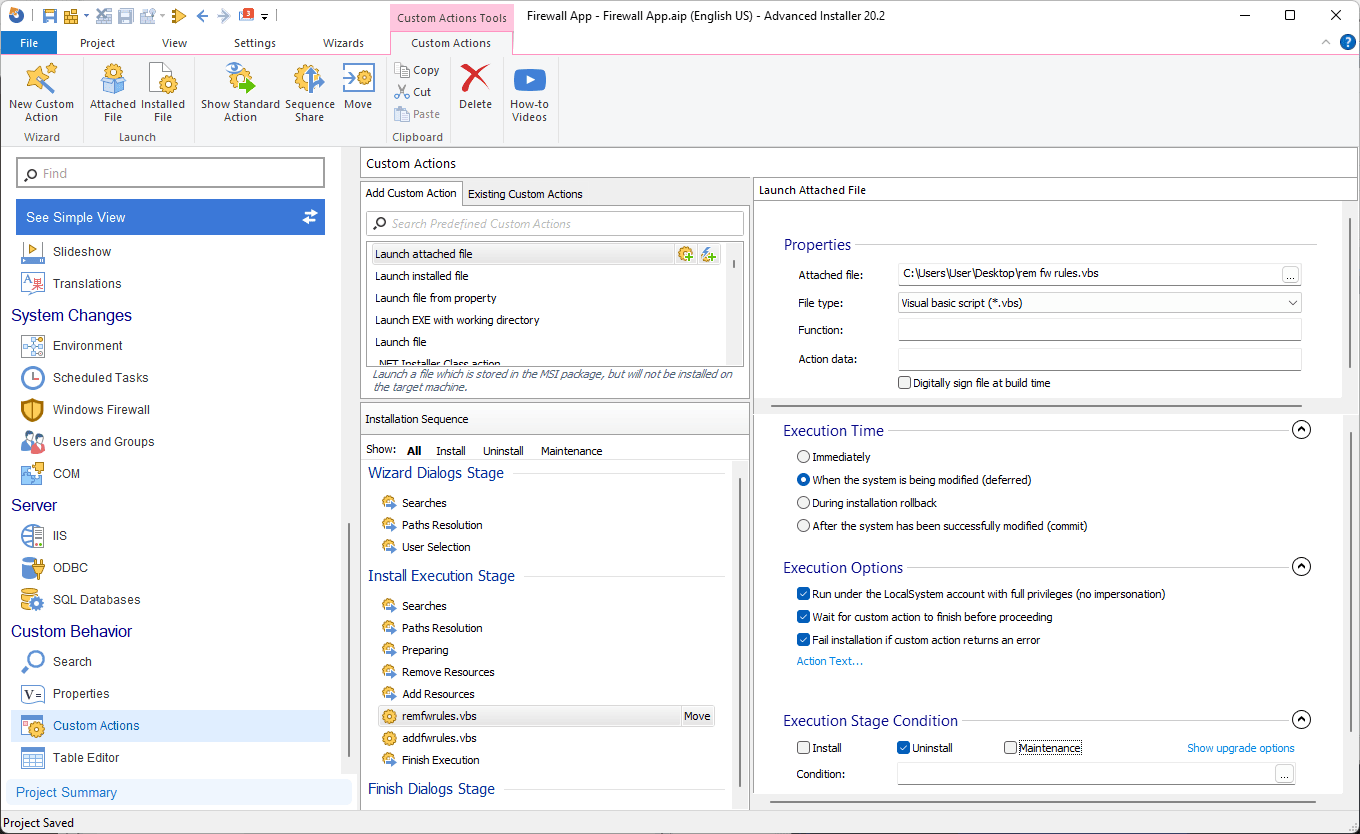
WshShell.Run "netsh.exe advfirewall firewall delete rule name=HelloWorld"Follow the same steps mentioned above to configure the custom action for rule removal.
How to Set Firewall rules with PowerShell?
While netsh is still available and widely used by the community, starting with Windows 8.1 you can use the buit-in NetSecurity PowerShell module to manage firewall operations.
While netsh remains a viable option, starting with Windows 8.1, you can leverage the built-in NetSecurity PowerShell module for firewall management.
This module offers 85 commands that you can use in Windows 10/11, but we will focus on two of them.
To add a firewall rule, use the following command:
$HelloWorldLocation = ${env:ProgramFiles(x86)} + "\Caphyon\Firewall App\HelloWorld.exe"
New-NetFirewallRule -Program $HelloWorldLocation -Action Allow -Profile Domain -DisplayName “HelloWorld” -Description “Block Firefox browser” -Direction InboundTo remove a firewall rule, use the Remove-NetFirewallRule PowerShell cmdlet:
Remove-NetFirewallRule -DisplayName "HelloWorld"
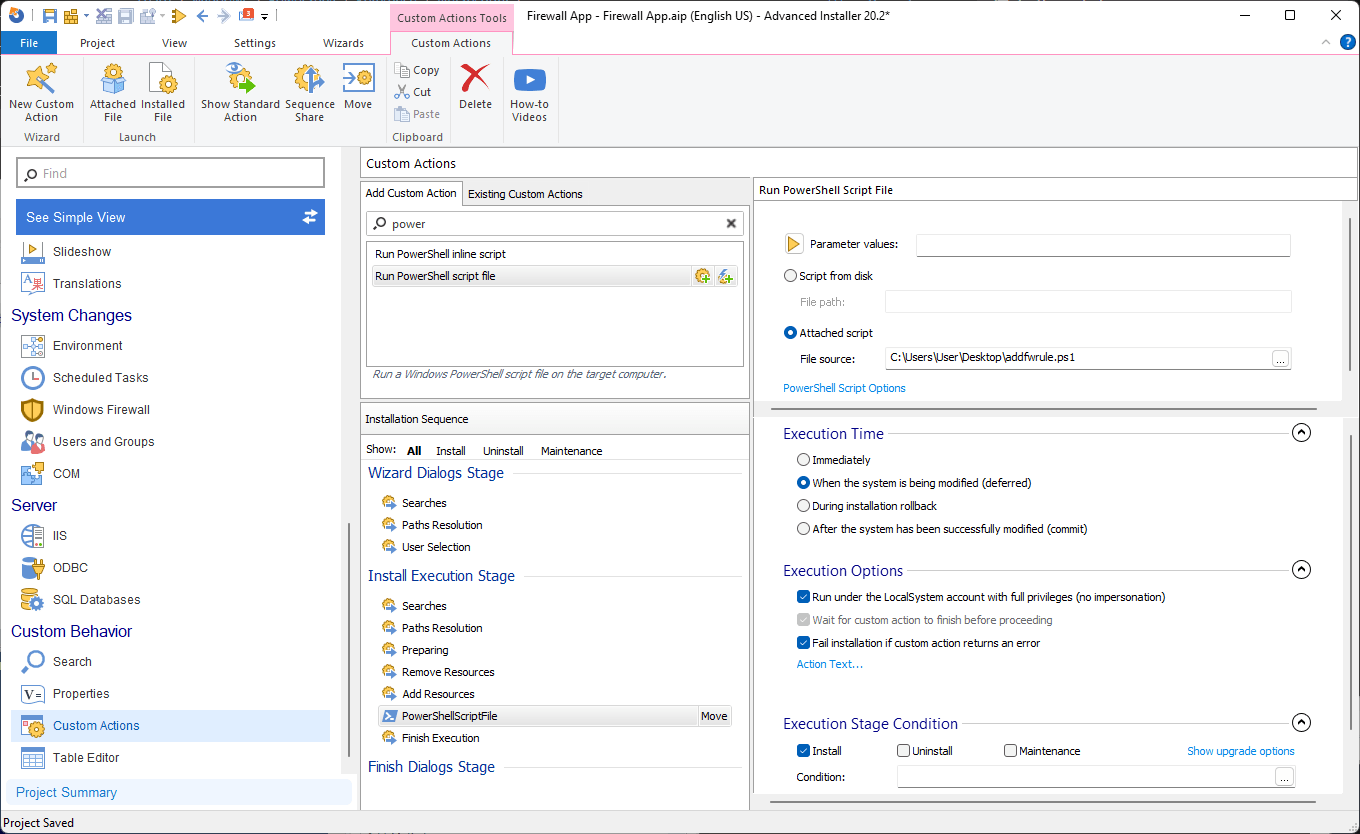
To integrate the PowerShell scripts, follow these steps:
- Open Advanced Installer and go to the Custom Actions page.
- Find the Run PowerShell script file option and specify the location of the PowerShell script.
- Configure the custom action to execute as shown below:
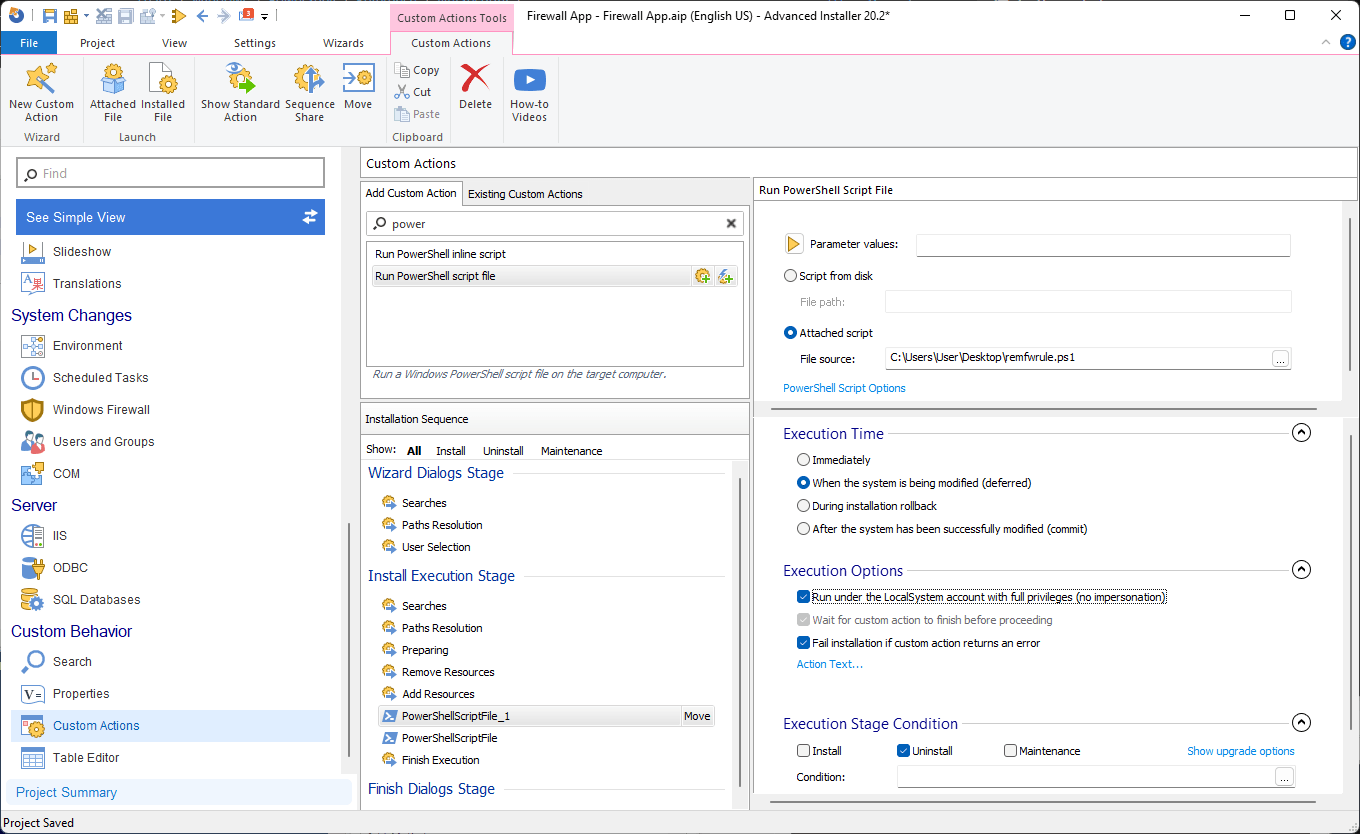
To add the remove firewall PowerShell script, follow the same steps as above and perform the following configurations:
How to Define Firewall rules with Advanced Installer?
For those who prefer a code-free approach, Advanced Installer offers a simplified method to add firewall rules. Follow these steps:
- Navigate to the Windows Firewall page in Advanced Installer.
- Click on "New Rule" to open a window where you can define the necessary details for your exception.
- Specify the direction, display name, program path, protocol, and other settings directly through the GUI.
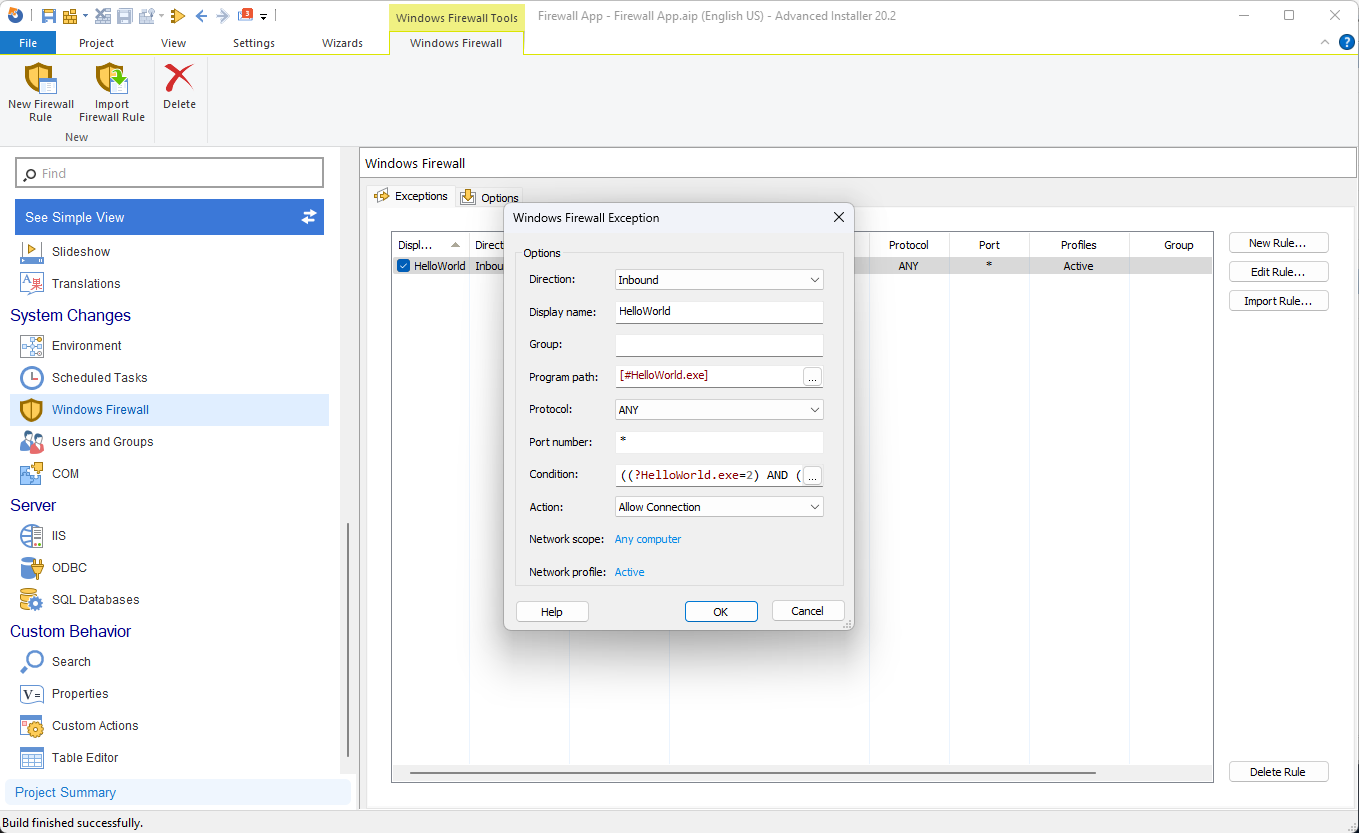
You're done!
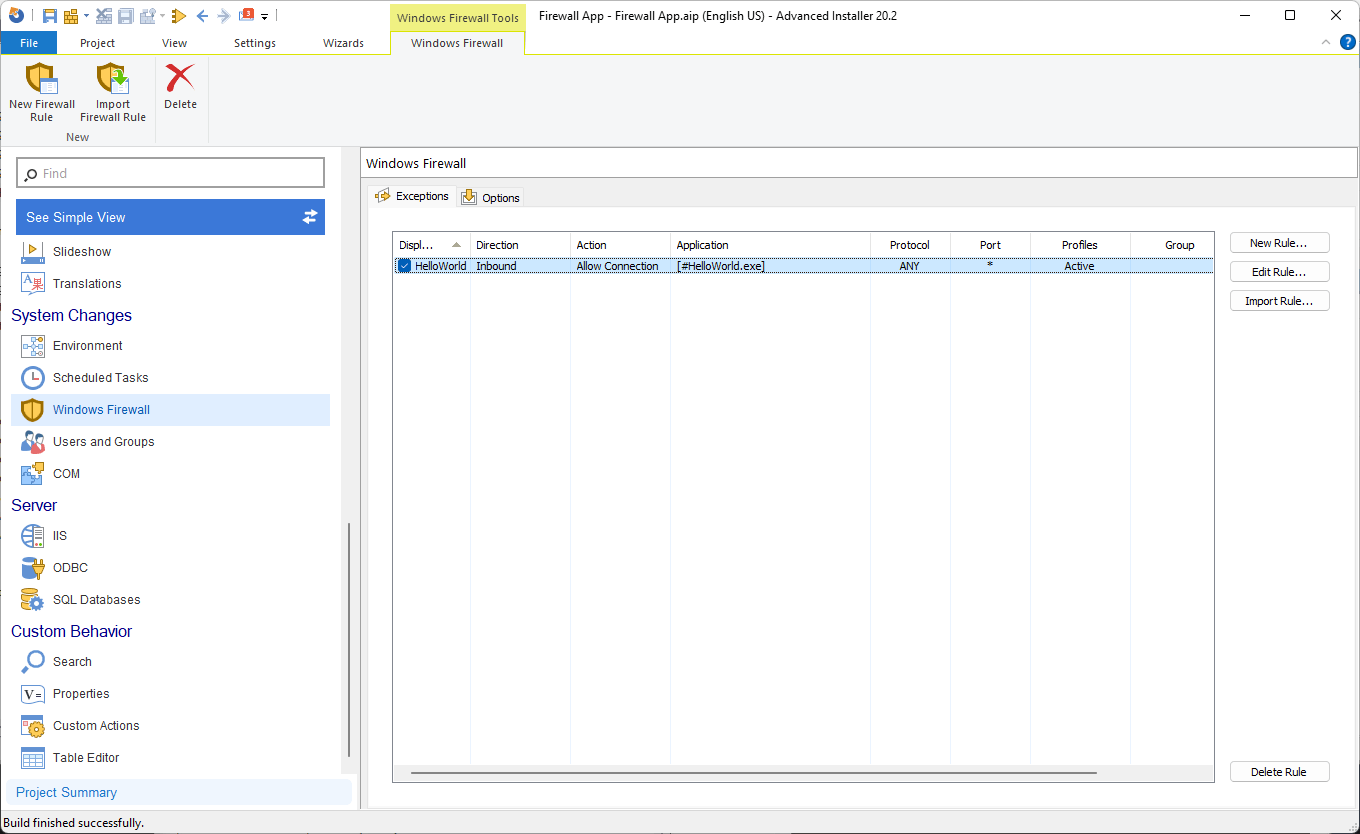
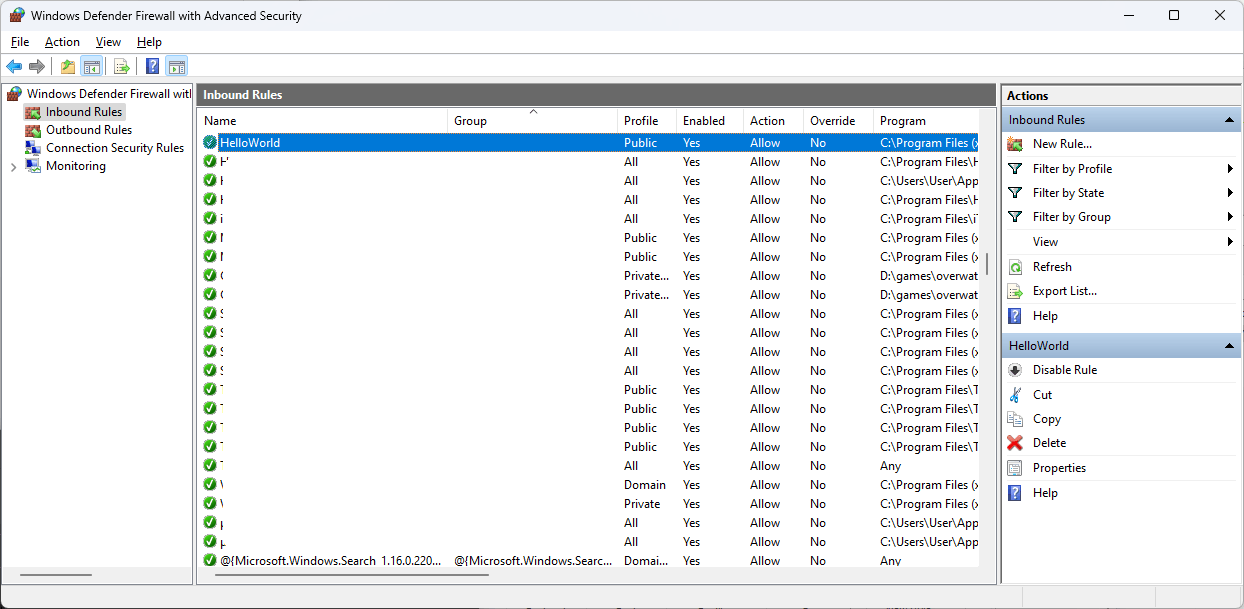
All that's left to do is build and install the MSI package. After the installation, if we check the Inbound Rules, our rule is there:
Get started with Advanced Installer's 30-day free trial and configure your firewall rules for enhanced security!
Conclusion
In the end, you can choose between using code or taking a streamlined approach with Advanced Installer to define firewall rules.
Advanced Installer automatically creates the exception during installation and removes it during uninstallation, eliminating the need for separate actions.
We hope you found this guide useful and you manage to configure firewall rules effectively.
