How to repackage your application in Windows Sandbox VM
Advanced installer Repackager allows you to repackage your application in multiple environments, such as the host machine, different types of virtual machines like VMware, Hyper-V, and now Windows Sandbox.
In this article, we will tackle what Windows Sandbox is, how it works, how to activate it, and how you can use Advanced Installer to repackage your application in Windows Sandbox.
What is Windows Sandbox
Windows Sandbox is an integrated feature available in select editions of Windows 10 and Windows 11. It provides users with a secure and isolated environment for running applications. With Windows Sandbox, you can safely execute untrusted software without compromising your system's security.
Windows Sandbox operates as a lightweight virtual machine, ensuring that any activities performed within it are contained and separate from the host operating system. This isolation allows you to install and test potentially harmful applications, visit suspicious websites, or open unknown files without risking the integrity of your computer.
How Does Windows Sandbox Work
When you launch Windows Sandbox, it creates a temporary desktop environment that is completely separate from your main system. Any changes made, files downloaded, or software installations performed within the Sandbox are confined to that session and do not persist after it is closed. This disposable nature ensures that your system remains unaffected, as the Sandbox starts fresh each time you use it.
The key advantages of Windows Sandbox include:
Isolation: The Sandbox's isolated environment prevents any malicious software or actions from impacting your primary system or compromising its security.
Disposable: Each Sandbox session begins with a clean state and resets upon closure. This eliminates any changes made within the Sandbox, effectively safeguarding your host system from potential threats.
User-Friendly: Windows Sandbox is designed for ease of use, requiring no complex setup or configuration. It comes pre-installed on compatible Windows editions, providing a seamless experience.
Here at Advanced Installer, we considered those reasons and decided to implement the feature allowing you to repackage your application in Windows Sandbox.
System Requirements
- Only the following operating systems are supported: Windows 10 Pro, Enterprise, or Education edition, Windows 11 Pro or Enterprise edition
- Your CPU must support virtualization technologies, specifically Intel Virtualization Technology (Intel VT) or AMD Virtualization (AMD-V) with Second Level Address Translation (SLAT). Most modern processors have these capabilities, but you should check your processor's specifications to ensure it supports virtualization
- A minimum of 4 gigabytes (GB) of RAM, but more is recommended for better performance. Keep in mind that the RAM allocated to the Sandbox will not be available for other applications on your host system
- Disk space: at least 8 GB of free space
- BIOS/UEFI settings: Virtualization features need to be enabled in your computer's BIOS or UEFI settings.
Activating Windows Sandbox on Windows 11: A Step-by-Step Guide
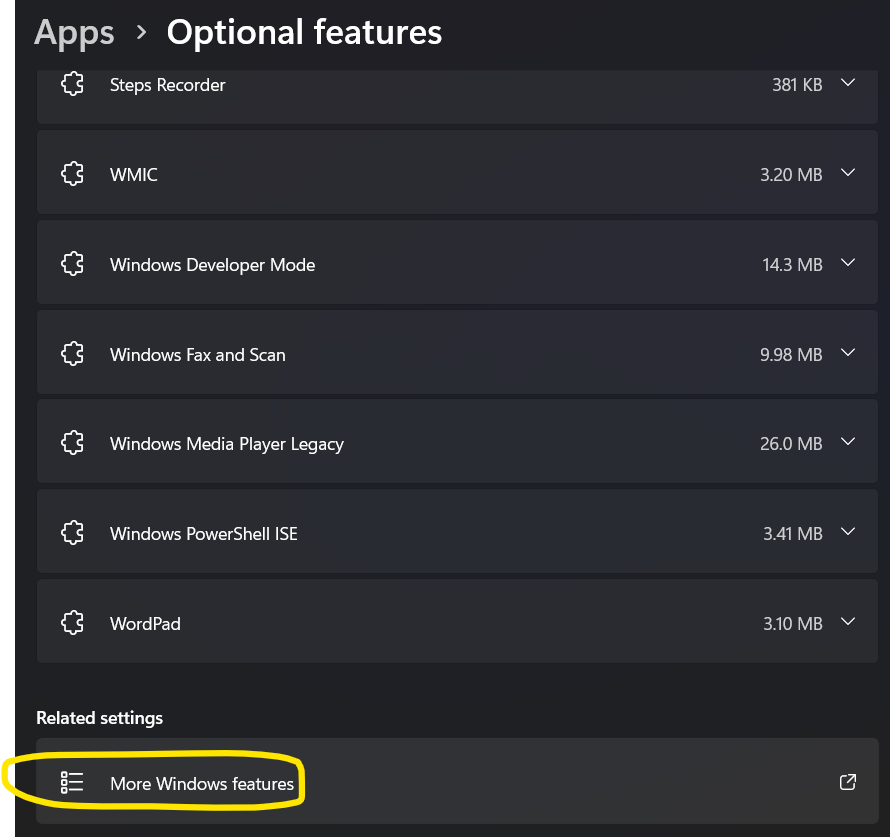
1. Begin by opening the Start menu and clicking on the "Settings" icon. You can also press the Windows key + I on your keyboard to open Settings directly. In the Settings window, select the "Apps" category, then choose "Optional features."

2. Click on "More Windows features”.
3. Scroll down or use the search bar to find "Windows Sandbox" in the list of optional features. Click on it to select it.
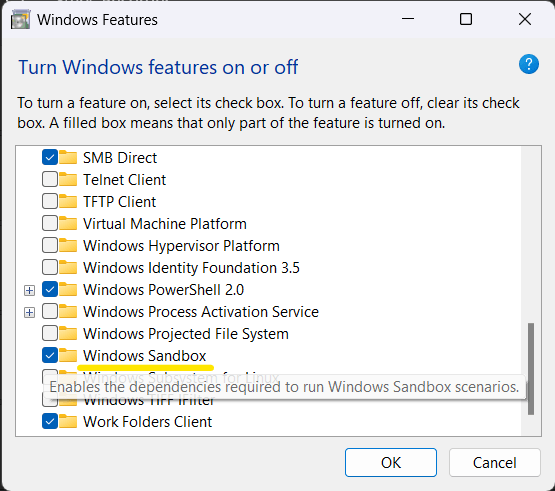
4. Hit the "Install" button, and Windows will proceed to install the necessary components for Windows Sandbox. This process may take a few moments.
5. Once the installation is complete, you might be prompted to restart your computer. If so, go ahead and restart to ensure the changes take effect.
6. After the restart, open the Start menu and search for "Windows Sandbox." Click on the "Windows Sandbox" app that appears in the search results.

7. Windows Sandbox will launch, providing you with a secure and isolated environment where you can confidently run untrusted applications.
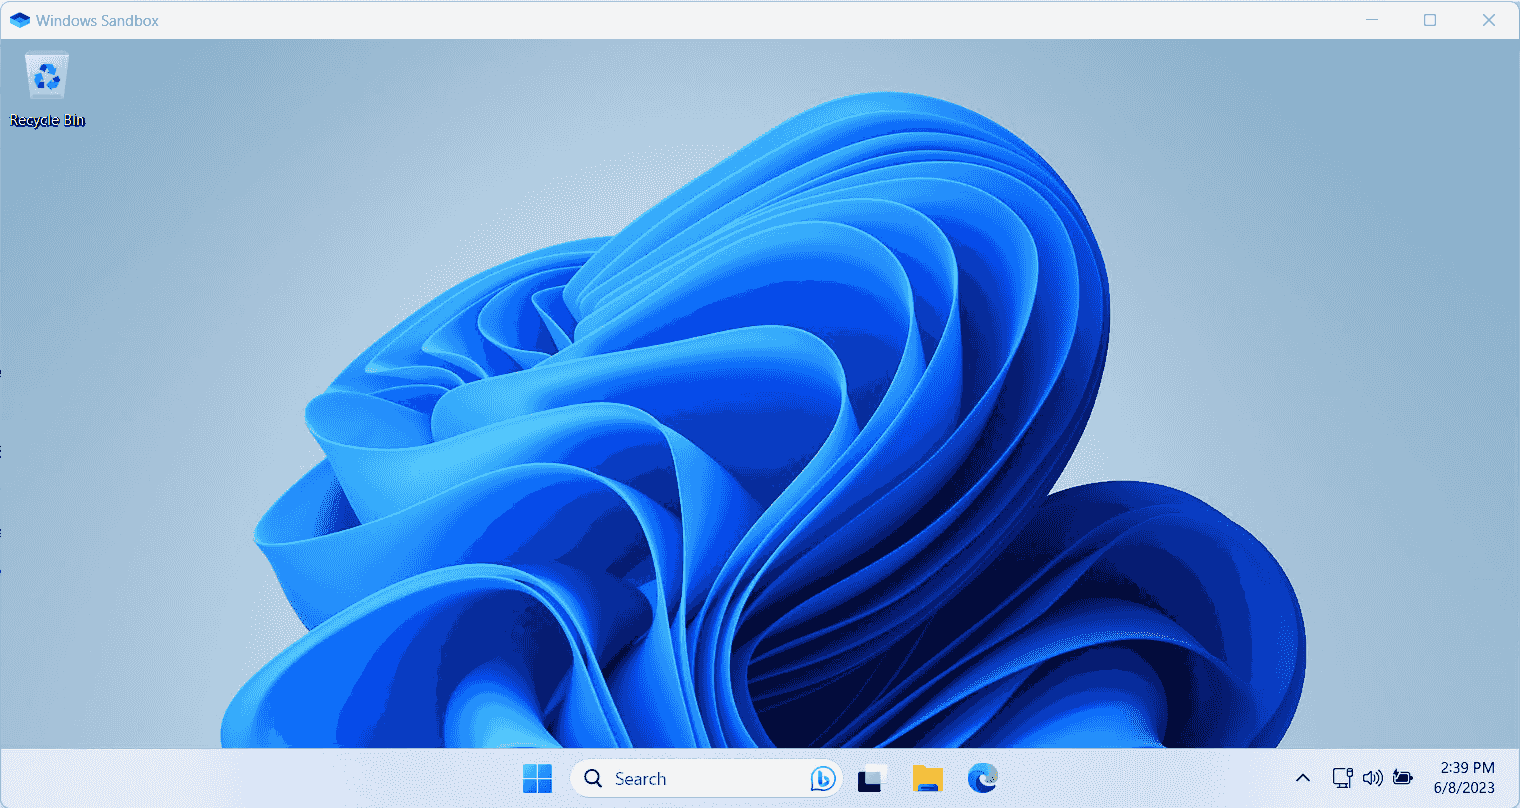
Note: Windows Sandbox availability on Windows 11 may vary depending on the edition and specific build. It is recommended to check the official documentation or system requirements to ensure compatibility.
Repackaging an application with Advanced Installer Repackager in Windows Sandbox
Starting with Advanced Installer version 20.7, you can now repackage your application in Windows Sandbox.
1. Begin by opening Advanced Repackager, then choose Capture Setup.
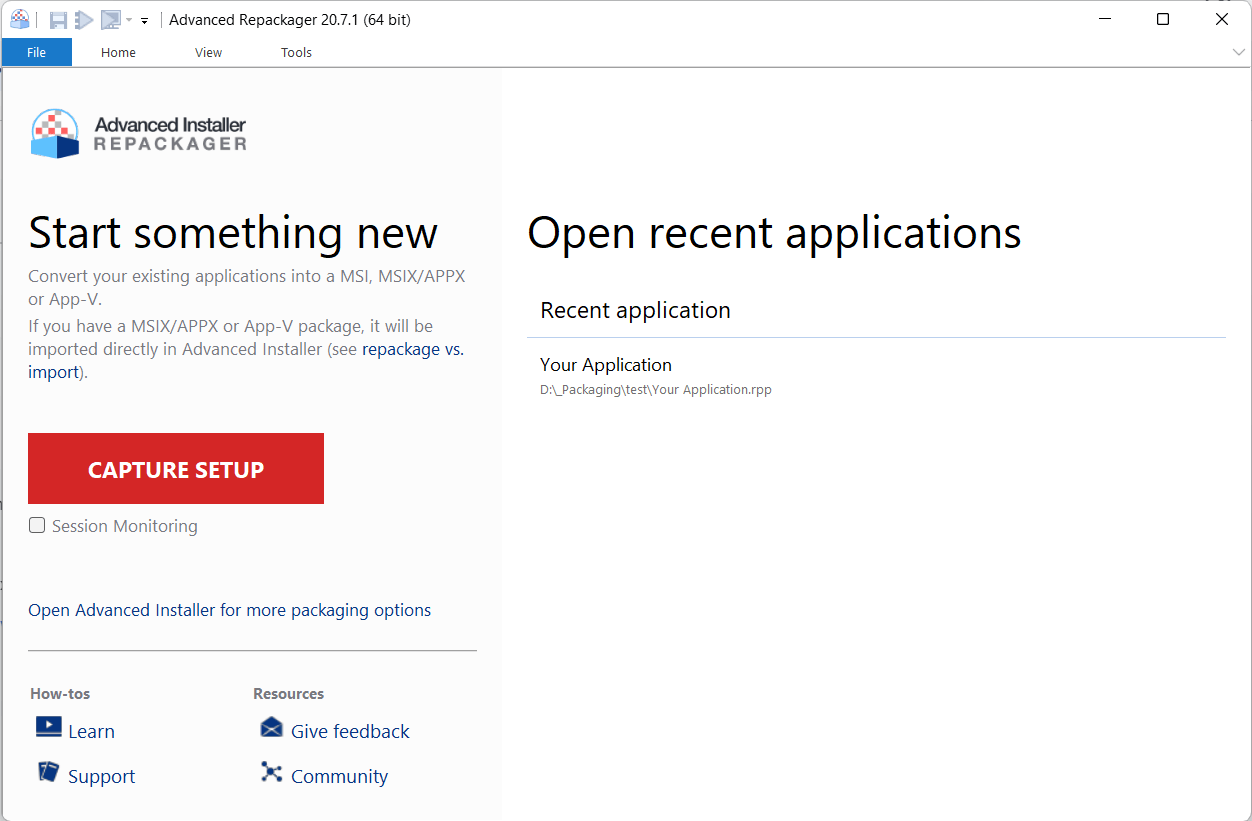
2. Next, browse for the setup exe you want to repackage.

3. Click Start in Sandbox, then choose the location where you want to save the repackager project.

4. Advanced Repackager will open Windows Sandbox and begin the initial system snapshot
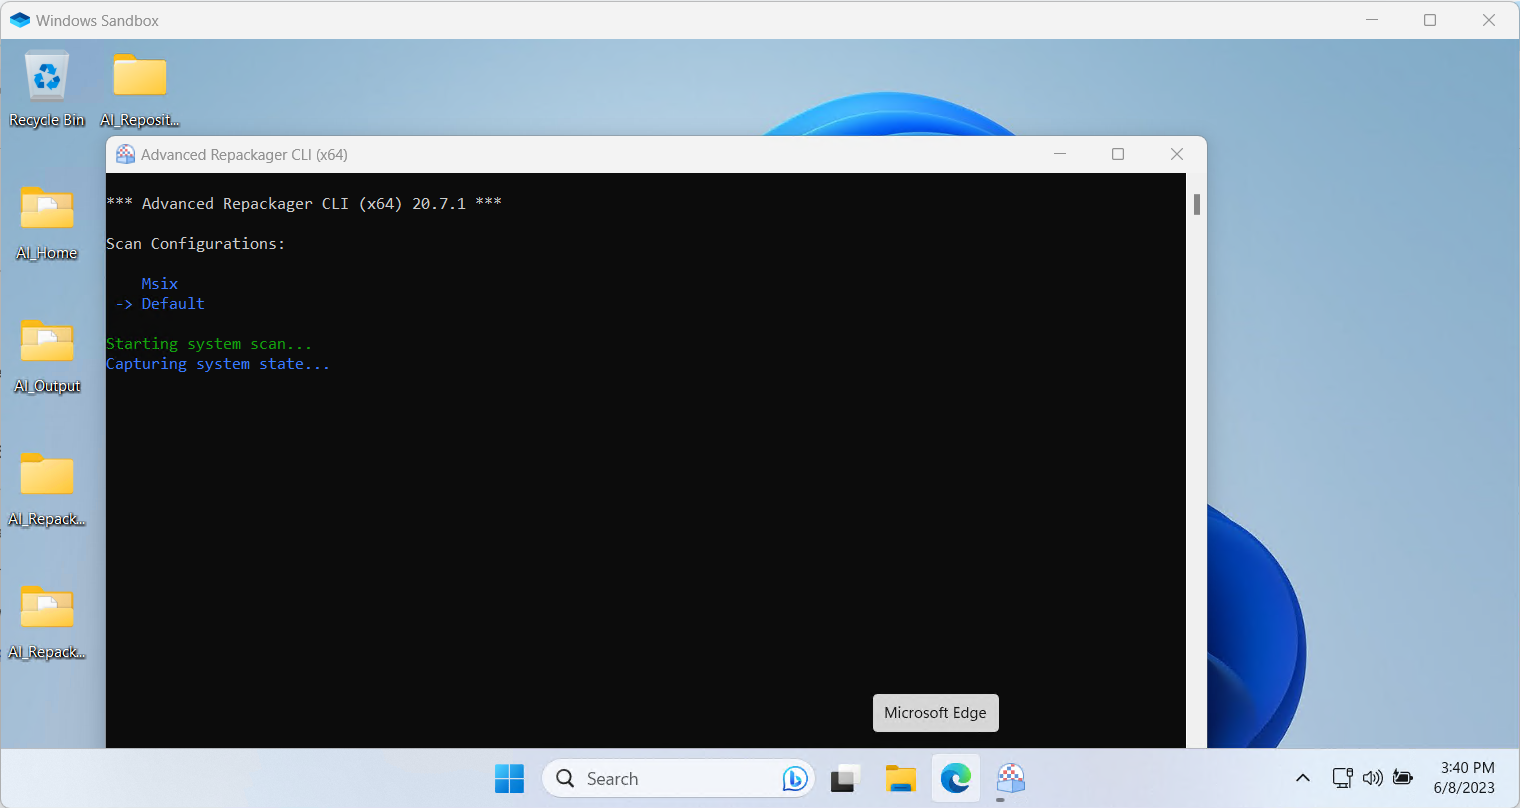
5. Once you are finished going through the install wizard, press enter to continue with the post-install scan.
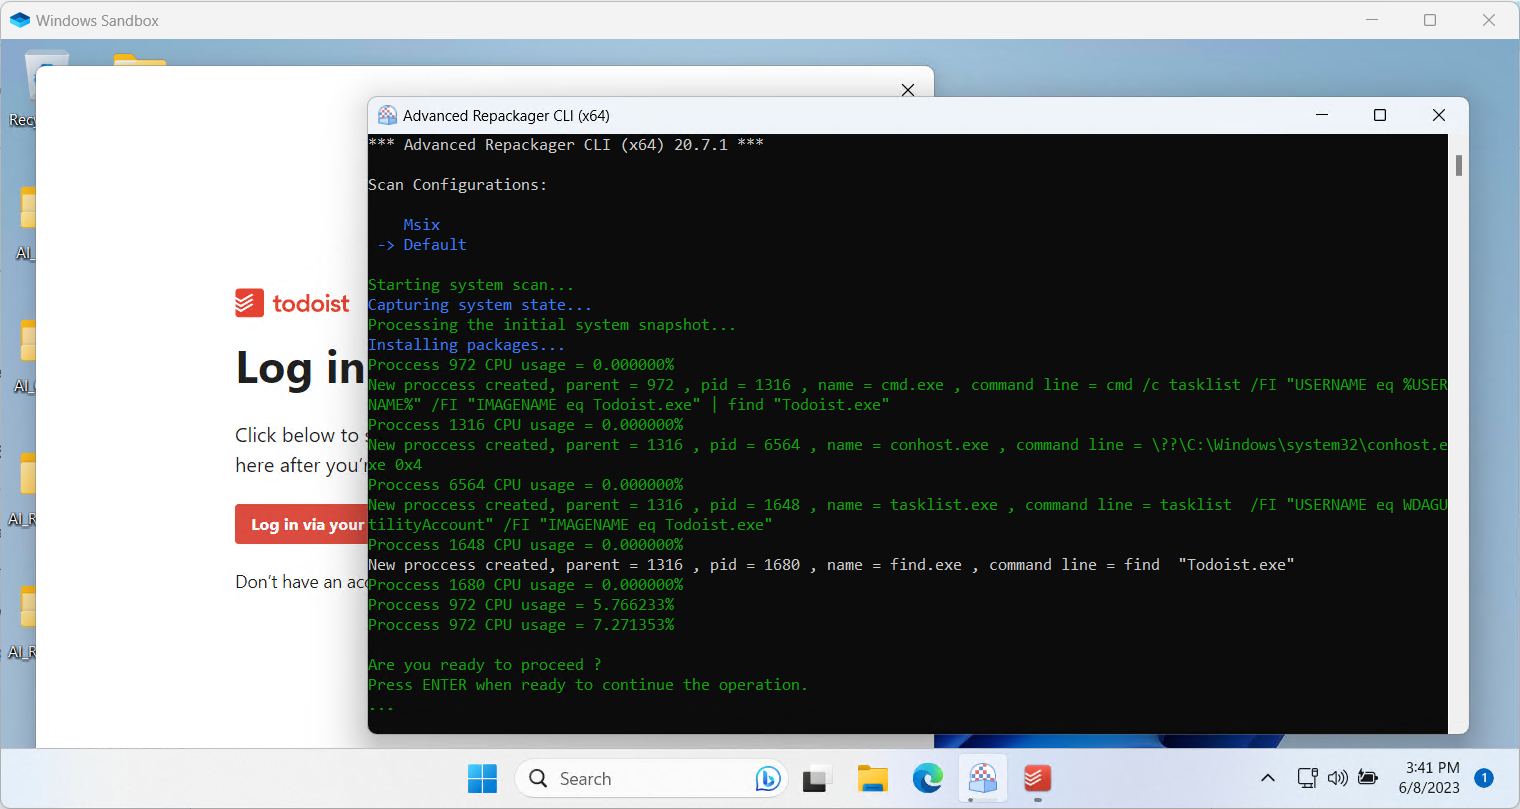
6. Once the operation is finished, on Advanced Repackager, you can see the repackage results.
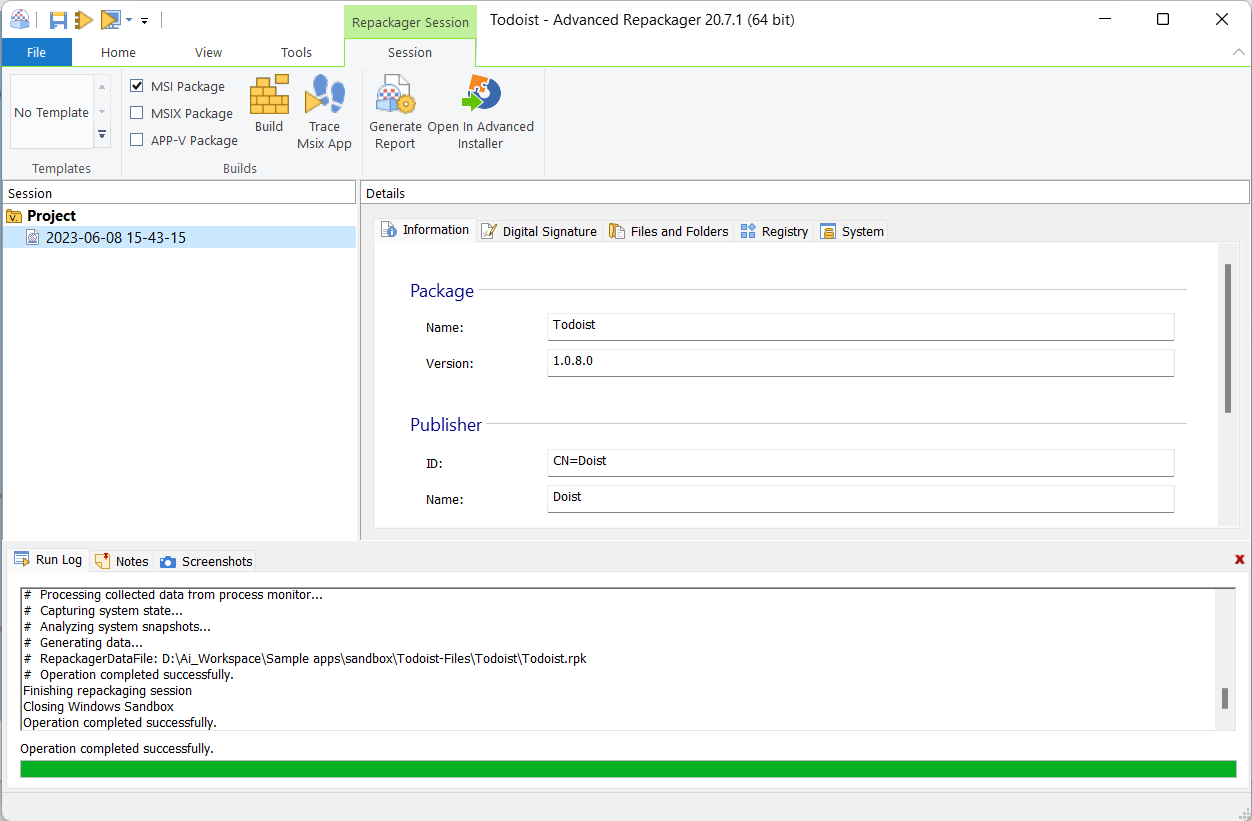
7. Now you are done with the repackaging process. Next, you can push the Open in Advanced Installer project and begin your installer customization and build.
We’ve seen that Advanced Installer’s built-in support for repackaging in Windows Sandbox provides an isolated environment for repackaging your applications.
There is no longer a need to manage large virtual machines, and it offers a secure, controlled environment for your capture process. By repackaging applications in Windows Sandbox, you'll improve your repackaging processes, streamline deployment, and significantly mitigate risks to your primary system.
To better illustrate the simplicity and effectiveness of this feature, we have prepared a video that demonstrates just how straightforward it is to enable and use repackaging in Windows Sandbox. We trust that this guide, together with our video, helps improving your repackaging experience.
