How to Integrate EULA in MSIX-Deployed Applications
Microsoft introduced new guidelines for configuring apps deployed via MSIX packages, different from those for traditional MSI packages. These include the app configuration when the user first launches it. With MSI packages you could hand over the app configuration to the installer. With MSIX you have to add code to allow configuration at the app’s initial launch because the installation sequence is no longer customizable
In this article, I will demonstrate how to display a license agreement dialog for a Windows Forms application. Then, I will show you how to package the app as an MSIX using Visual Studio (VS) and the Advanced Installer extension for VS.
Create the Application
First things first, let’s create the Windows Forms application in Visual Studio:
1. Navigate to File → New → Project.
2. Choose the Windows Forms App template from the list of templates.

3. Set a name for the project, select the .NET version and press the ‘Create’ button.
Add the License Agreement Form
Now, let’s add the end-user license agreement form:
- To add a new form to the application: right-click on the project → Add → Form → name it EULA.
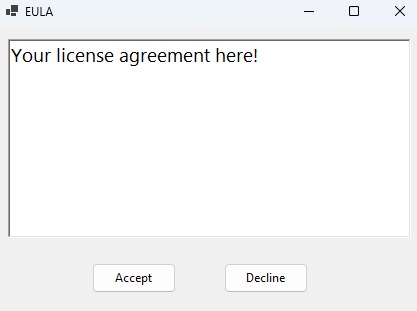
- Insert the license agreement text into a RichTextBox or a TextBox set to read-only.
- Add two buttons: ‘Accept’ and ‘Decline’.

Manage the License Agreement
Step 1. Check the system registry to determine if the user has accepted the license agreement upon app launch.
Use the following code to search for the 'licenseAgreement' registry entry:
RegistryKey appSettingsKey = Registry.CurrentUser.OpenSubKey(@"Software\Your Company\Your Application");
bool isEulaAccepted = false;
 if (appSettingsKey != null)
 {
     var eulaStatus = appSettingsKey.GetValue("licenseAgreement") as string;
     isEulaAccepted = eulaStatus == "Accepted";
     appSettingsKey.Close();
}Step 2. If the user hasn’t accepted the license agreement, display the EULA form and wait for their response.
if (!isEulaAccepted)
{
    using (EULA EulaForm = new EULA())
    {
        if (EulaForm.ShowDialog() != DialogResult.OK)
        {
            return;
        }
    }
}Step 3. Record the license agreement acceptance in the registry if the user accepts it.
private void btnAccept_Click(object sender, EventArgs e)
{
    RegistryKey appSettingsKey = Registry.CurrentUser.CreateSubKey(@"Software\Your Company\Your Application");
    appSettingsKey.SetValue("licenseAgreement", "Accepted");
    appSettingsKey.Close();
    this.DialogResult = DialogResult.OK;
    this.Close();
}Step 4. Close the app if the user declines the license agreement.
private void btnDecline_Click(object sender, EventArgs e)
{
    this.DialogResult = DialogResult.Cancel;
    MessageBox.Show("You must accept the EULA to use this application.", "EULA Declined", MessageBoxButtons.OK, MessageBoxIcon.Information);
    Application.Exit();
}Create the MSIX Package for the Application
Once the license agreement feature is implemented and the app is ready to be deployed, let me guide you through creating the MSIX package for the application.
Before going through the next steps, ensure that you’ve added the Advanced Installer extension to Visual Studio. If you haven’t already, you can download it from the Visual Studio Marketplace.
Now, it’s time to create the setup project for the application:
1. Right-click on the project solution → Add → New Project.
2. From the list of templates, select the Advanced Installer Project template.

3. Set a name for the project and click the ‘Create’ button.
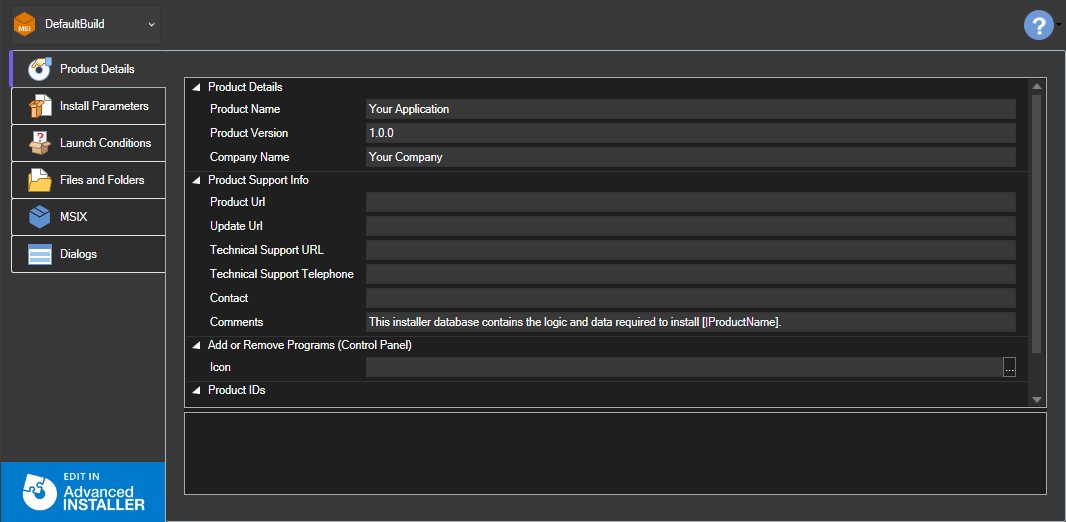
Once the project is created, you can access the project viewer by selecting the .AIP file. In the project viewer, you can edit basic information regarding your installer.

Add the Project Output
The next step is to add the project output:
- Open the project viewer and go to the Files and Folders tab.
- Click the ‘Add Project Output’ button and choose one of the two options based on your scenario:
- If you already have a folder publish profile, simply select it.
- If you do not have a folder publish profile, you’ll need to create one first. Once created, return to the Files and Folders tab, click the ‘Add Project Output’ button again and select the newly created publish folder.
Add MSIX Build to the Setup Project
By default, the Advanced Installer Project generates an MSI package.
To generate an MSIX package instead, you need to add an MSIX build:
1. Go to the MSIX tab in the viewer and click on the ‘Add UWP MSIX Build’ option.
Please note that adding an MSIX build is a feature available starting with the Professional edition of Advanced Installer.
Start Advanced Installer’s 30-dat free trial and get access to all features.
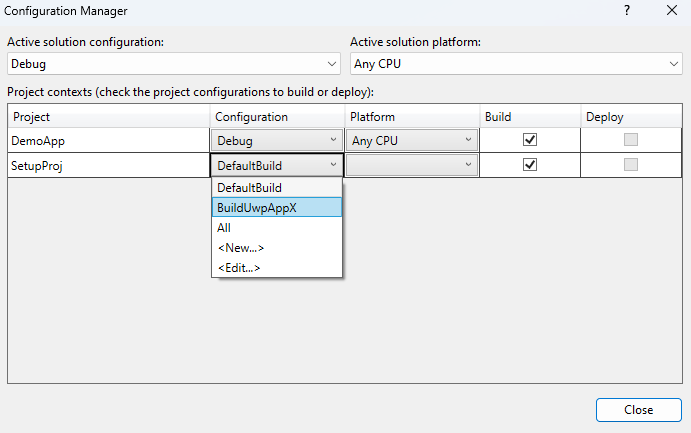
2. After adding the MSIX build, you must switch the installer project configuration:
- Navigate to the Build Menu → Configuration Manager.
- Switch the installer project configuration from DefaultBuild to <Newly added MSIX Build>.

Digitally Sign the Package
The last step is to digitally sign the package. Here’s how to do it:
- Open the Digital Signature tab.
- Check the ‘Enable signing’ option.
- Select your certificate from a local file on your disk or import it from the store.
- If you do not have a certificate, simply click the 'Create' button to create one.

Build and Install
After completing all the steps above, build the project to generate the MSIX package. Then, run it to install the application.
At first launch, you should be prompted to accept the license agreement to use the application. Once accepted, you’ll be able to use the application.
Conclusion
In conclusion, adapting to the new MSIX packaging format requires a shift in how we handle initial app configurations, such as presenting license agreements. As we've seen, this process involves a few key steps: creating a Windows Forms application, adding a license agreement form, managing user responses to the agreement, and finally, packaging the application as an MSIX using Visual Studio and Advanced Installer.
By following the steps outlined in this article, developers can ensure that their applications comply with the requirements of MSIX technology while maintaining a user-friendly experience. The registry-based approach for tracking the acceptance of the EULA, along with the straightforward integration with Advanced Installer, streamlines the deployment process.
As MSIX continues to grow in popularity, its benefits in terms of security, reliability, and ease of deployment make it an attractive option for software distribution. Understanding and implementing these new guidelines not only enhances the user experience but also ensures that your applications are future-proof in the ever-evolving landscape of software development and distribution.
