How to Add C++ Dependencies to Your .NET MAUI MSIX Package
.NET MAUI (Multi-platform App UI) is a cross platform framework designed for creating native mobile and desktop applications using C# and XAML. With the .NET MAUI platform, you can create applications that run on Android, iOS, MacOS, and Windows from a single code-base.
The best part is that .NET MAUI is open source and it’s actually the next step of Xamarin.Forms which was extended for mobile and desktop applications.
In this article, let’s have a look at:
- How you can build an MSIX for a .NET MAUI application.
- How to add C++ dependencies into your MSIX package by importing it into Advanced Installer
How to Export .NET MAUI as MSIX in Visual Studio
Before we dive in, make sure to go through this Tutorial: Create a .NET MAUI app that Microsoft shared with the community, and download the full source code since we’ll be using it in this article.
It's important to have at least Visual Studio Community 2022 with the required components for .NET Multi-platform App UI Development.
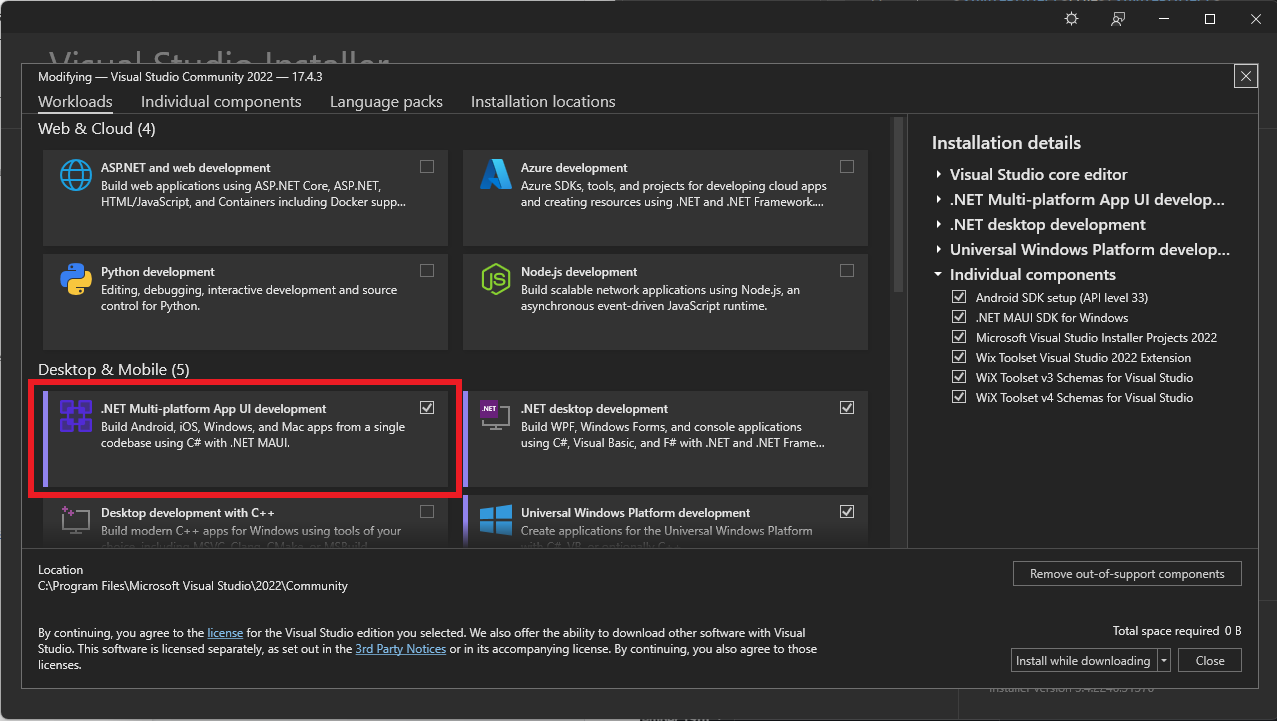
Once we download the example from Microsoft and open the SLN, we need to build the MSIX.
To do that, go to View > Terminal in Visual Studio.
Once the terminal is opened, type the following command:
msbuild .\Notes.csproj /restore /t:Publish /p:TargetFramework=net6.0-windows10.0.19041 /p:GenerateAppxPackageOnBuild=true /p:Platform=x64 /p:AppxPackageSigningEnabled=true /p:PackageCertificateThumbprint="YOURTHUMBPRINT" /p:PackageCertificatePassword="YOURPASSWORD"
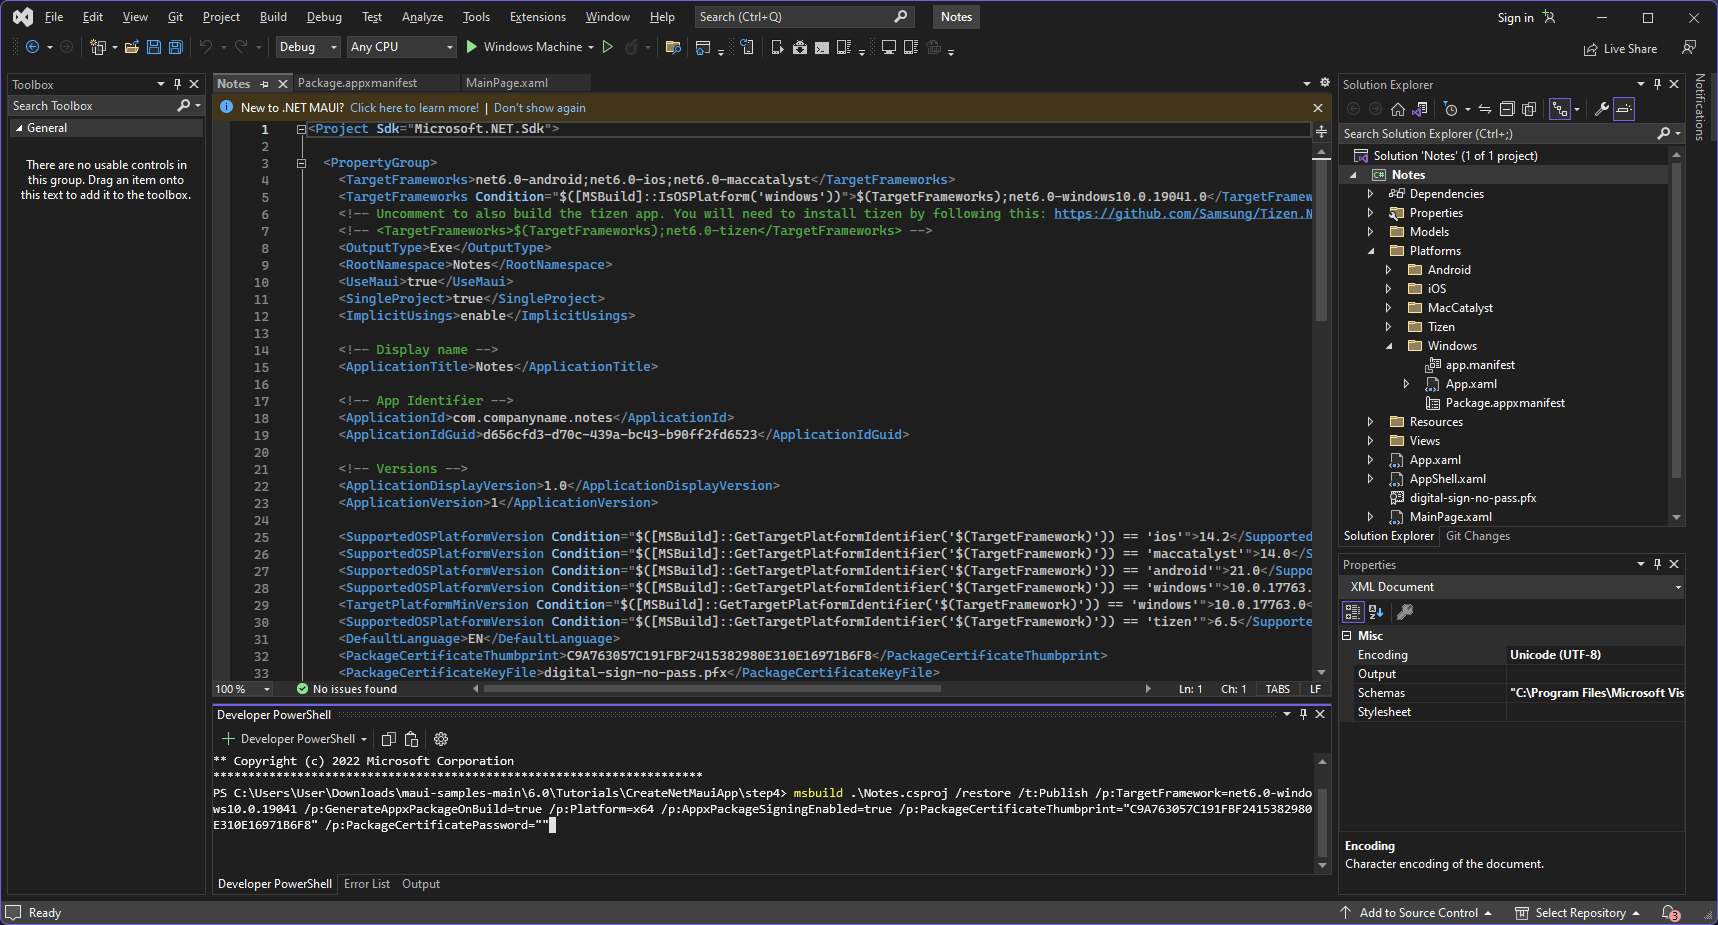
The command line above includes a certificate thumbprint and password since it’s mandatory for the MSIX to be digitally signed before it’s installed.
Use the following Get-PfxCertificate PowerShell cmdlet to learn your certificate's thumbprint:
Get-PfxCertificate -FilePath "Path to certificate"
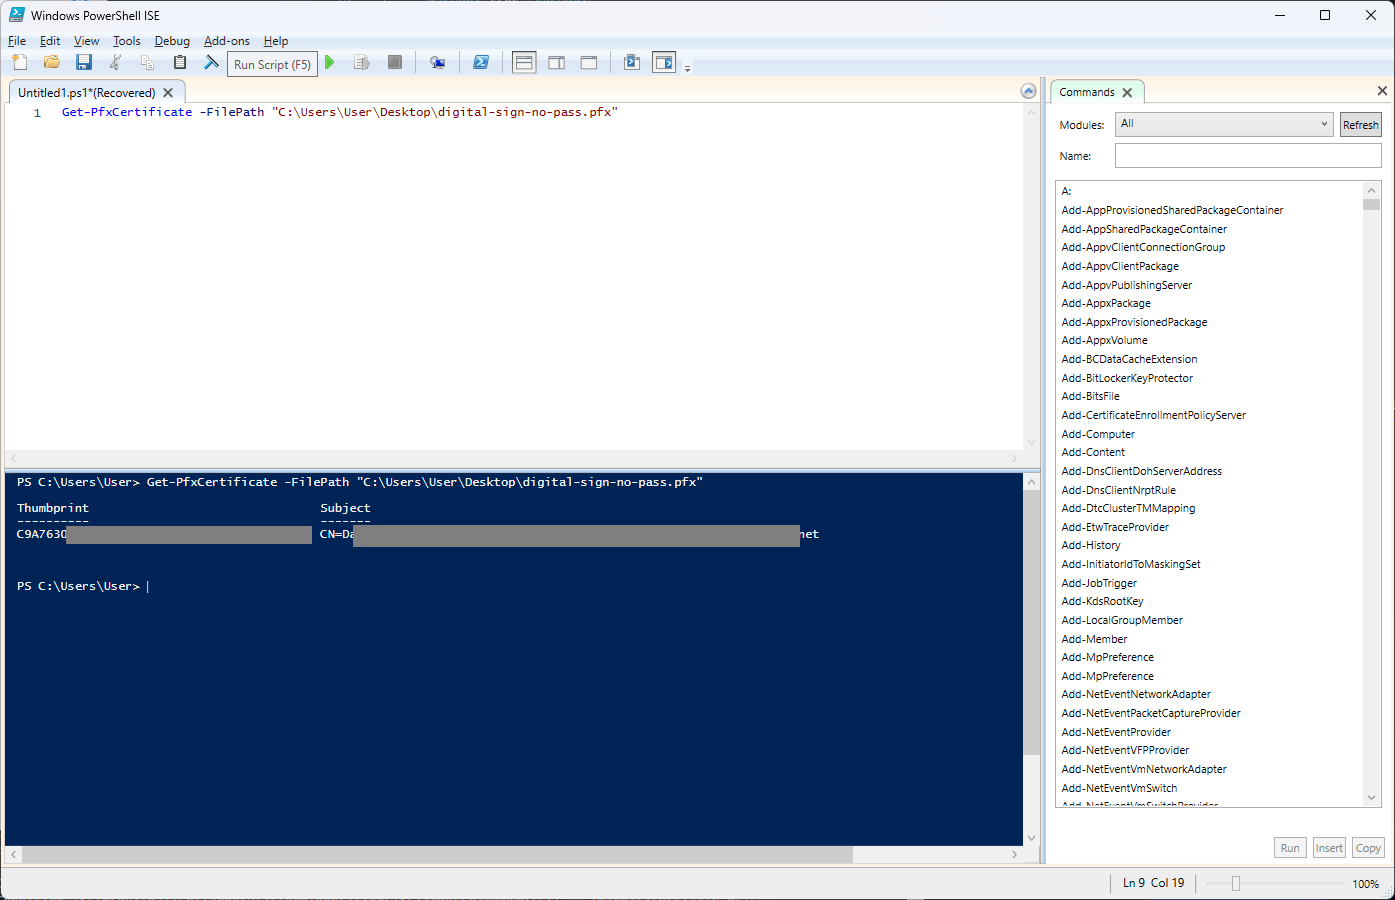
Once you execute the command, you will find the MSIX package in the “bin folder” of the solution.
Import your MSIX for your .NET MAUI in Advanced Installer
Once the MSIX package for the .NET MAUI is built, let’s import it in Advanced Installer by navigating to Windows Store > Import Windows Store App.
You may wonder why we didn't choose the Import > MSIX Package option in Advanced Installer. That’s because the output MSIX package from Visual Studio is a native Windows Store App.
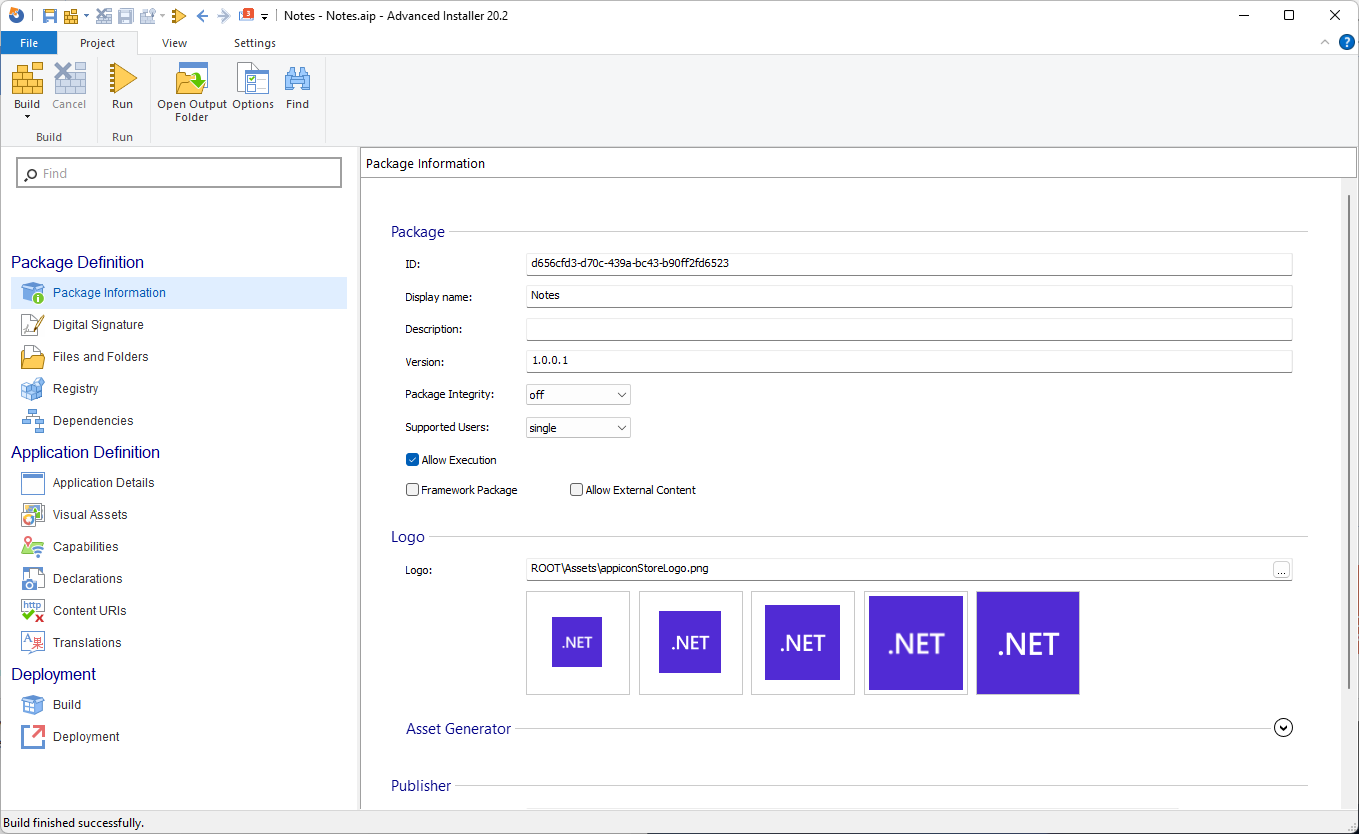
Now that you have your MSIX package imported in Advanced Installer, you can change and customize the package as you wish, for example:
- Adding more files,
- Changing registry entries,
- Adding dependencies,
- Declaring application details or
- Adding other types of declarations such as Startup Task, Firewall rules, and so on.
How to add VCLib MSIX dependencies
Microsoft offers C++ Runtime framework packages that enable desktop applications distributed through the Windows Store to reference the C++ runtime. These packages are distributed and updated through the Windows Store, and are managed in a similar manner to C++ UWP framework packages.
When your .NET MAUI requires C++ runtime libraries as dependencies, you can add them directly from Advanced Installer.
With the MSIX package imported into Advanced Installer, navigate to the Dependencies page and click on Add Dependency.
This will open a new window that gives you the possibility to declare a package that gets installed on the machine or an MSIX that is present on the disk.
For example, on my machine, the VCLibs v14 were previously installed, as you can notice below:
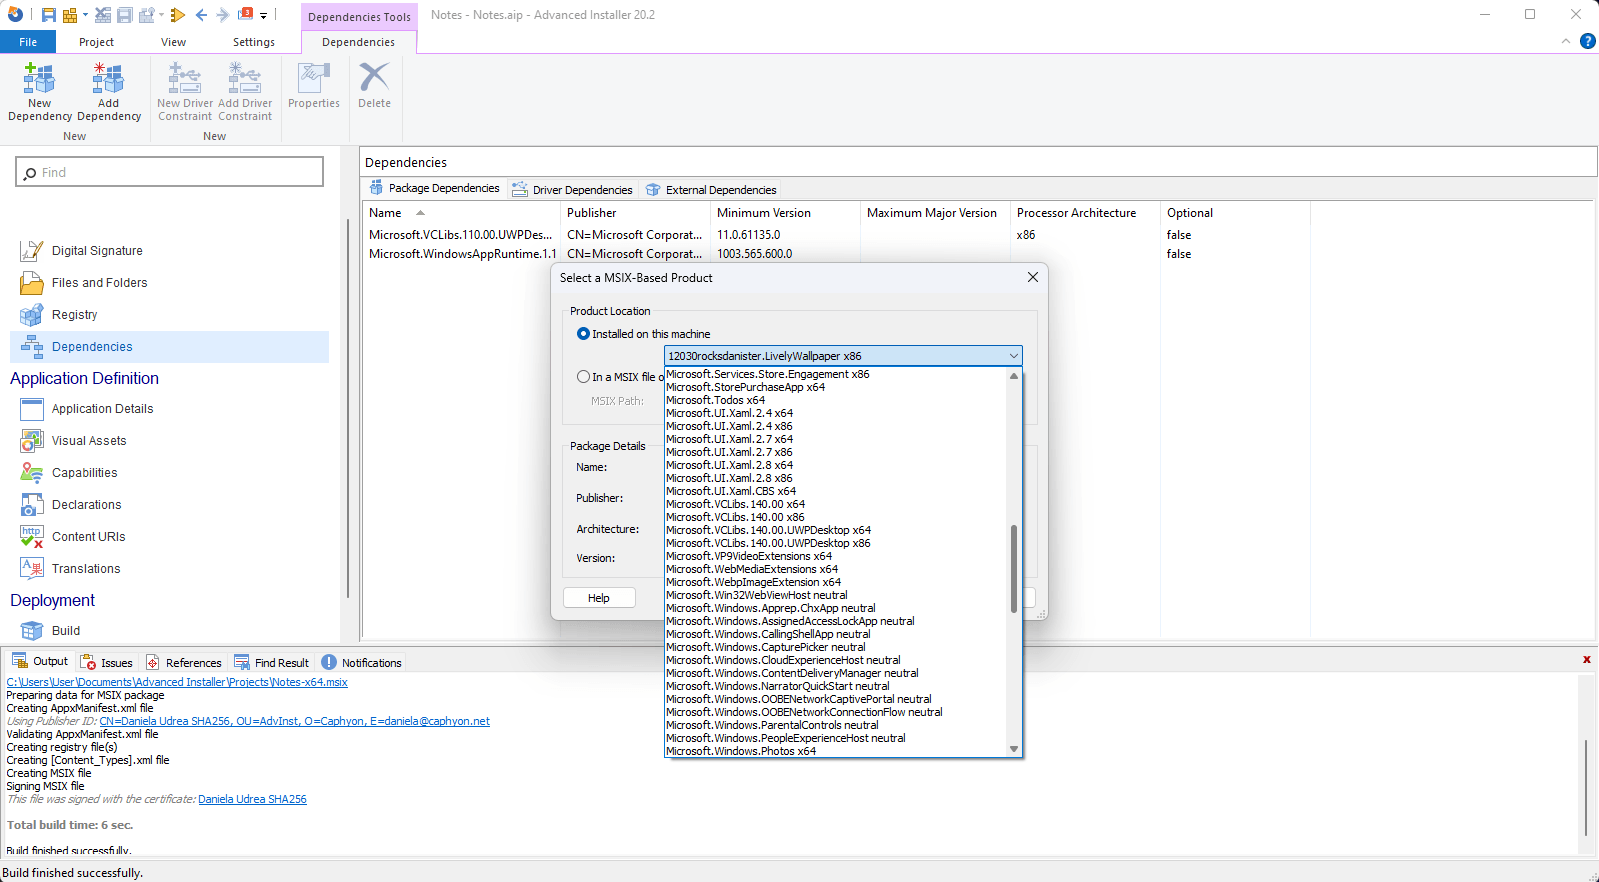
If you don’t have VCLib v14 installed on the machine, you can directly download the APPX files for them from Microsoft.
In this case, to add them in Advanced Installer you have to options:
1. You manually install the APPX files for the VCLib on your machine and then add them into the project as shown above
2. Or, choose the “In a MSIX file on disk” option and select the APPX File downloaded from Microsoft
If you need older versions of VCLib, Microsoft also offers the possibility to install the legacy v12 and v11, and you can find them here:
- C++ Runtime v11.0 framework package for Desktop Bridge (Project Centennial)
- C++ Runtime v12 framework package for Desktop Bridge (Project Centennial)
Even though these downloads are executables, Microsoft offers the necessary information you need to declare in your MSIX when adding these dependencies.
To manually add the information to your dependencies, you need to:
1. Go to the same Dependencies page in Advanced Installer
2. Click on New Dependency
3. Add the necessary information which is stated on Microsoft website: Name, Publisher and Min. Version.
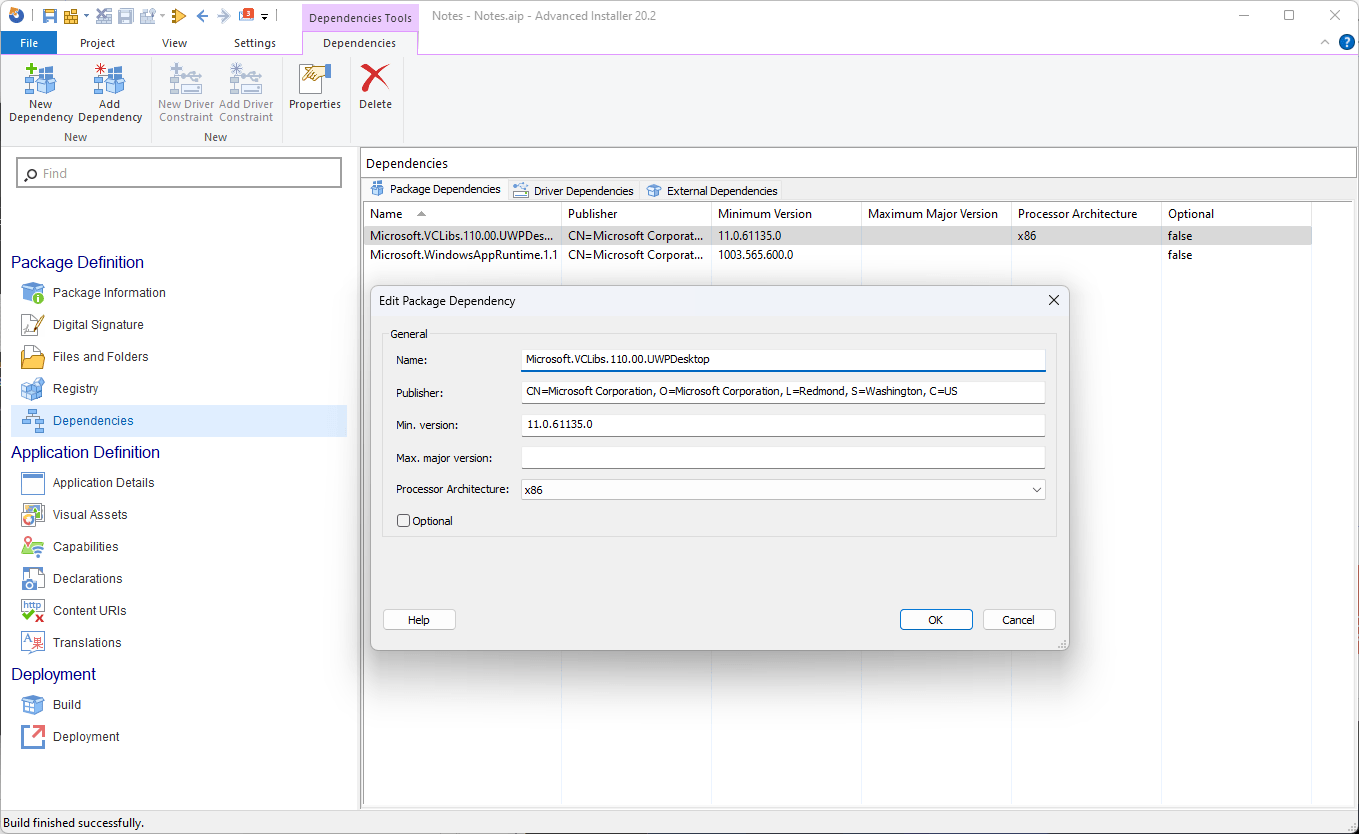
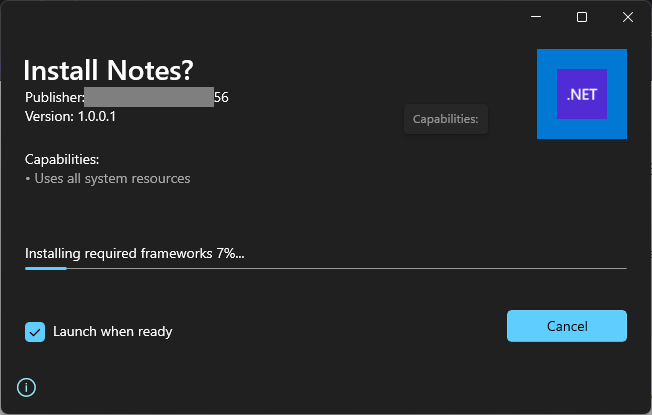
Now you can build and test the installation of your MSIX Packages. If the frameworks are defined correctly, the App Installer will let you know that it’s downloading the dependencies from Microsoft Store and installing them:
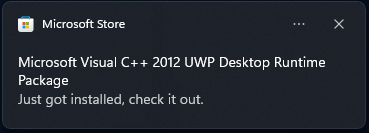
For each declared dependency, you will receive a toast notification once it's installed:
Alternative method for VCLib dependencies
There are cases where the VCLib dependencies might not get installed as presented above. Although it’s a rare scenario and we didn’t encounter many failures in our tests, you could think of an alternative way to package your .NET MAUI application together with the necessary dependencies. You can do that by creating an MSI Wrapper.
Advanced Installer lets you create an MSI wrapper for your MSIX/APPX applications by taking advantage of the predefined custom actions:
- Install MSIX package
- Uninstall MSIX Package
To add dependencies to your MSIX package, you have to:
1. Add your MSIX package into the Files and Folders page of a new project,
2. Navigate to the Custom Actions Page and add the Install MSIX package custom action into sequence,
3. Define your MSIX Path with the internal path of your MSIX and you're done.
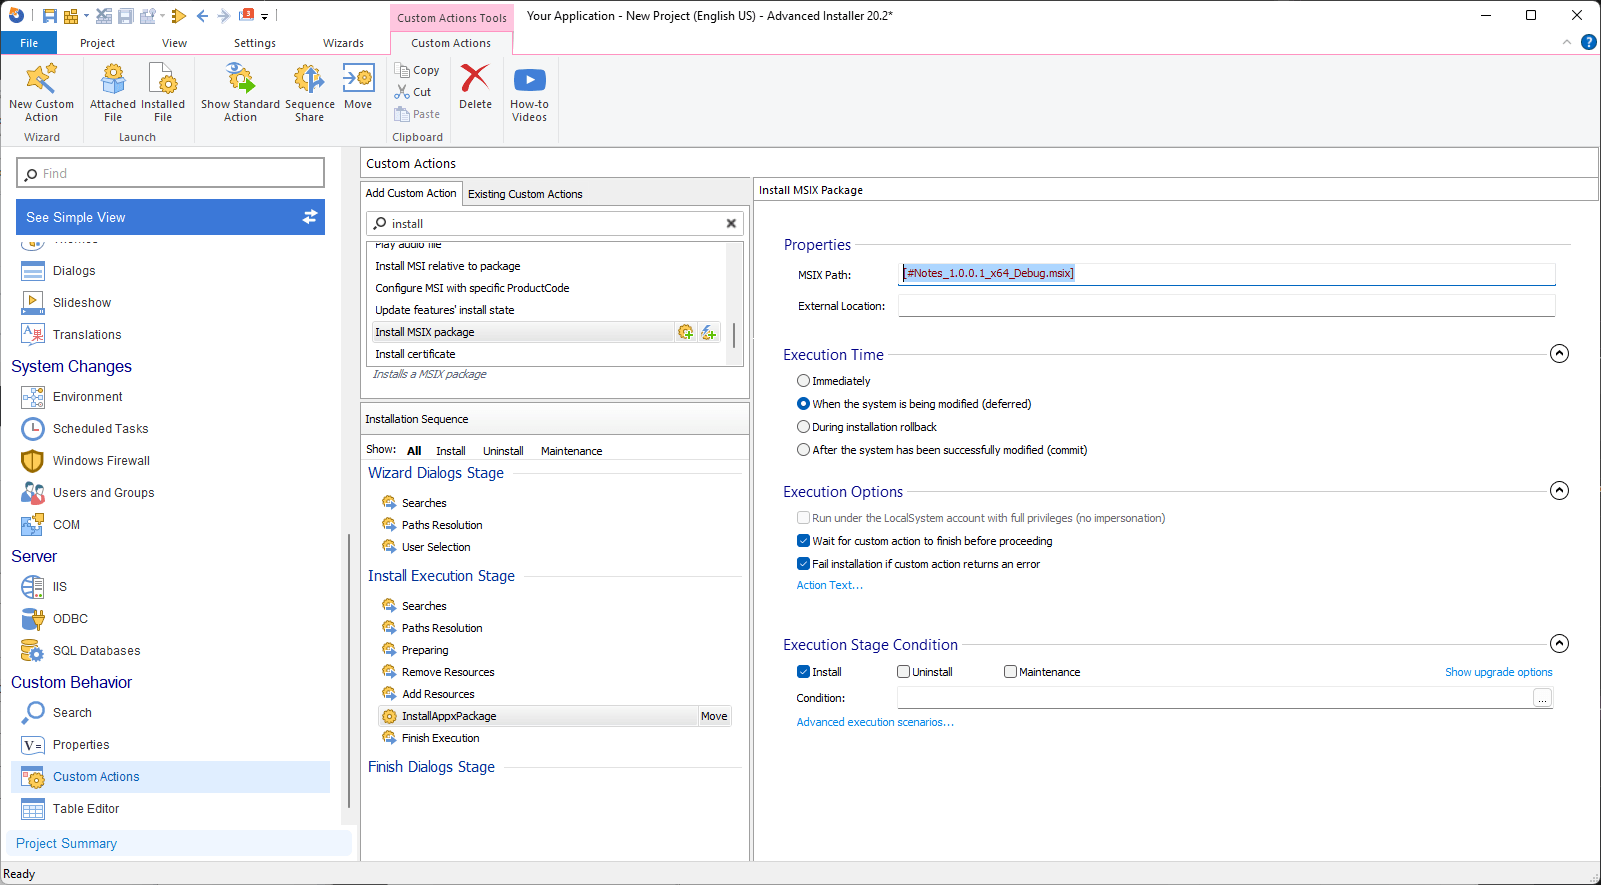
Basically, you repeat the process for each dependency, and at the end, you install your main MSIX package.
If you want to add the C++ v11 or v12 as a prerequisite, you need to use the Launch attached file custom action since these are EXE files.
Conclusion
In this article, we showed you how to build an MSIX package for a .NET MAUI application, and import it into Advanced Installer to add C++ dependencies to the MSIX package.
We also presented an alternative method for adding VCLib dependencies to your application.
If you're a developer looking to create cross-platform applications with ease, .NET MAUI is definitely worth exploring.
We hope you found this article useful. Let us know if you have questions.
